The academic structure is the very blueprint of your institution. Our Academics & Timetabling module provides an intuitive and powerful set of tools to digitally construct, manage, and visualize this blueprint. Move away from complex spreadsheets and scattered documents to a centralized, error-free system that forms the foundation for all other school operations.
Academic Module User Manual: School ERP SaaS Platform
Part 1: The Academics Module
Objective: To build the core academic foundation of your school within the ERP system. This includes defining the school year, classes, sections, subjects, and creating a functional timetable. Completing this module is mandatory before you can add students or manage fees.
1.1 Initial Setup: Academic Session
The Academic Session defines the current school year (e.g., "2025-2026"). All student records, fees, and exams are tied to a specific session.
Navigation: MANAGEMENT > Academics > Classes & Sections
- On the "Classes & Sections" page, you will see three tabs. Click on the Academic Sessions tab.
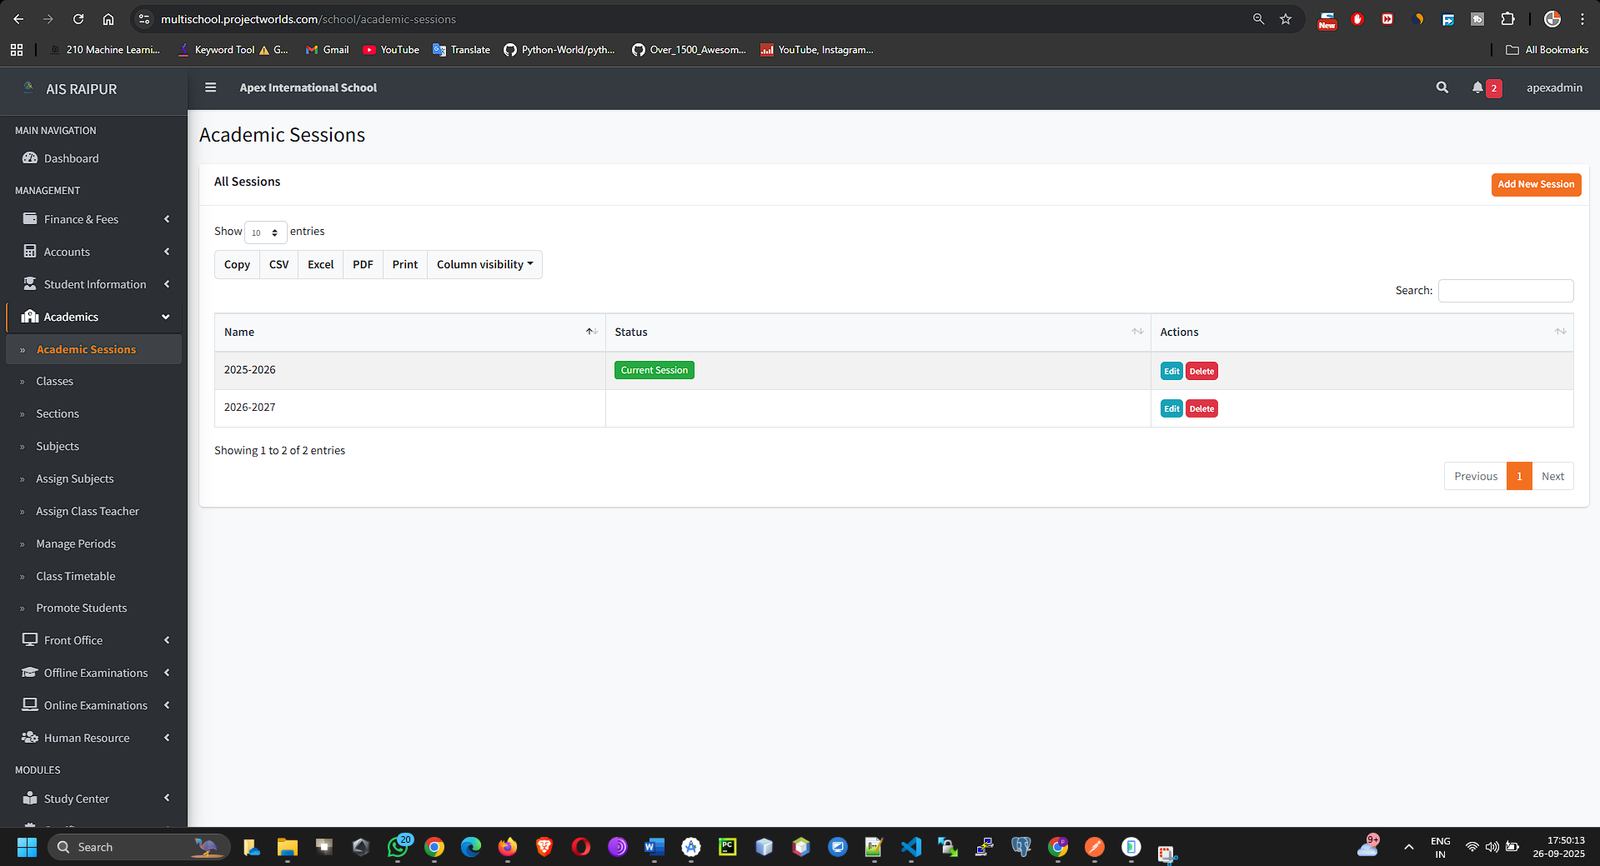
- Click the + Add New Session button on the top right.
- A modal window will appear. Fill in the following fields:
- Session Name: Enter the name in a clear format. Example: 2025-2026.
- Is Current: This is a crucial setting. Check this box only for the active academic year. All new student admissions will be automatically placed into the "Current" session.
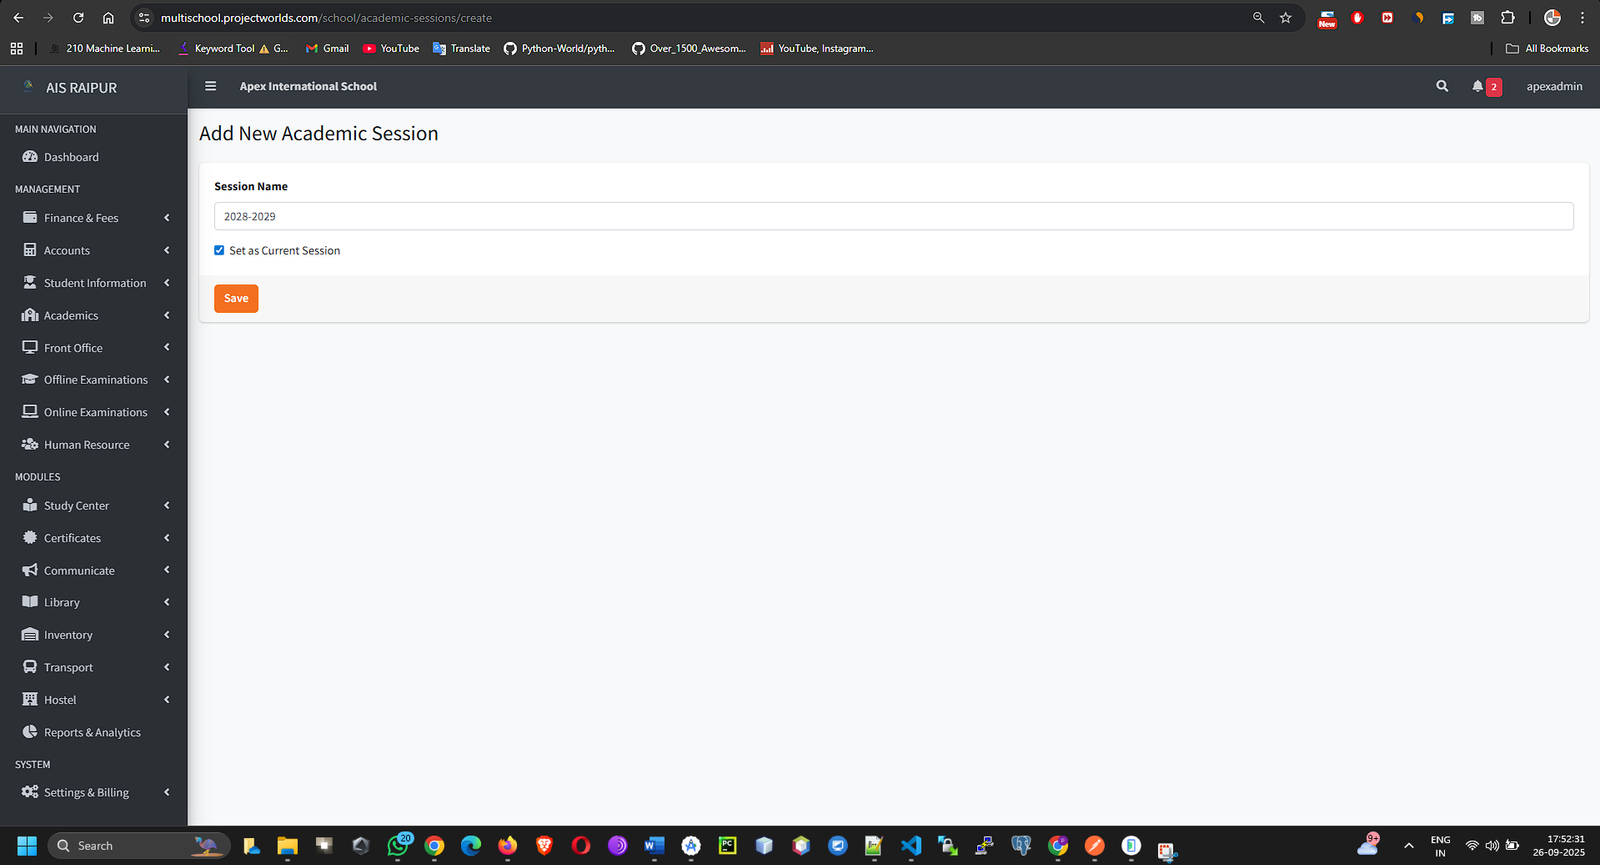
- Click Save. Your new session will now appear in the list.
Important Note: You can have multiple academic sessions in the system (e.g., for past records), but only one session can be marked as "Current" at any given time. To change the current session, simply edit an existing session and check the box.
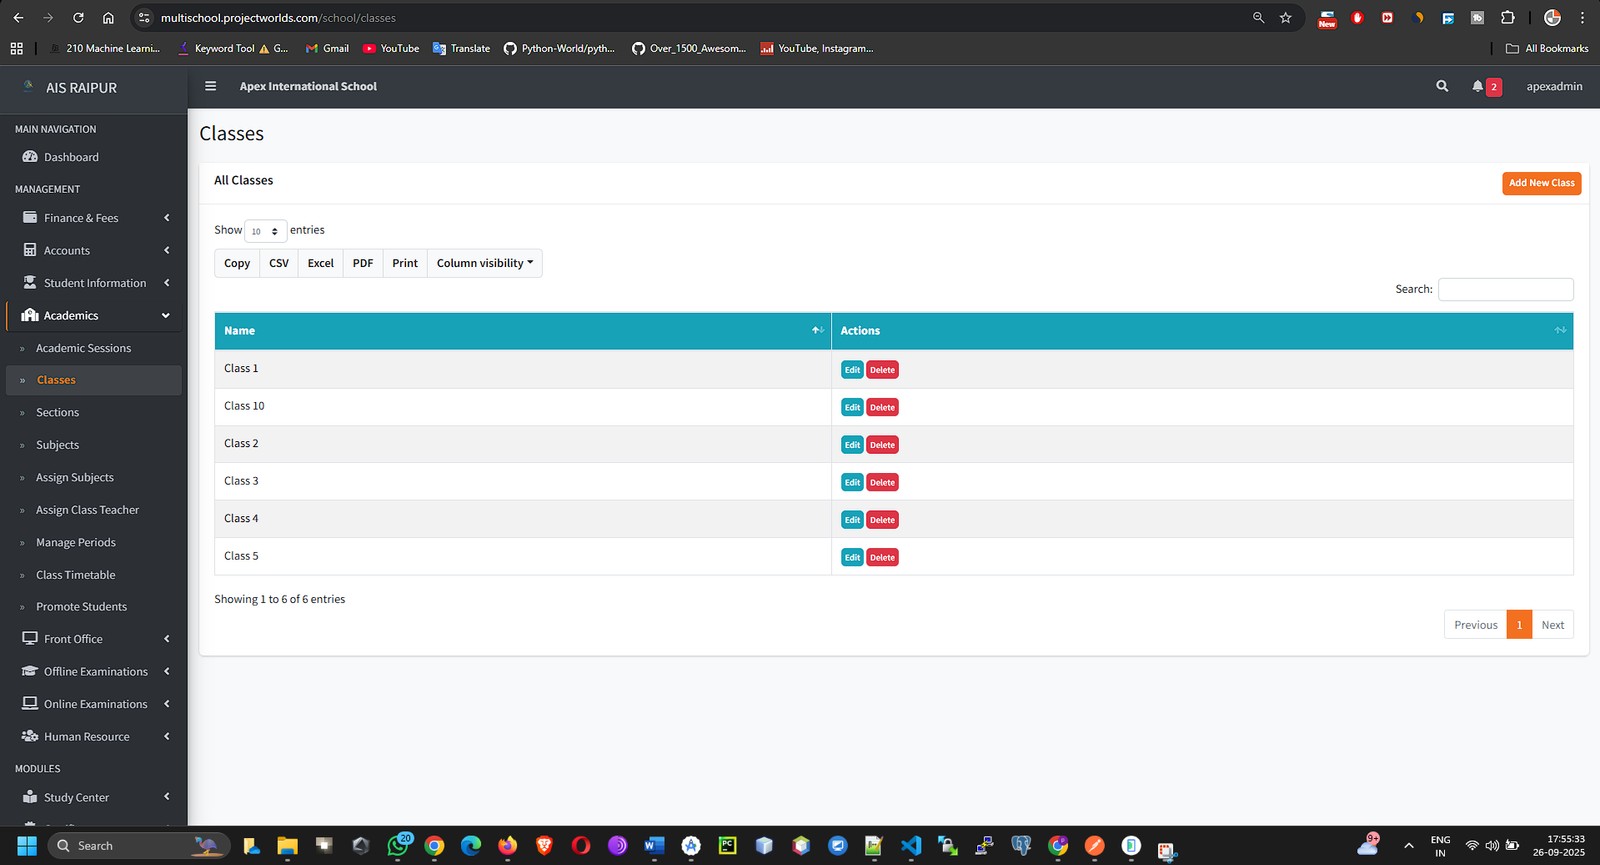
1.2 Creating Classes & Sections
Now, let's define the structure of your school's grades and divisions.
Navigation: MANAGEMENT > Academics > Classes & Sections
Step A: Create Classes
- Stay on the Classes tab.
- Click the + Add New Class button.
- In the modal that appears, enter the Class Name. Examples: "Nursery", "Class 1", "Class 10".
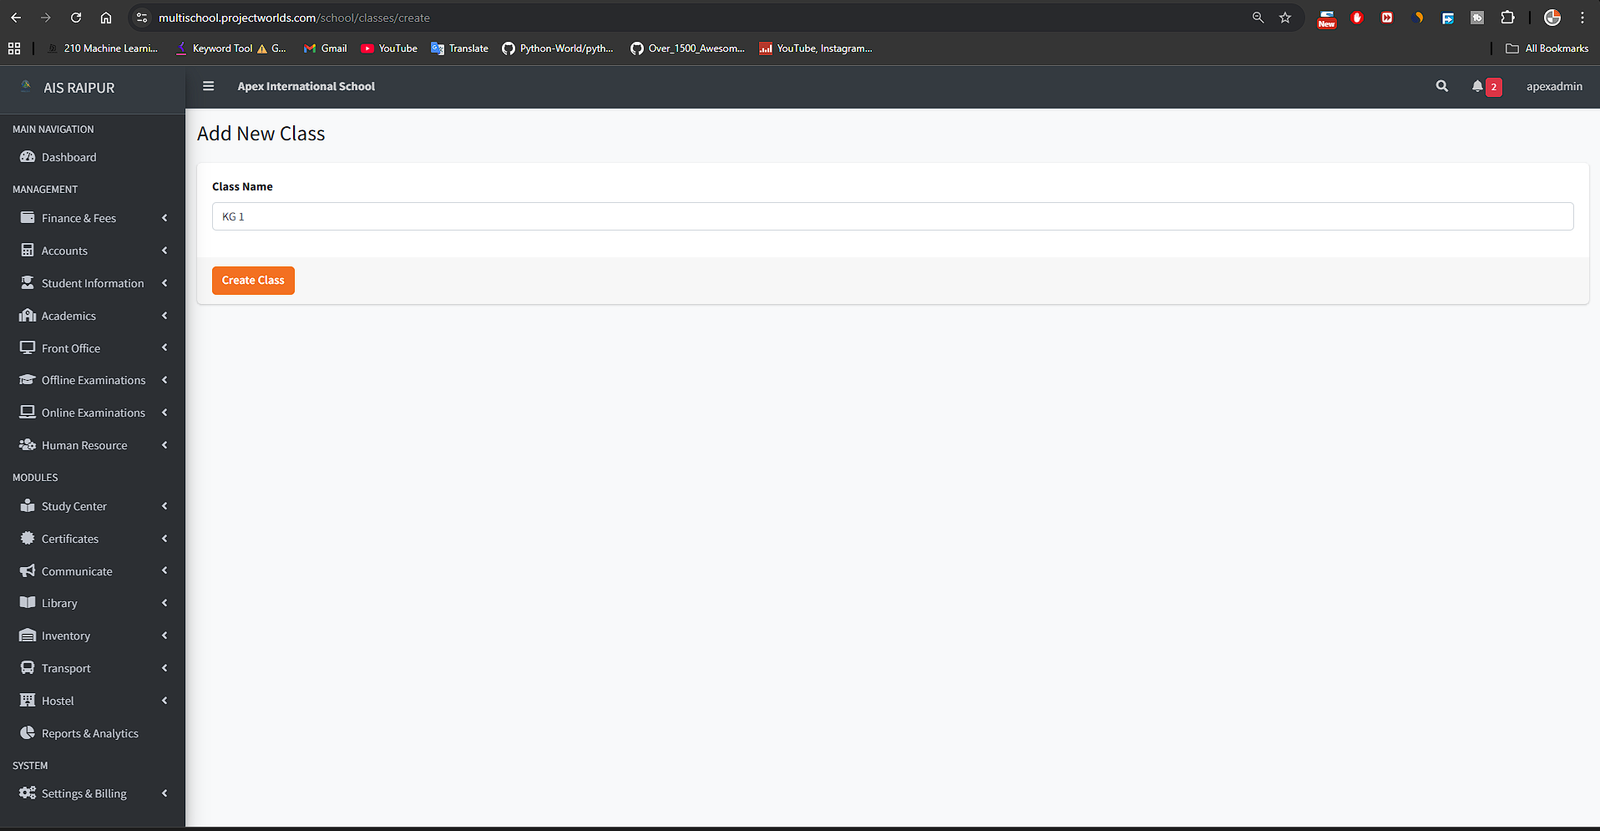
- Click Save.
- Repeat this process for all the classes in your school. They will appear in a list.
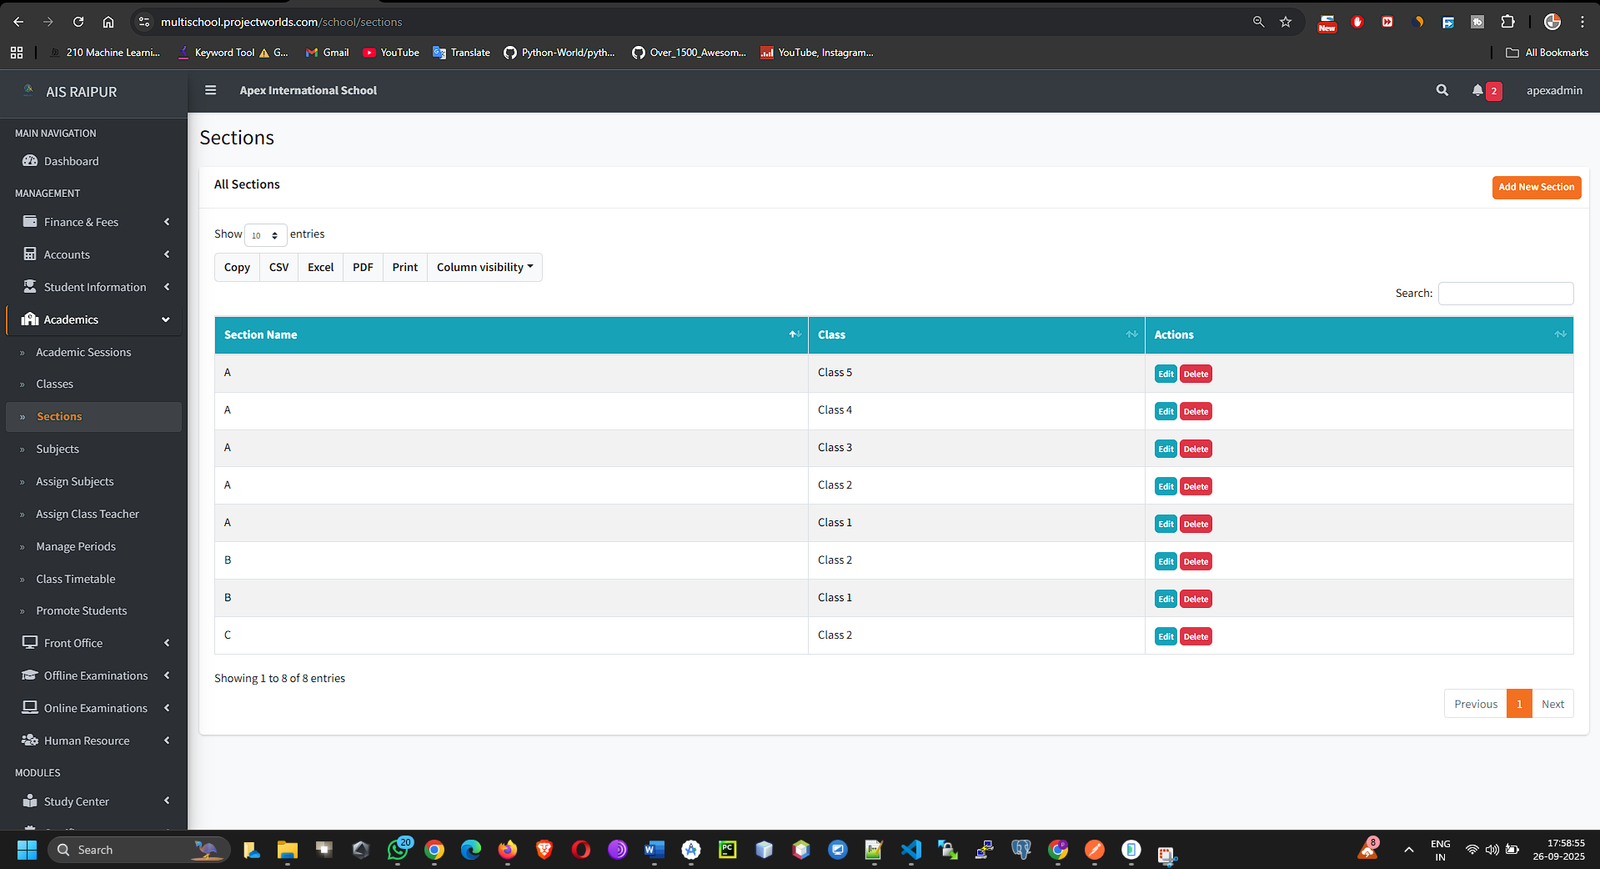
Step B: Create Sections
- Click on the Sections tab.
- Click the + Add New Section button.
- In the modal, you must:
- Select Class: Choose the class you want to add a section to from the dropdown menu.
- Section Name: Enter the name of the section. Examples: "A", "B", "Bluebells".
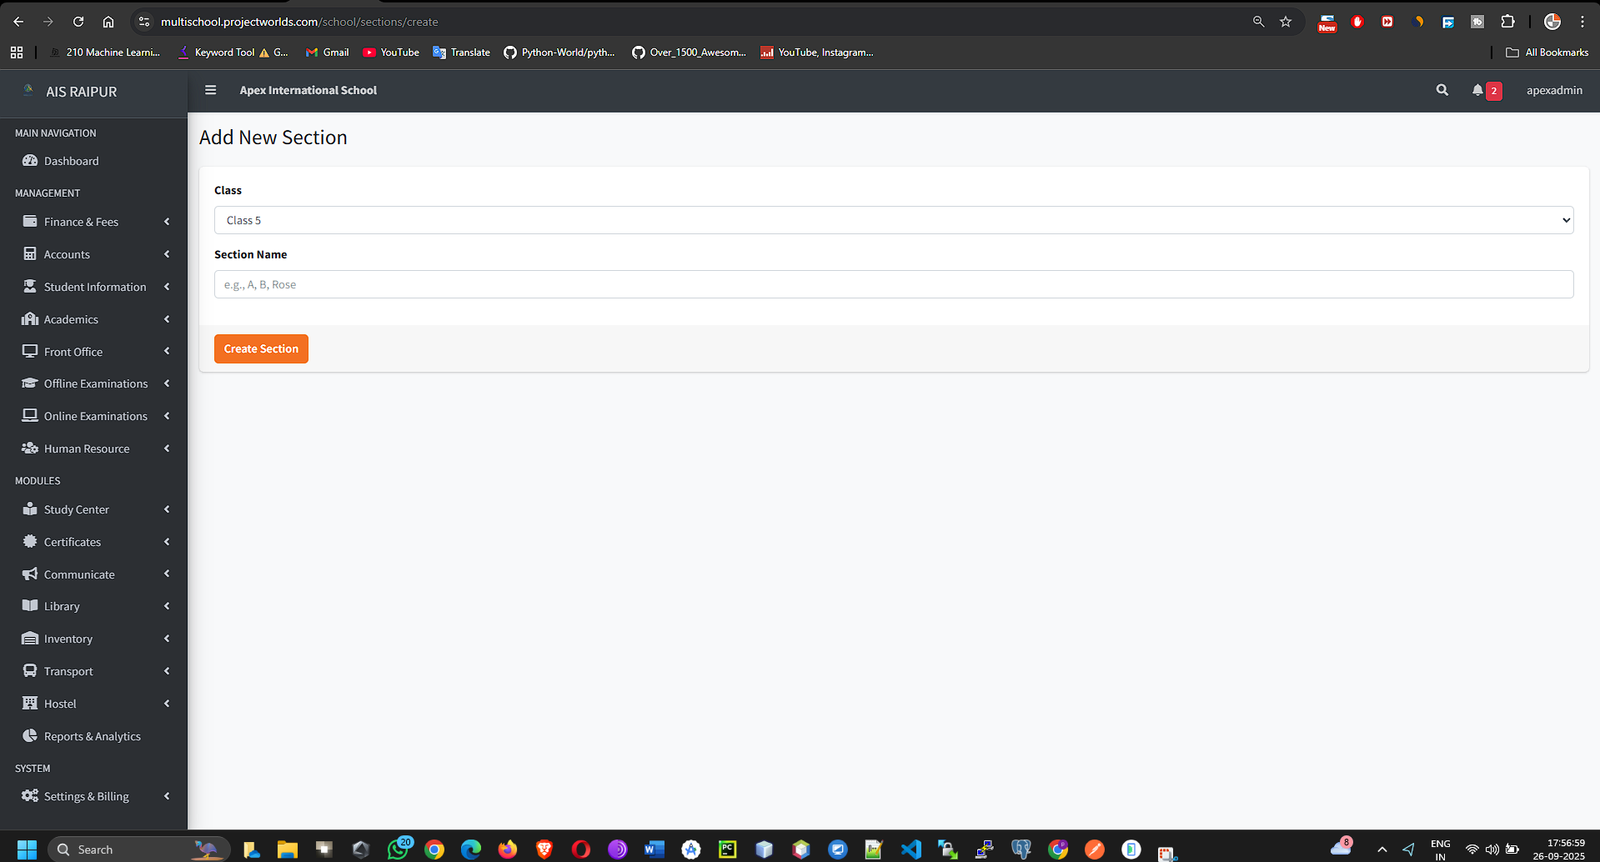
- Click Save.
- Continue this process until you have created all sections for every class. The list will show which section belongs to which class.
1.3 Managing Subjects
Here, you will create a master list of all subjects taught at your school.
Navigation: MANAGEMENT > Academics > Subjects
- You will be taken to the "Manage Subjects" page. Click the + Add New Subject button.
- A modal will appear. Fill in the details:
- Subject Name: The full name of the subject (e.g., "Mathematics", "Physical Education").
- Subject Code (Optional): An internal code for the subject, which can be useful for report cards (e.g., "MATH101", "PHYED").
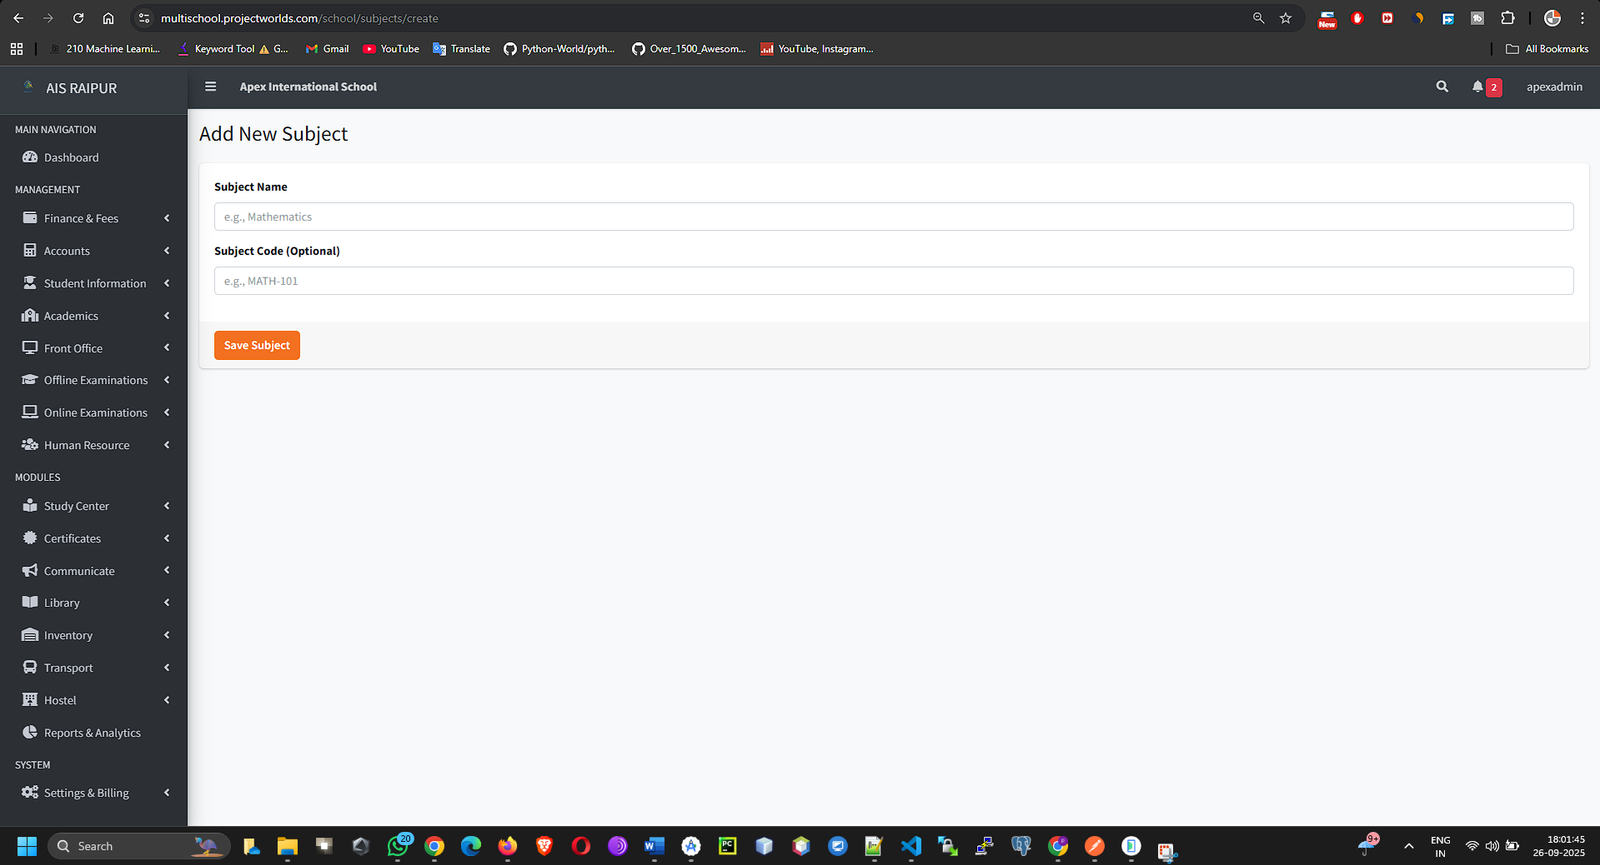
- Click Save.
- Add all subjects one by one. You will see a complete list on this page.
1.4 Assigning Subjects to Classes
After creating the master list, you must specify which classes study which subjects.
Navigation: MANAGEMENT > Academics > Assign Subjects
- On the "Assign Subjects" page, you will see a dropdown menu labeled Select Class.
- Choose a class from the list (e.g., "Class 10").
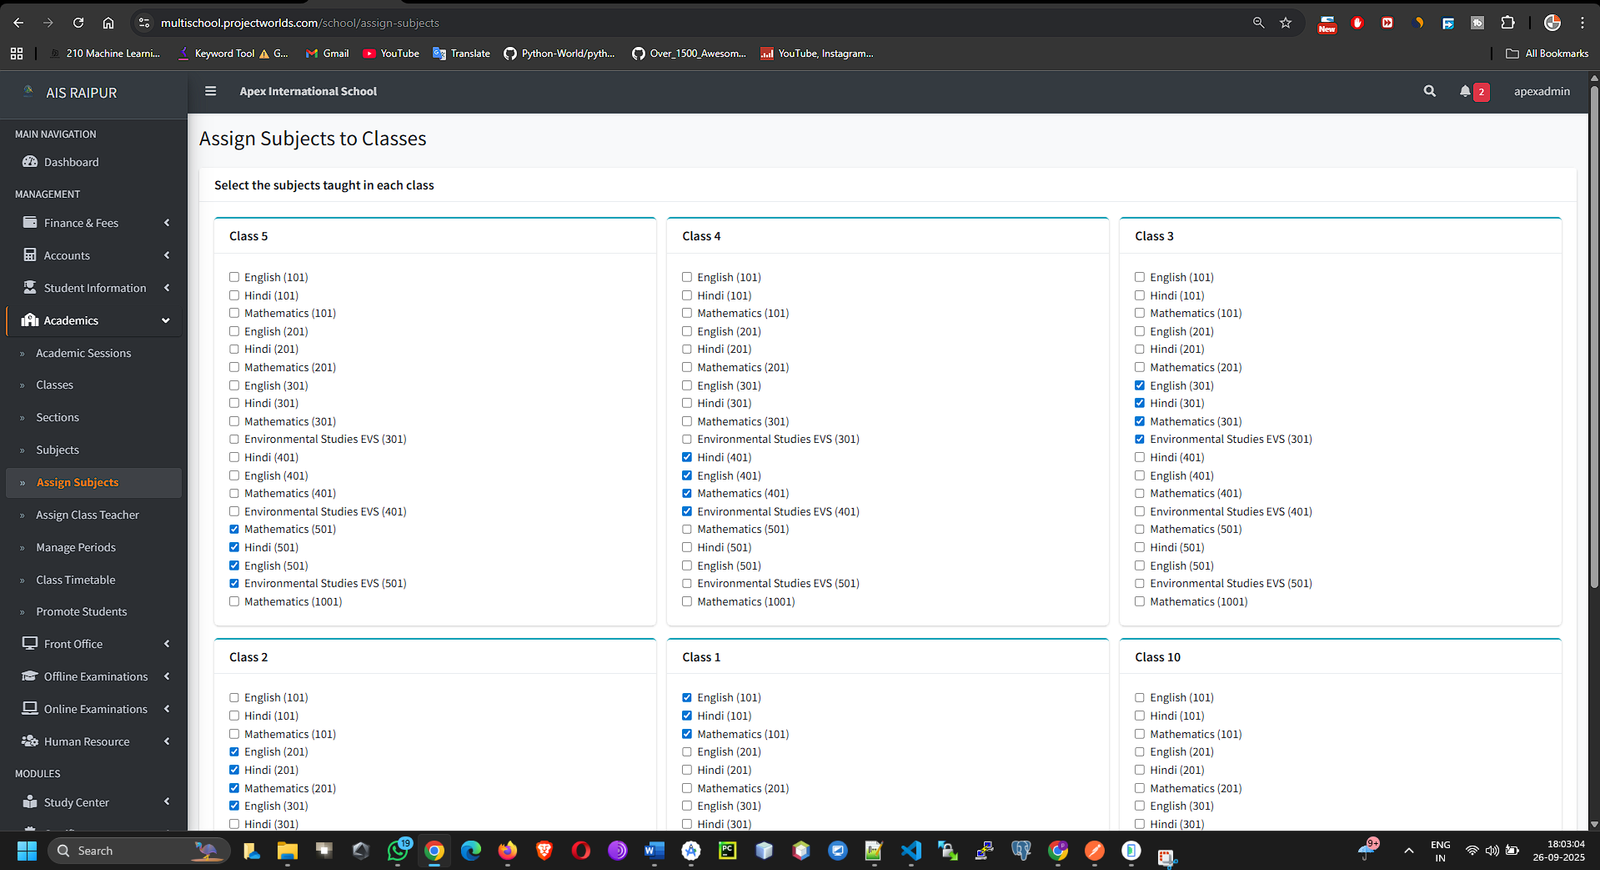
- The page will refresh, showing a list of all the subjects you created in the previous step.
- Check the box next to every subject that is taught in the selected class.
- Click the Save button at the bottom of the list.
- Repeat this process for every class in your school.
Pro-Tip: This step is vital for the timetable and examination modules. If a subject is not assigned to a class here, you will not be able to add it to that class's timetable or enter marks for it.
1.5 Creating Time Slots (Periods)
Before building the timetable, you must define the time blocks for your school day.
Navigation: MANAGEMENT > Academics > Class Timetable
- On the timetable page, click the Time Slots button on the top right.

- You will be taken to the "Manage Time Slots" page. Click + Add New Time Slot.
- Fill in the details for each period:
- Name: The name of the period (e.g., "Period 1", "Lunch Break", "Period 2").
- Start Time: The exact start time for this slot.
- End Time: The exact end time for this slot.
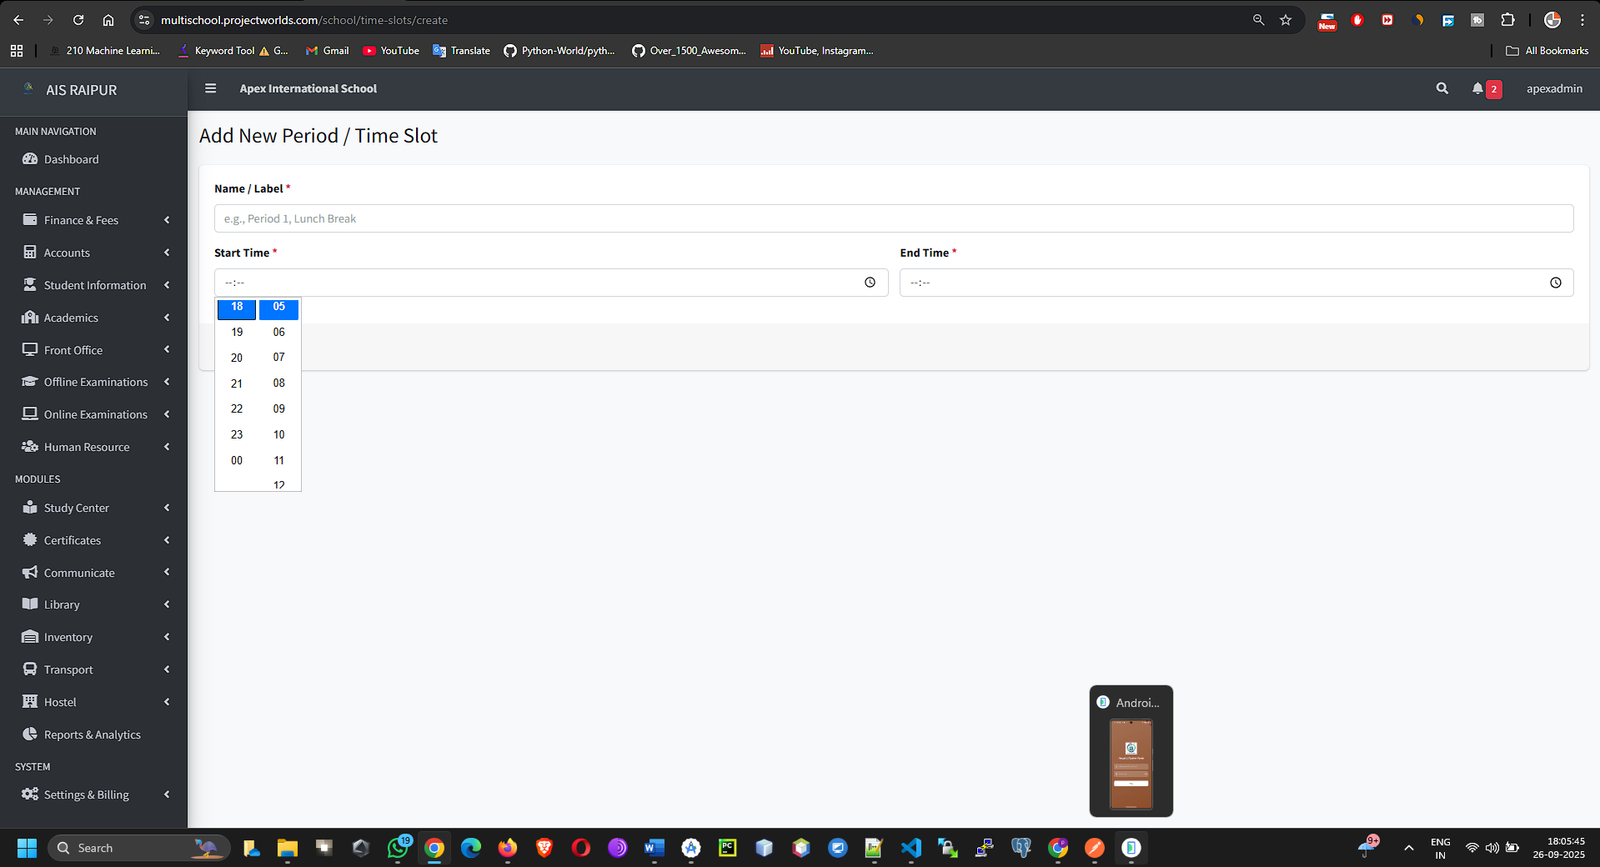
- Click Save. Create time slots for the entire school day, including breaks.
1.6 Building the Class Timetable
This is where you bring everything together: classes, sections, subjects, and time slots.
Navigation: MANAGEMENT > Academics > Class Timetable
- Select the Class and Section for which you want to create a timetable.
- The page will display a grid with days of the week on the vertical axis and the time slots you created on the horizontal axis.
[SCREENSHOT: Academics_Timetable_Blank_Grid.png]
- For each cell in the grid, you will see two dropdown menus:
- Select Subject: This list will only show subjects you assigned to this class in step 1.4.
- Select Teacher: This list will show all staff members with the "Teacher" role.
- Room Number (Optional): You can enter a room number if needed.
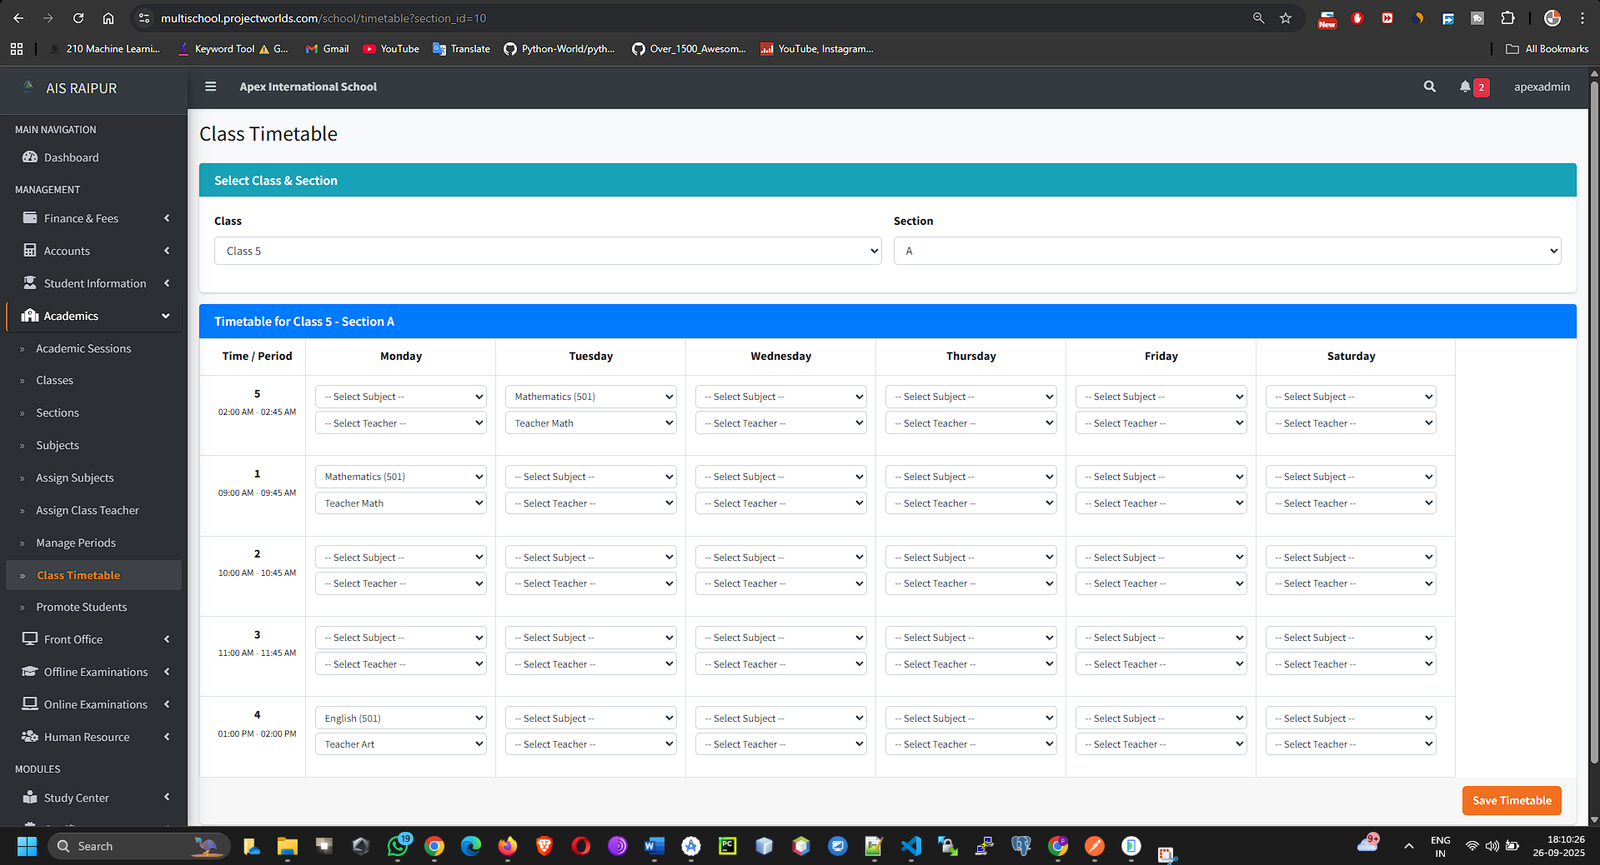
- Fill out the entire grid for the week, assigning a subject and teacher to each period.
- Once you have completed the timetable, click the Save Timetable button at the bottom.
- Repeat this process for every section of every class.
1.7 Assigning Class Teachers
Designate one teacher as the main "Class Teacher" for each section. This is important for communication and reports.
Navigation: MANAGEMENT > Academics > Assign Class Teacher
- This page will list every section of every class in your school.
- Next to each section, there is a dropdown menu labeled Select Class Teacher.
- From this menu, select the staff member who is the designated class teacher for that section.
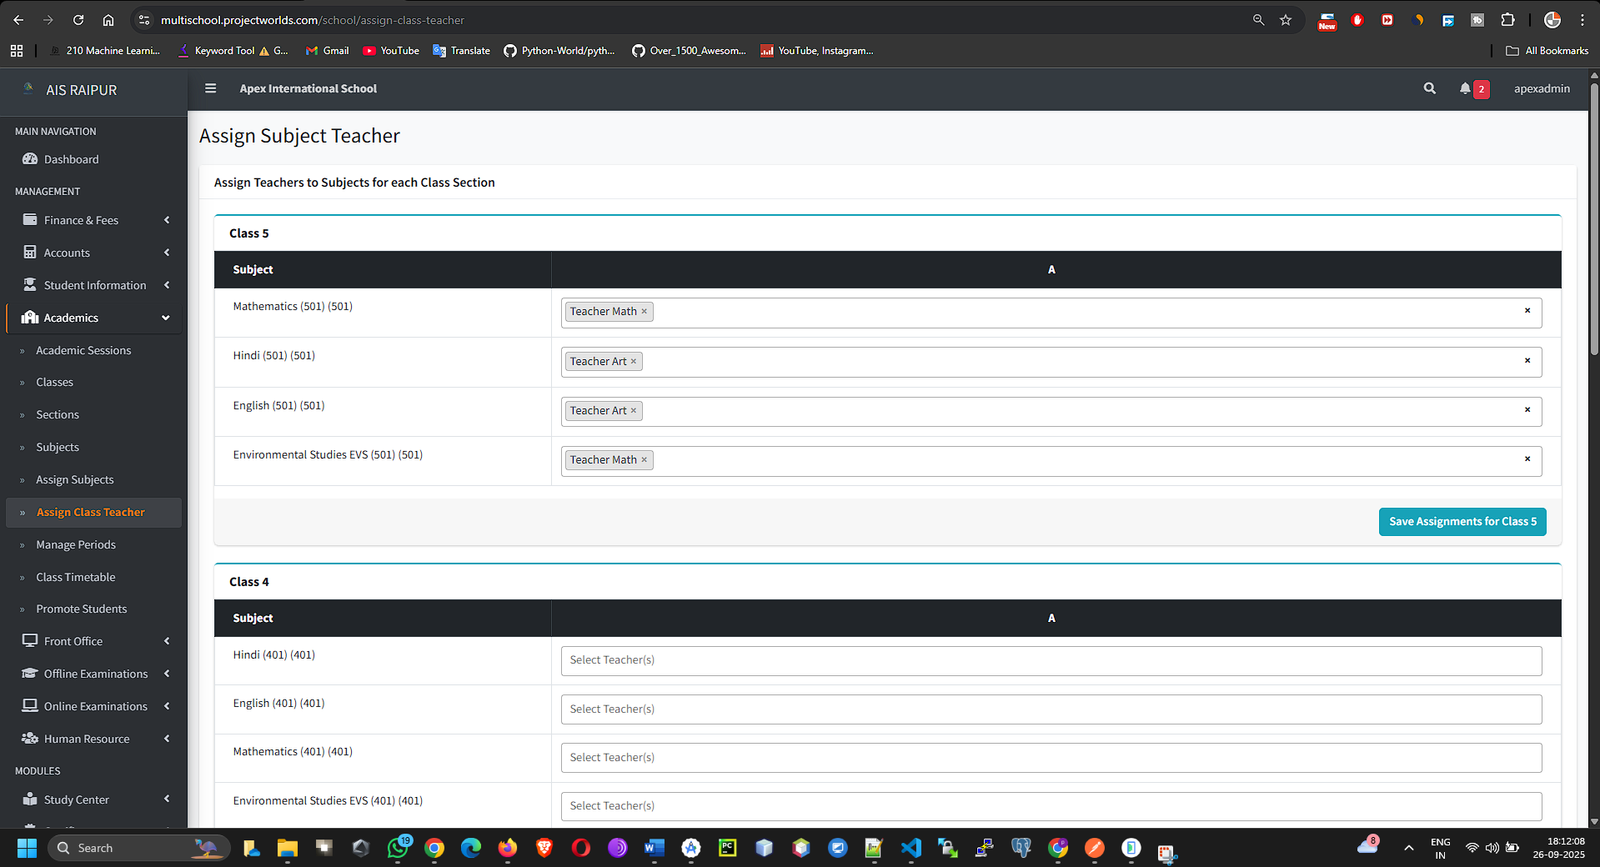
- After assigning teachers to all sections, click the Save button.
1.8 Promote Students: Managing the Year-End Transition
Objective: To efficiently move students from their current class to the next higher class at the end of an academic year. This feature automates the process of updating student records for the new academic session, saving hours of manual work.
Prerequisite: Before using this feature, ensure you have already created the next academic session (e.g., "2026-2027") in Academics > Academic Sessions.
Navigation: MANAGEMENT > Academics > Promote Students
Step 1: Select the Source Class
- When you navigate to the "Promote Students" page, you will first need to select the students you wish to promote.
- Fill in the fields on the screen:
- Current Class: Select the class from which students are graduating (e.g., "Class 9").
- Current Section: Select the specific section (e.g., "A").
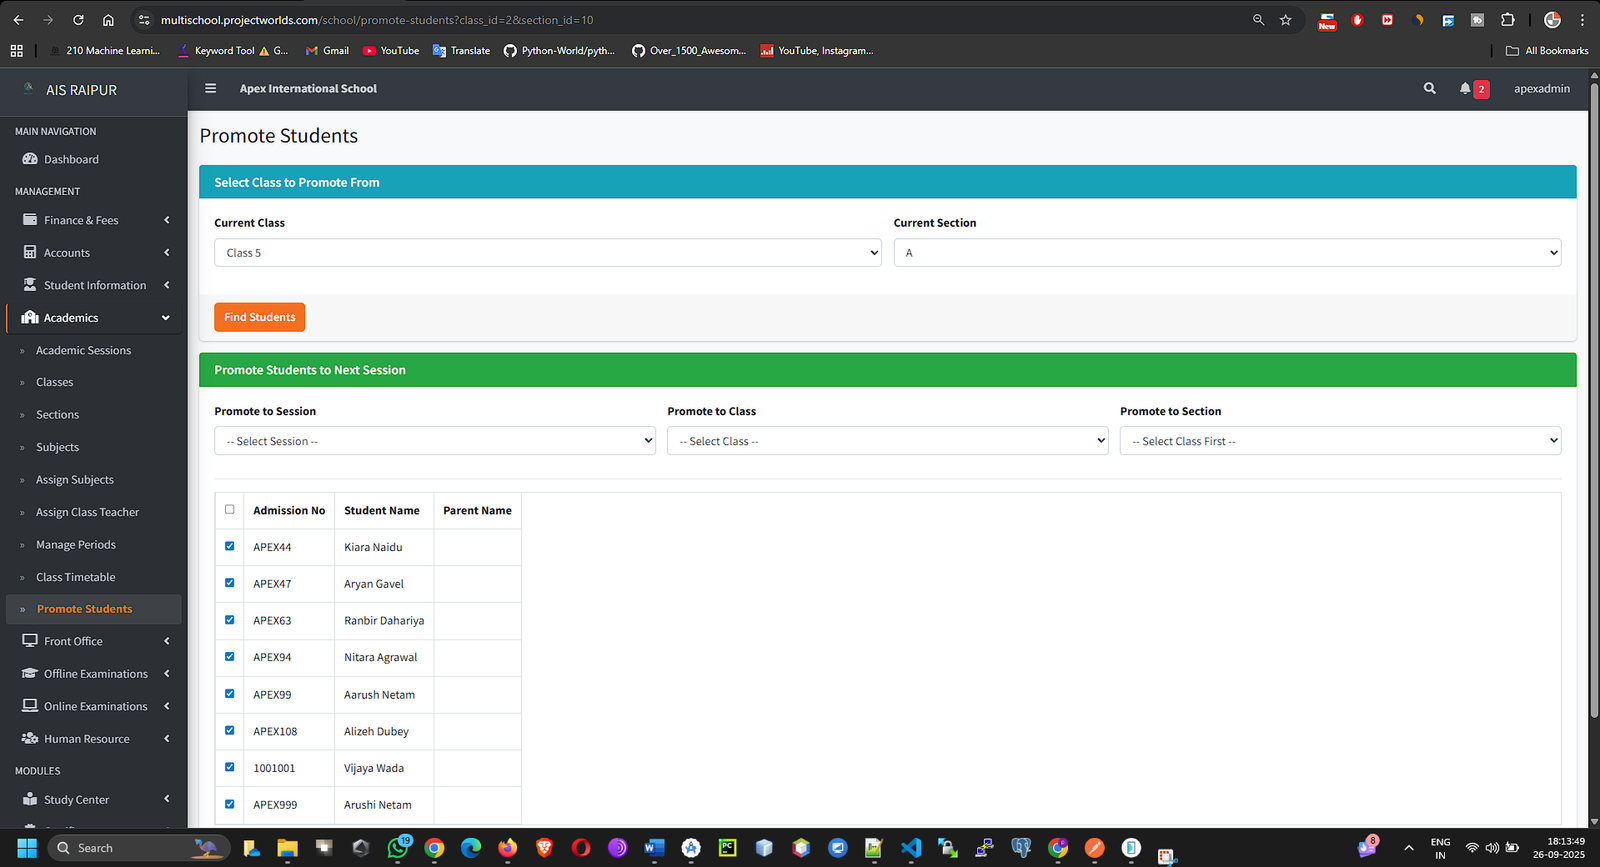
- Click the Find Students button.
Step 2: Manage the Promotion and Set the Destination
- After clicking "Find Students," the page will load a new section below, displaying a list of all students enrolled in the class you selected.
- At the top of this new section, you must define the destination for the promoted students:
- Promote to Session: Select the new academic session to which the students will be moved (e.g., "2026-2027").
- Promote to Class: Select the class the students will be promoted into (e.g., "Class 10").
- Promote to Section: Select the section they will be in for the new session (e.g., "A").
[SCREENSHOT: Academics_PromoteStudents_DestinationSelection.png]
Step 3: Set Promotion Status for Each Student
- In the student list, you will see columns for managing each student's outcome for the year. For each student, you can set:
- Result: Mark their academic outcome for the current session (e.g., Pass, Fail).
- Promotion Status: Based on the result, decide the next action. This might include:
- Promote: The student will be moved to the new class.
- Continue in Same Class: The student will be re-enrolled in the same class for the new session.
- You can use the "Mark All as..." options at the top of the table to quickly set the status for all students and then adjust individuals as needed.
Step 4: Finalize the Promotion
- Carefully review your selections for the destination class and the status of each student.
- Once everything is correct, click the Promote Students button at the bottom of the page.
What Happens in the System?
When you click "Promote Students," the ERP performs a critical background task. For each student marked for promotion, it creates a new student_session record, linking them to the new academic session, the new class, and the new section. Their old record for the previous year is marked as 'Promoted'. This ensures a clean, historical record of each student's academic journey through the school.
Important Note: This action is significant and affects a large amount of data. Please double-check all your selections before finalizing the promotion.