To streamline communication with students, parents, and staff by managing official notices, scheduling events, and broadcasting important messages.
12.1 Notice Board
The Notice Board is for posting official announcements that are visible to users on their dashboards and in the mobile apps.
Navigation: MODULES > Communicate > Notice Board
- Click the + Add New Notice button.
- Fill out the notice creation form:
- Title: A clear and concise headline for the notice. Example: "Holiday Declared for Annual Sports Day", "Fee Payment Deadline Extension".
- Content: The full text of the notice. You can use the rich text editor to format the message.
- Published At: The date from which the notice will become visible to users.
- Recipient Type: This is a crucial field for targeting your audience. Select who should see this notice:
- All: Visible to everyone (all students, parents, and staff).
- Class: Visible only to students and parents of a specific class.
- Section: Visible only to students and parents of a specific section.
- Role: Visible only to users with a specific staff role (e.g., All Teachers, Accountants).
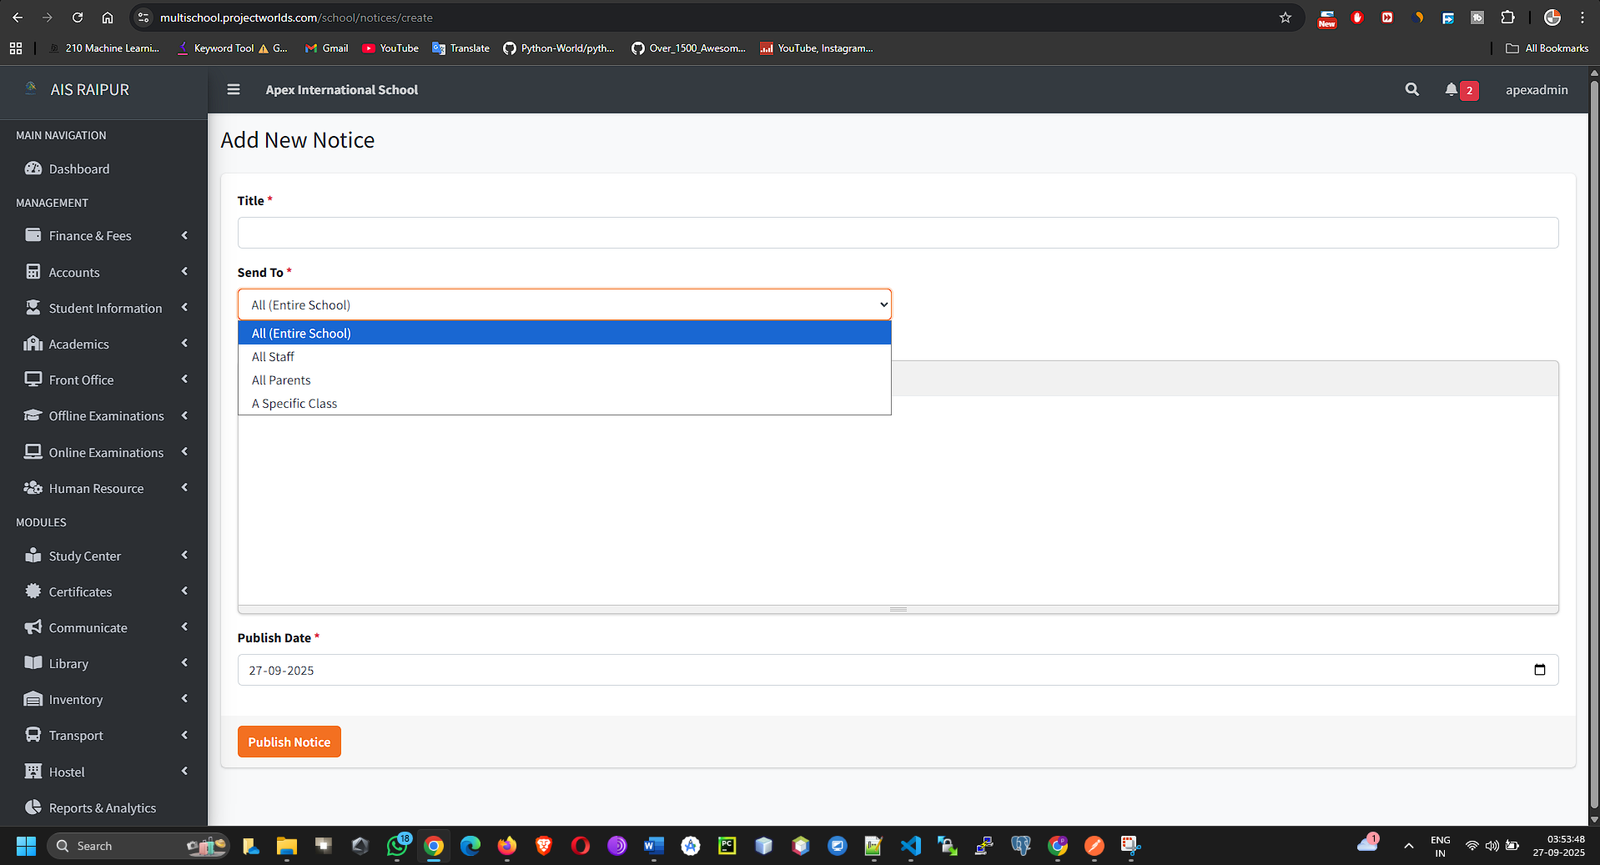
- Depending on your selection in "Recipient Type," additional dropdowns will appear to let you select the specific class, section, or role.
- Click Save. The notice is now scheduled and will appear for the target audience on the specified publication date.
12.2 Events & Holidays
This section allows you to populate the school's calendar with important events and declare holidays. These entries will be visible on the main dashboard calendar for all users.
Navigation: MODULES > Communicate > Events & Holidays
- Click the + Add New Event button.
- Complete the event form:
- Event Title: The name of the event or holiday. Example: "Annual Day Function", "Parent-Teacher Meeting", "Diwali Holiday".
- Event Type: Select either Event or Holiday. This helps in color-coding the calendar.
- Start Date & End Date: For a single-day event, both dates will be the same. For multi-day events (like a holiday break), specify the range.
- Description (Optional): Any additional details about the event.
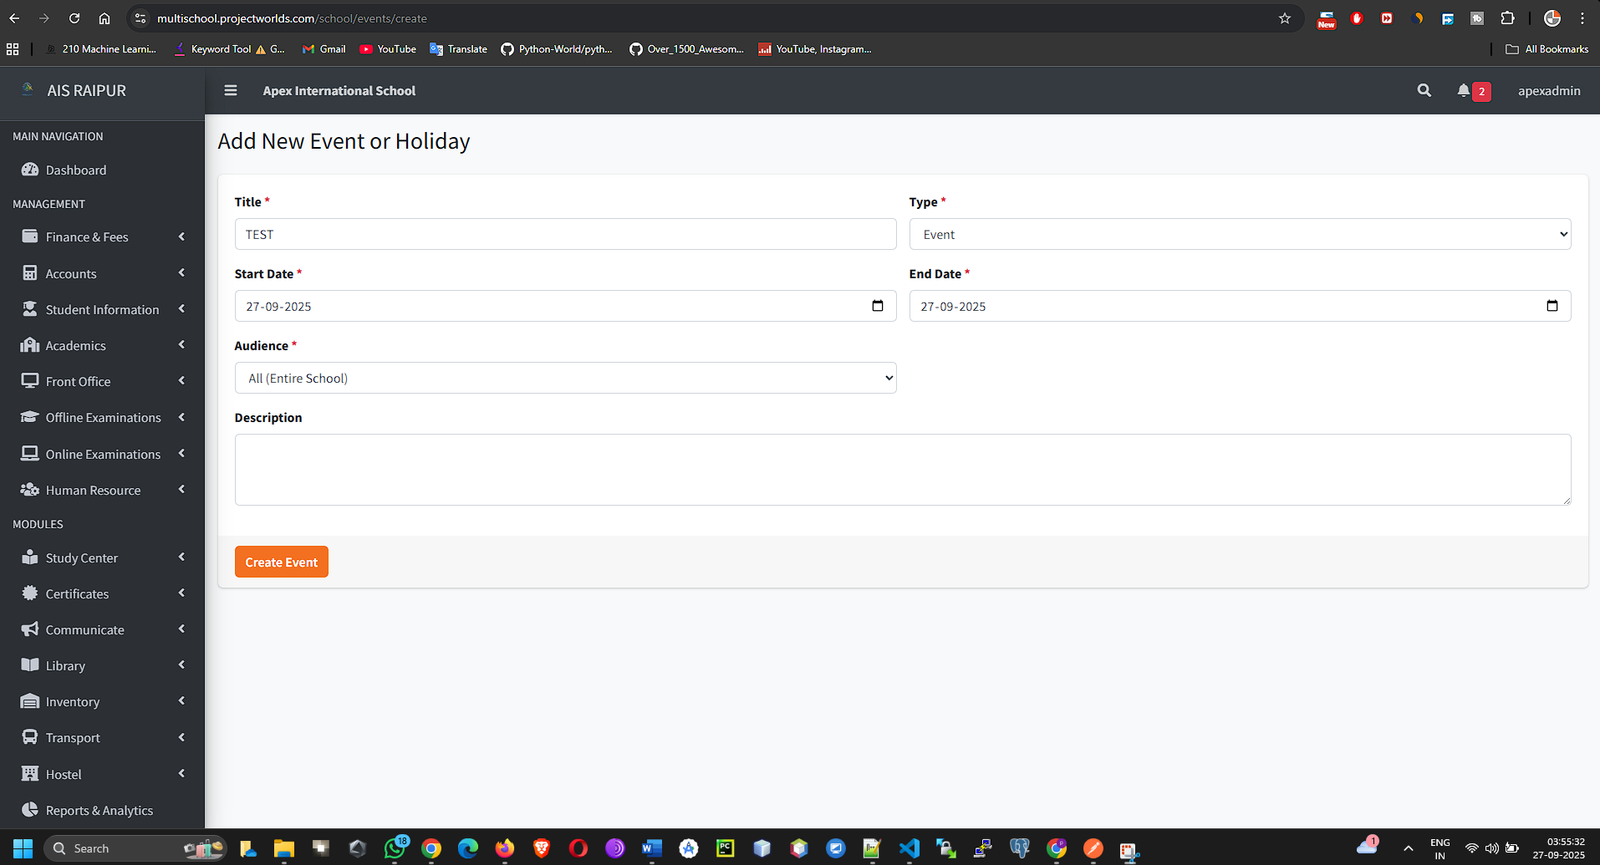
- Click Save. The event/holiday will now appear on the main dashboard's School Calendar.
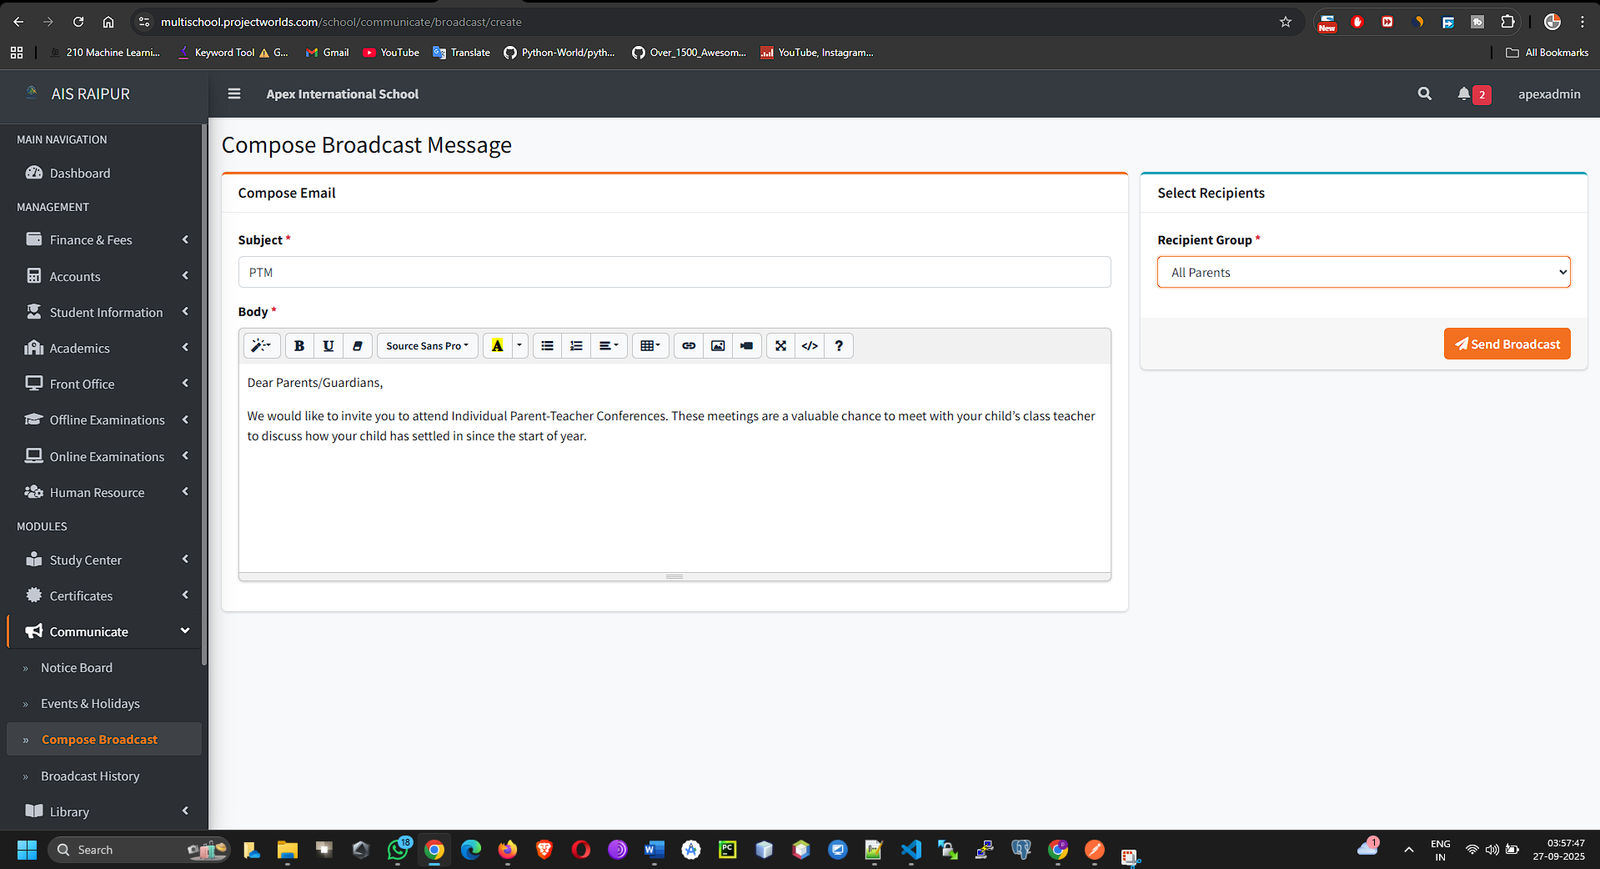
12.3 Broadcasts (Email/SMS Communication)
The Broadcast feature is a powerful tool for sending direct messages to a targeted group of users.
Navigation: MANAGEMENT > Front Office > Compose Broadcast (This may vary, but let's assume it's here based on the routes).
- On the "Compose Broadcast" page, fill in the details:
- Subject: The subject line for the email or the title of the message.
- Body: The main content of your message. Use the text editor for formatting.
- Send To: Select the audience for your broadcast:
- All Students
- All Parents
- All Staff
- Specific Class/Section Students/Parents
- Specific Staff Role
- Choose Communication Channel:
- Check the box for Send Email.
- Check the box for Send SMS (if your SMS gateway is configured).
- Click Send Broadcast. The system will queue the messages and send them to the selected recipients' registered email addresses and phone numbers.
You can view the history of all sent messages under Front Office > Broadcast History.
Advanced User Manual: School ERP SaaS Platform
Part 13: The Certificates Module
Objective: To design reusable templates for various official documents and generate personalized certificates or ID cards for students.
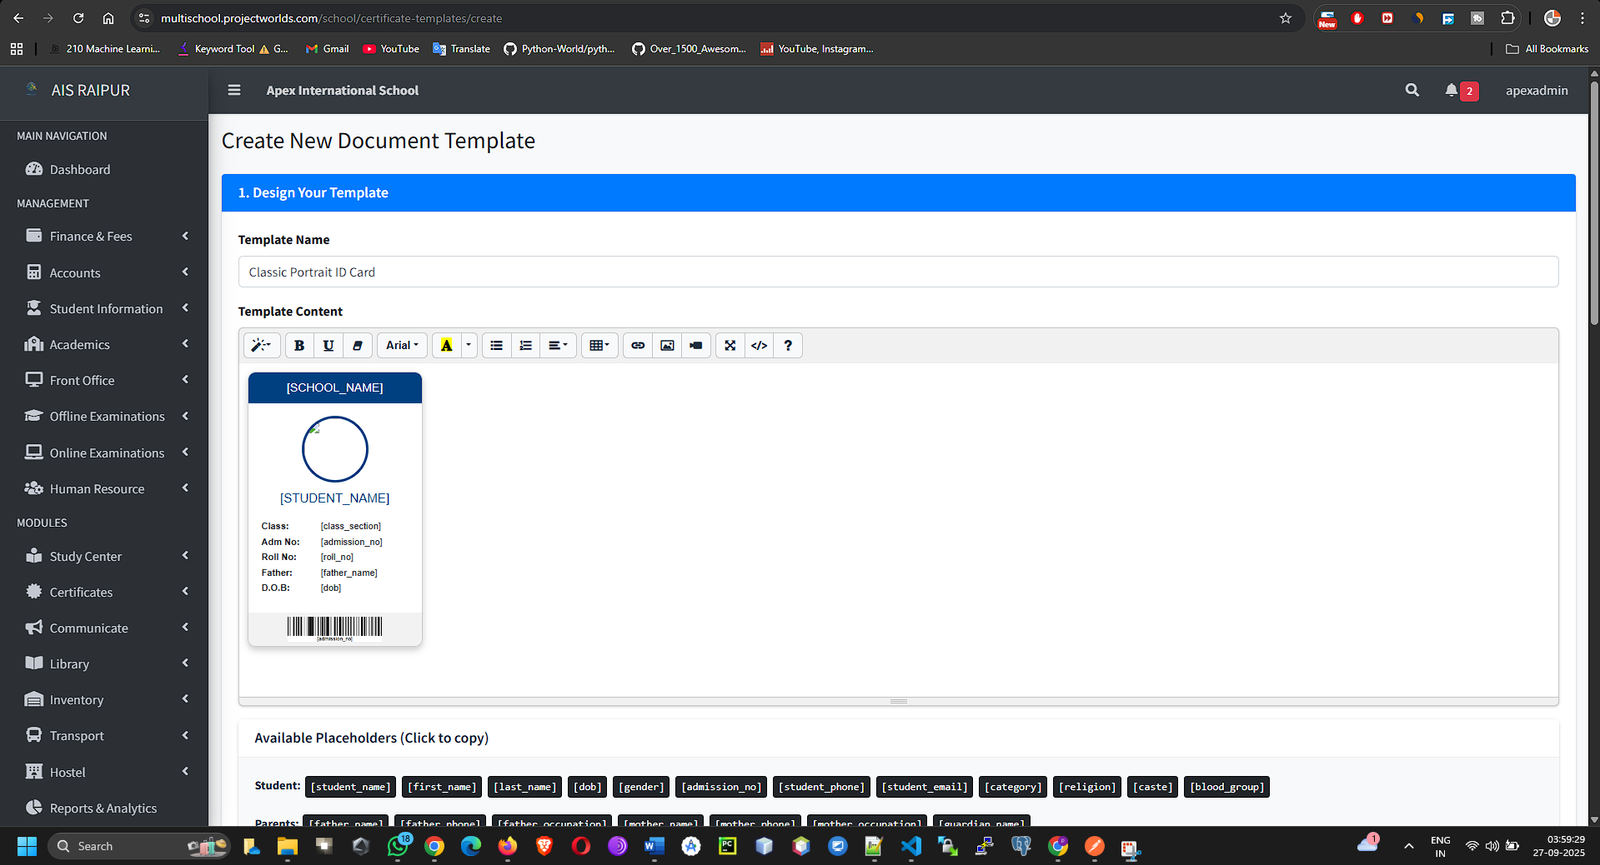
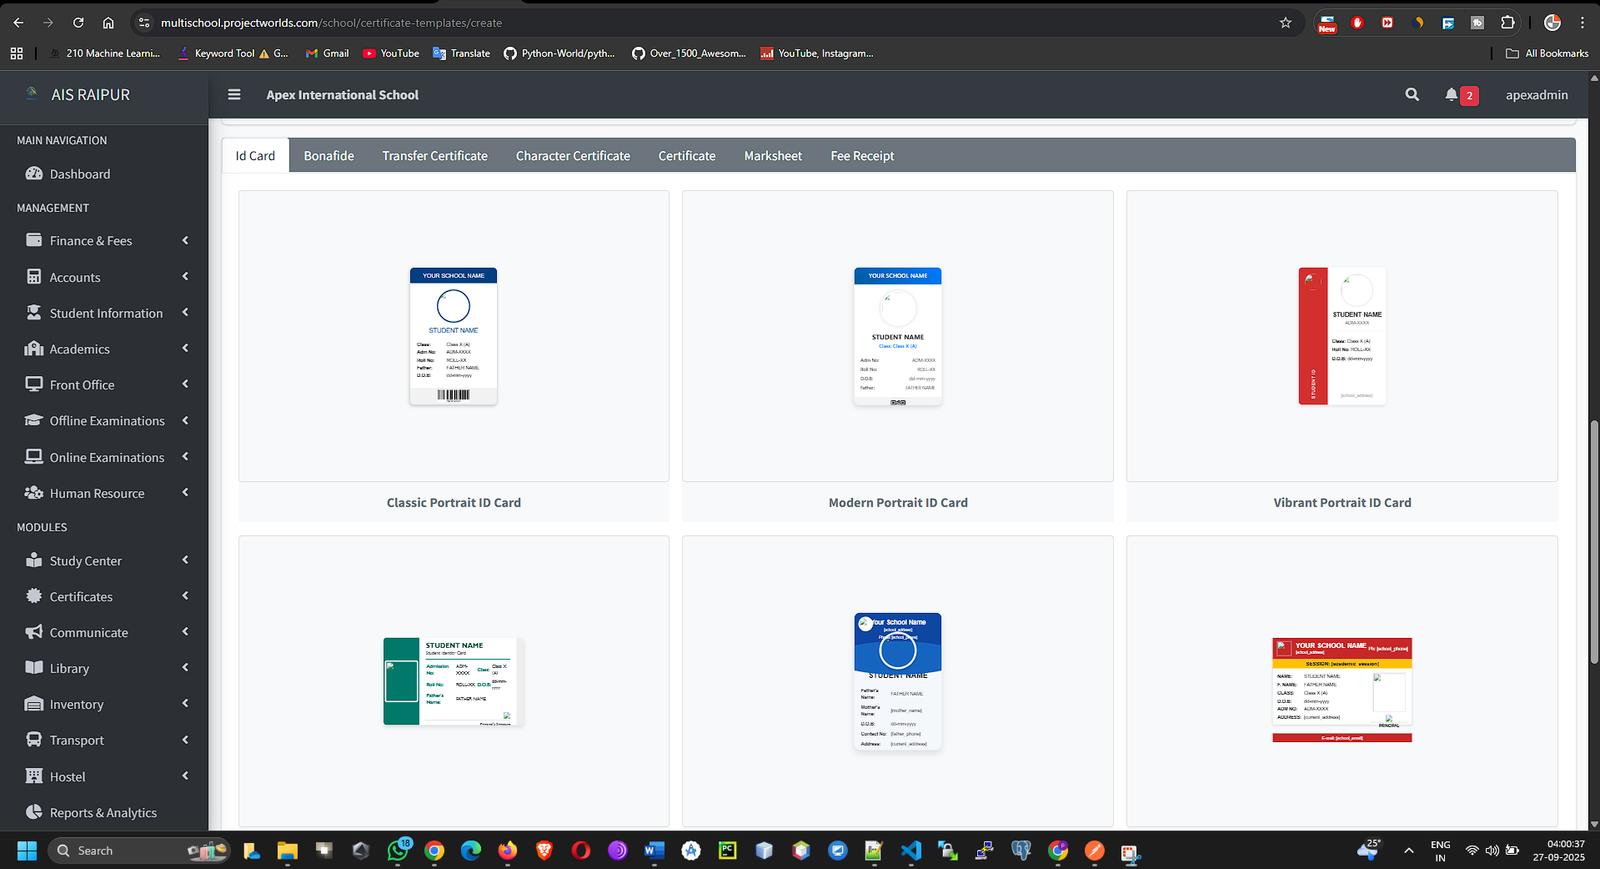
13.1 Certificate Templates
First, you need to create the design and layout of your certificates. The system uses placeholders to automatically insert student data.
Navigation: MODULES > Certificates > Certificate Templates
- Click the + Add New Template button.
- Fill in the template details:
- Template Name: An internal name for the template. Example: "Student ID Card Template", "Bonafide Certificate Template", "Transfer Certificate".
- Content: This is the main design area. It's a rich text editor where you will create the certificate's layout using text, tables, and images (like a background or school logo).
- Using Placeholders: The key to this feature is using predefined placeholders. When you generate a document for a student, the system will replace these placeholders with the student's actual data. Common placeholders include:
- {student_name}
- {admission_no}
- {roll_no}
- {class_name}
- {section_name}
- {date_of_birth}
- {father_name}
- {mother_name}
- {current_address}
- {student_photo}
- {principal_signature} (This will insert the signature image you uploaded in School Settings)
- Arrange the text and placeholders to create your desired layout. For example:
"This is to certify that {student_name}, Admission No {admission_no}, is a bonafide student of Class {class_name} - {section_name} in our school."
- Click Save. Your template is now ready to be used.
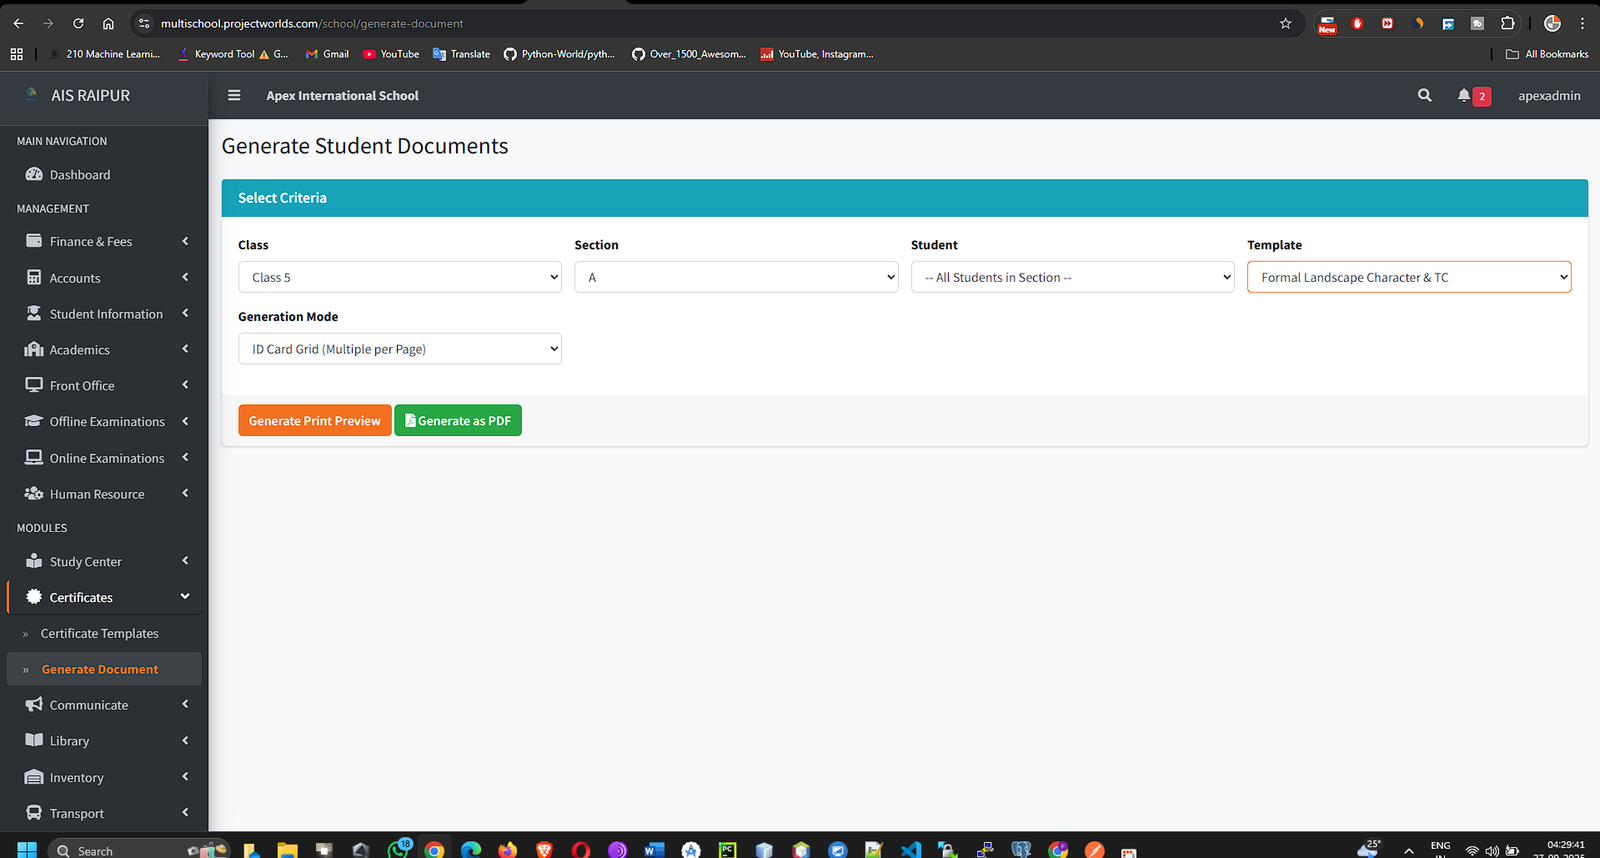
13.2 Generate Document
Once you have templates, you can generate the documents for individual students or entire classes.
Navigation: MODULES > Certificates > Generate Document
- On the "Generate Document" page, use the filters to select the students:
- Select Certificate Template: Choose the template you want to use from the dropdown.
- Select Class and Select Section.
- Click Search. A list of all students in the selected section will appear.
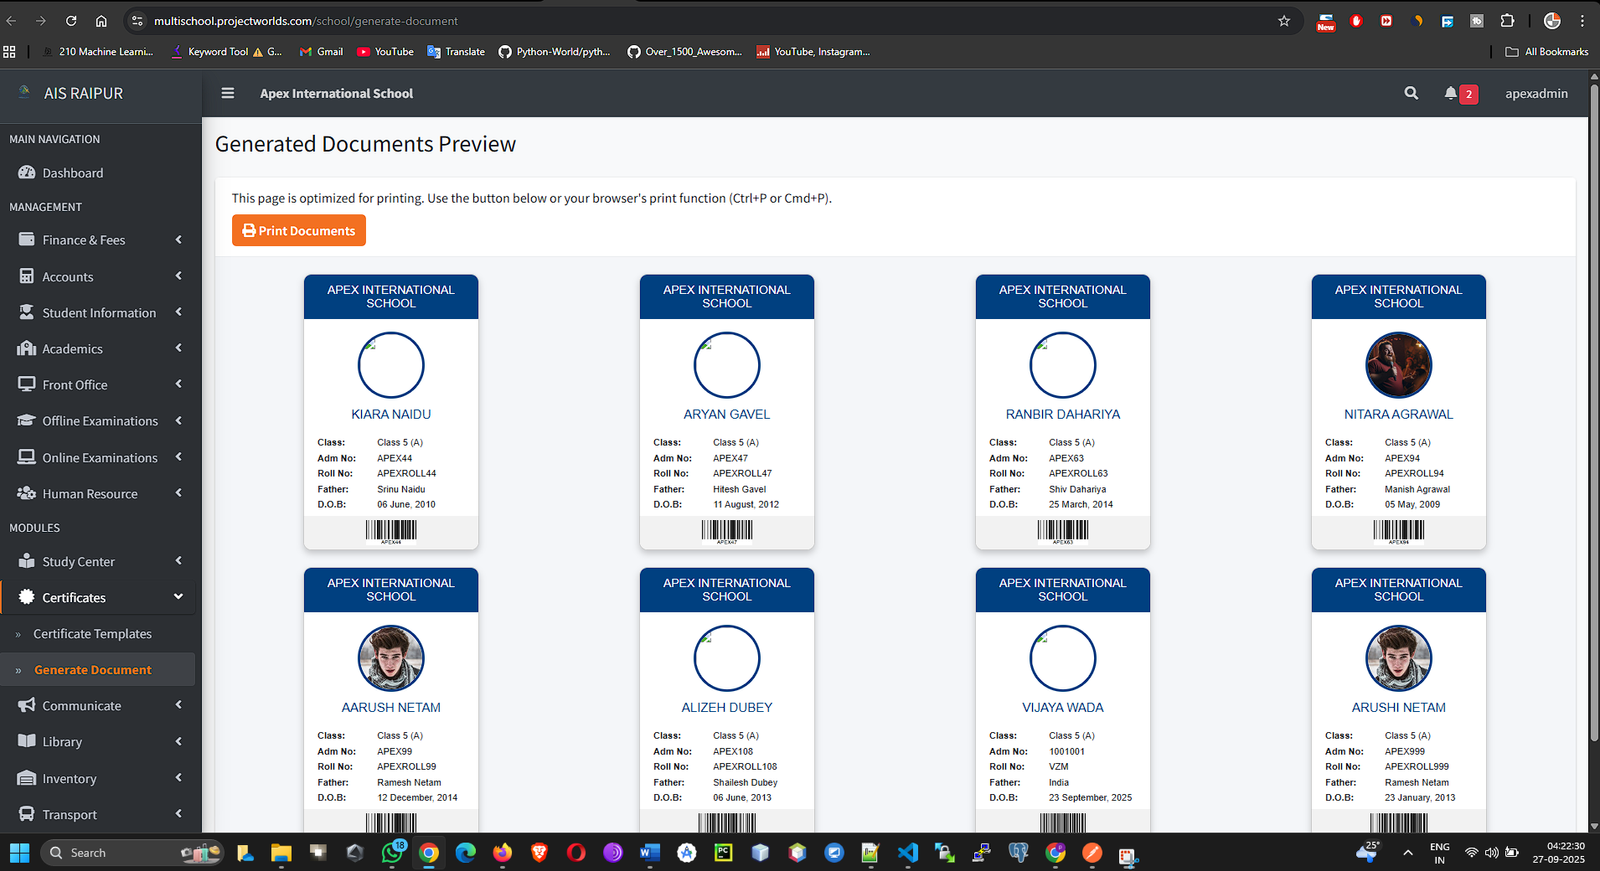
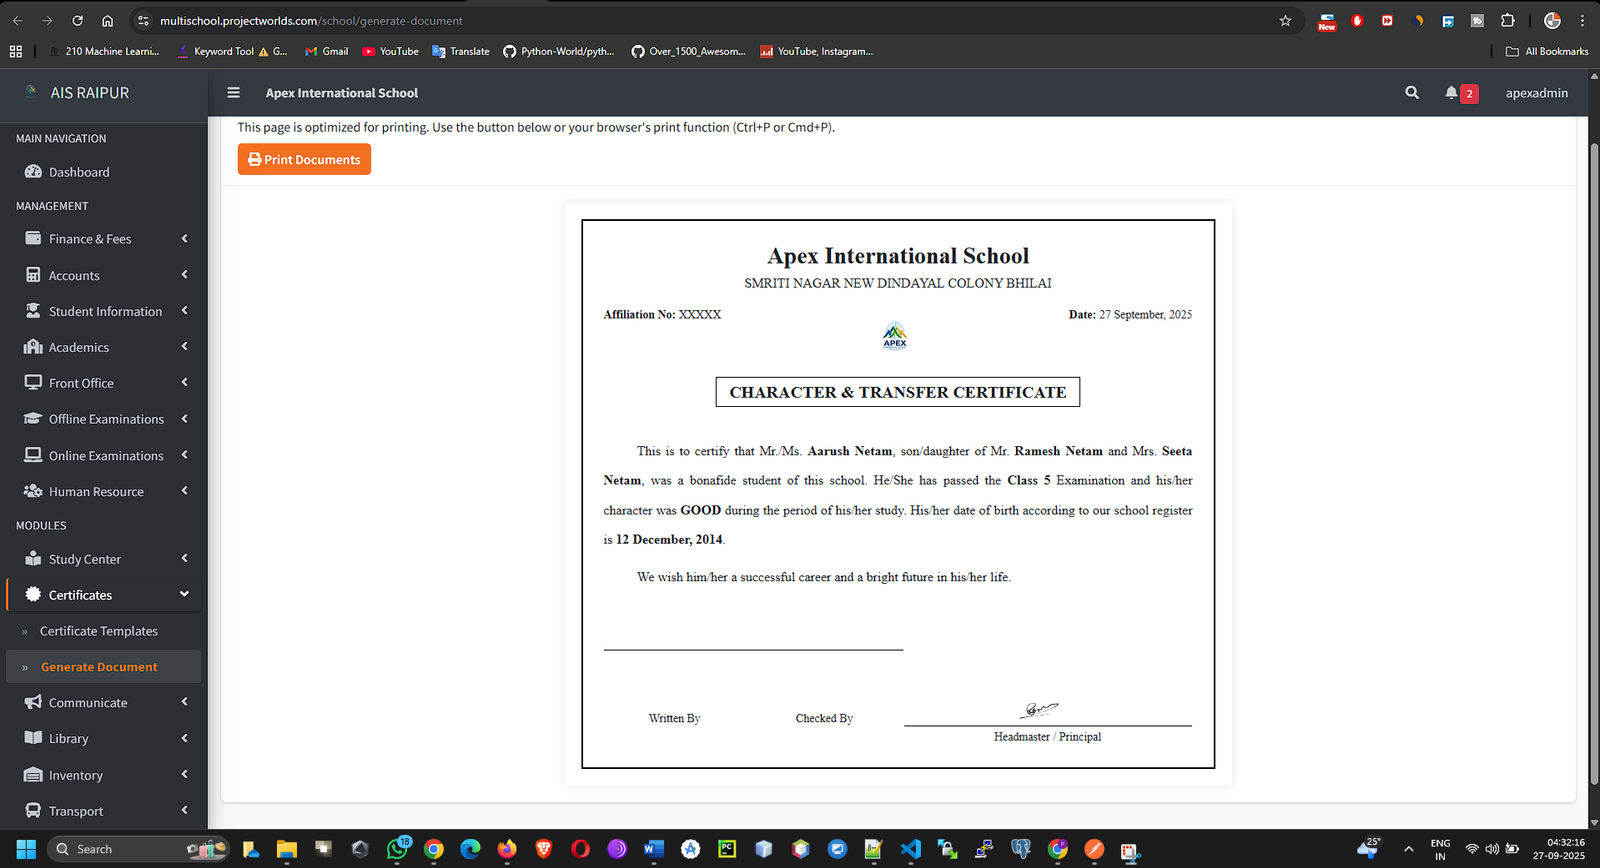
- You can generate documents in two ways:
- Individual: Click the Generate (Print) icon in the "Action" column for a single student.
- Bulk: Check the box in the table header to select all students, then click a "Generate for Selected" button.
- The system will take you to a print preview page, showing the final certificate with all the placeholders replaced by the student's actual data. From here, you can print the document directly.