To efficiently manage the school's hostel facilities, including defining different hostels and room types, managing individual rooms, and allocating students to those rooms.
11.1 Hostel Setup: Hostels & Room Types
Before allocating rooms, you need to create the physical structure of your hostel system within the ERP.
Navigation: MODULES > Hostel
Step A: Manage Hostels
This is where you register the main hostel buildings.
- From the Hostel menu, select Manage Hostels.
- Click the + Add New Hostel button.
- Fill in the hostel's details:
- Hostel Name: The name of the building. Example: "Sarojini Naidu Girls Hostel", "Vivekananda Boys Hostel Block A".
- Hostel Type: Select from Boys, Girls, or Combined.
- Address: The physical address of the hostel building.
- Note (Optional): Any additional information, like the warden's name or contact number.
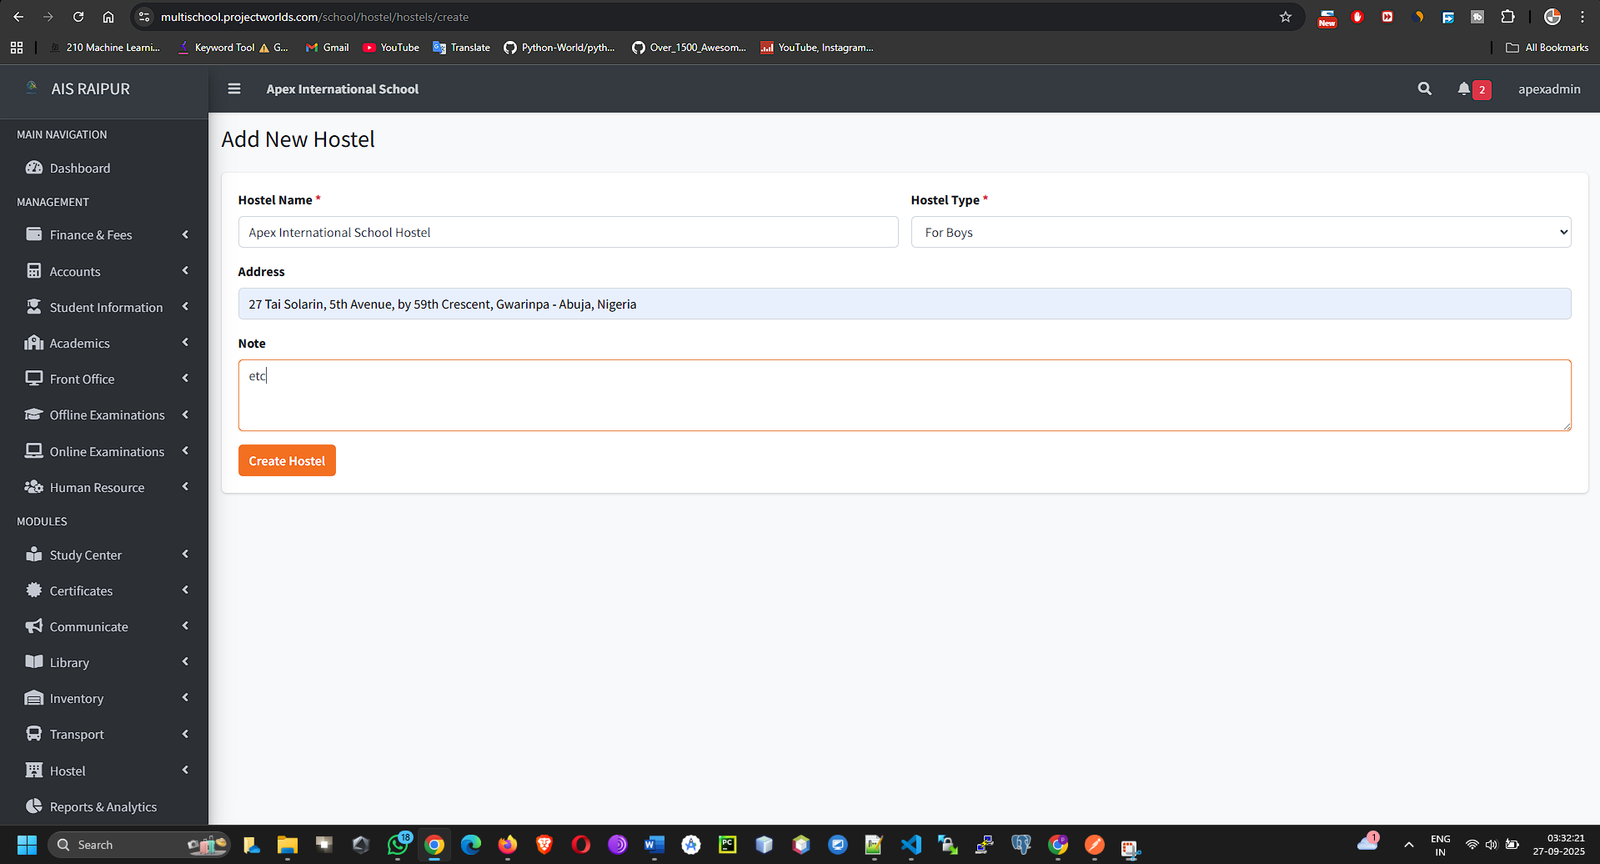
- Click Save. Add all hostel buildings your school operates.
Step B: Manage Room Types
Room types categorize the rooms based on their facilities and cost.
- From the Hostel menu, select Room Types.
- Click the + Add New Room Type button.
- Fill in the details for the room category:
- Room Type Name: A descriptive name. Example: "2-Seater AC", "4-Seater Non-AC", "Dormitory".
- Fare: The fee charged for this type of room (e.g., per month or per year).
- Description (Optional): Details about the facilities in this room type.
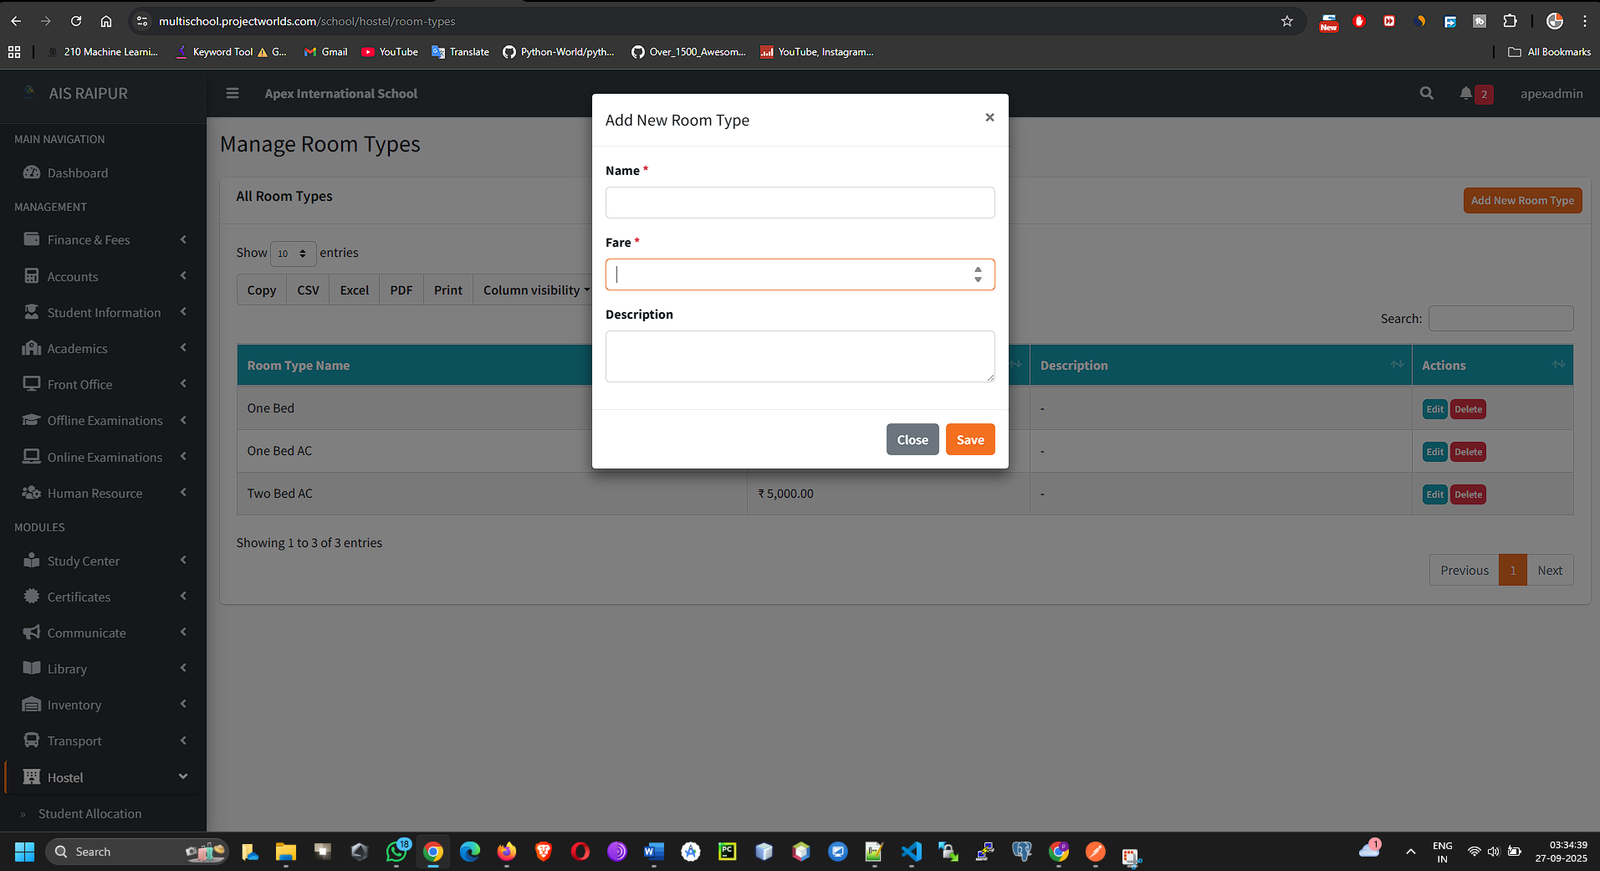
- Click Save. Create all the different types of rooms available across your hostels.
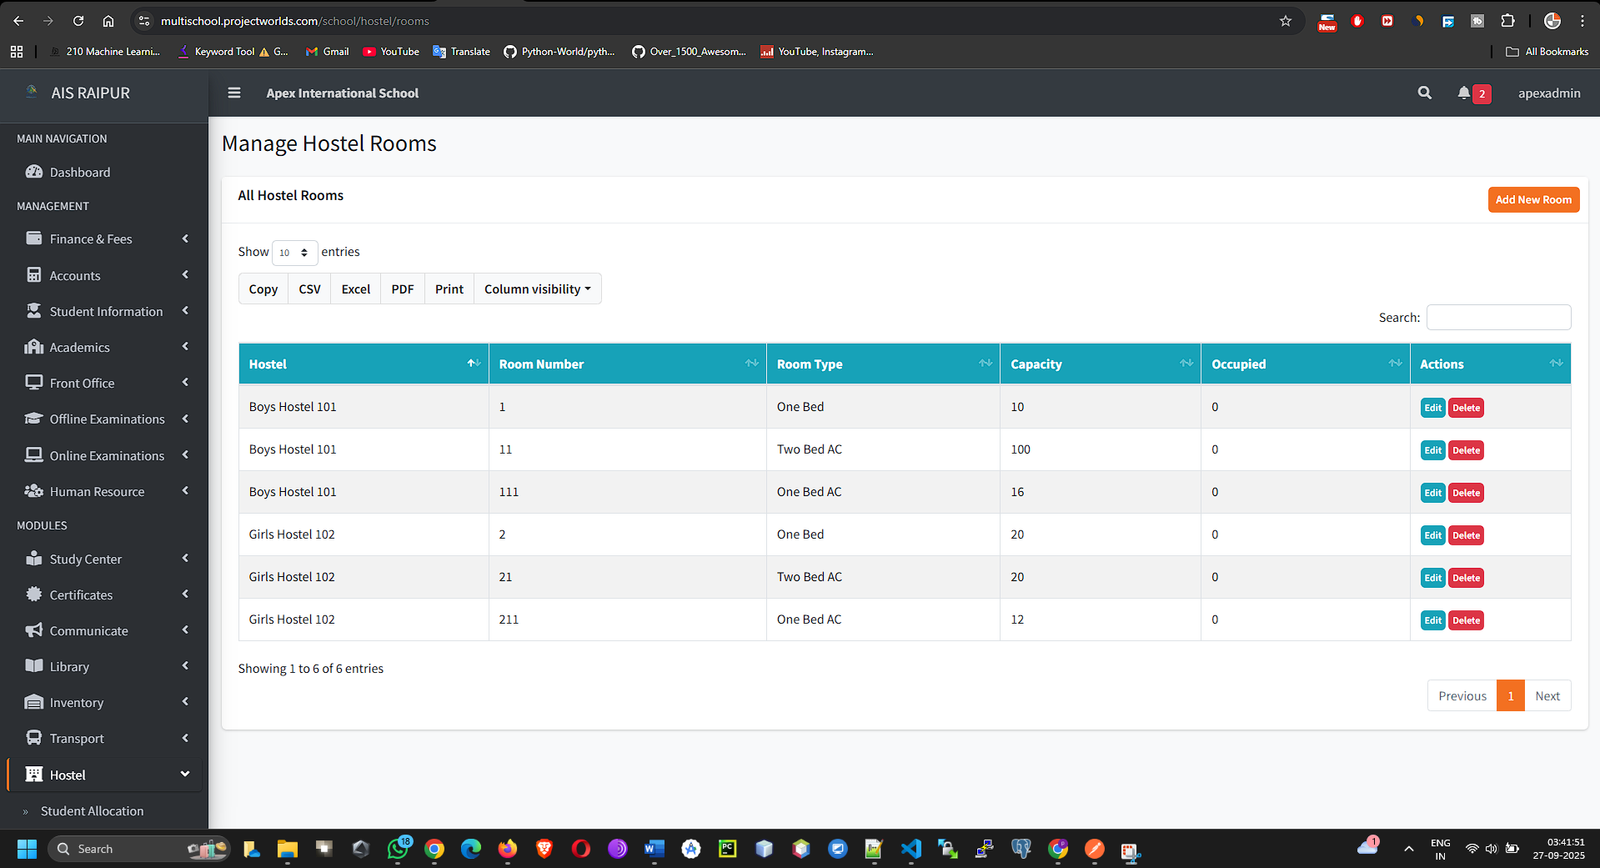
11.2 Manage Rooms: Creating the Digital Room Inventory
Now you will create individual room records within each hostel.
Navigation: MODULES > Hostel > Manage Rooms
- First, Select Hostel from the dropdown menu to see the rooms in a specific building.
- Click the + Add New Room button.
- A modal will appear. Fill in the room's specific details:
- Room Number / Name: The unique identifier for the room. Example: "201", "G-05".
- Hostel: This will be pre-selected based on your choice in step 1.
- Room Type: Select the room type from the list you created in the previous step (e.g., "2-Seater AC").
- Capacity: The total number of beds or students this room can accommodate.
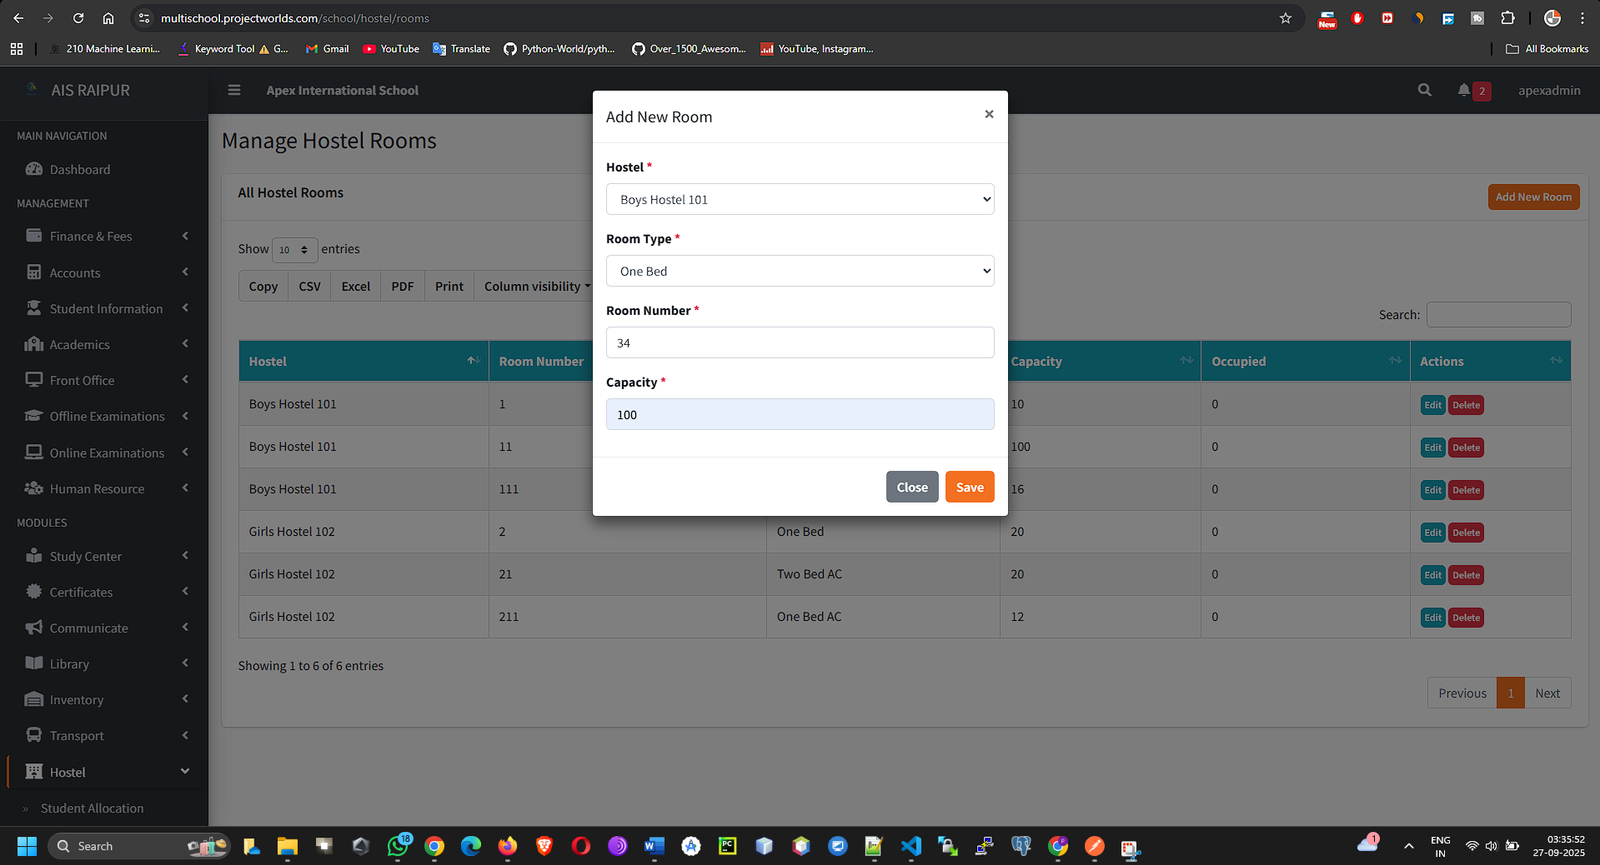
- Click Save.
- Repeat this process to add every single room for the selected hostel. The "Manage Rooms" page will display a list of all rooms, showing their type, capacity, and the number of students currently allocated.
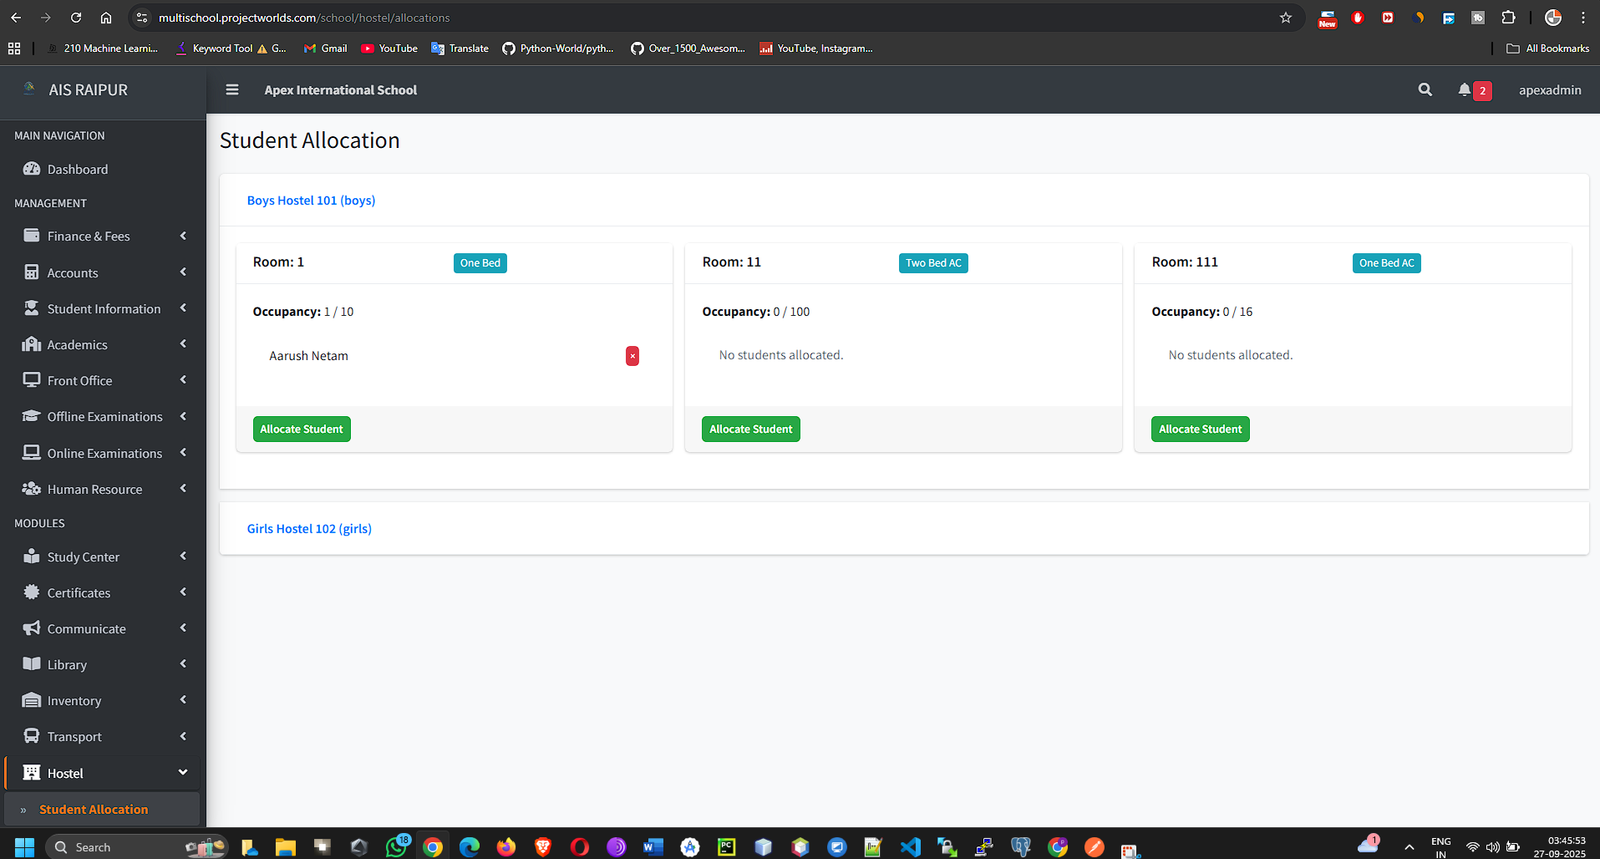
11.3 Student Allocation
This is the main operational screen where you will assign rooms to students.
Navigation: MODULES > Hostel > Student Allocation
This page shows a list of all students who are currently allocated to any hostel room.
Allocating a Room to a Student
- Click the + Allocate Room button.
- An allocation form will appear in a modal window.
- Search Student: Start typing the name or admission number of the student you want to allocate a room to. Select the student from the search results.
- Select Hostel: Choose the hostel building.
- Select Room: This is a smart dropdown. It will only show rooms in the selected hostel that have vacant capacity. Rooms that are already full will not appear in this list.
- Allocated At: The date the student is officially moving into the hostel.
- Click Save.
- The student is now officially allocated to the room. The system performs two key updates:
- The "Allocated" count for that room on the "Manage Rooms" page will increase by one.
- A fee invoice for the hostel fare (as defined in the "Room Type") might be automatically generated for the student.
- The student's name will appear on the main "Student Allocation" list.
De-allocating a Student
- On the "Student Allocation" page, find the student you wish to remove from the hostel.
- In the Action column, click the Delete (Trash can) icon.
- Confirm the action. The student will be de-allocated, and the "Allocated" count for their former room will decrease, making a space available for a new student.