To create a digital record of the school's consumable and non-consumable items, manage stock quantities, track suppliers, and maintain a log of all items issued to and returned by staff.
9.1 Inventory Setup: Suppliers & Categories
Before you can add items to your inventory, you must set up the necessary classifications and supplier information.
Navigation: MODULES > Inventory
Step A: Manage Suppliers
A supplier is any vendor or store from which the school purchases inventory items.
- From the Inventory menu, select Suppliers.
- Click the + Add New Supplier button.
- Fill in the supplier's details:
- Supplier Name: The name of the company or vendor.
- Phone, Email, Address: Contact information for the supplier.
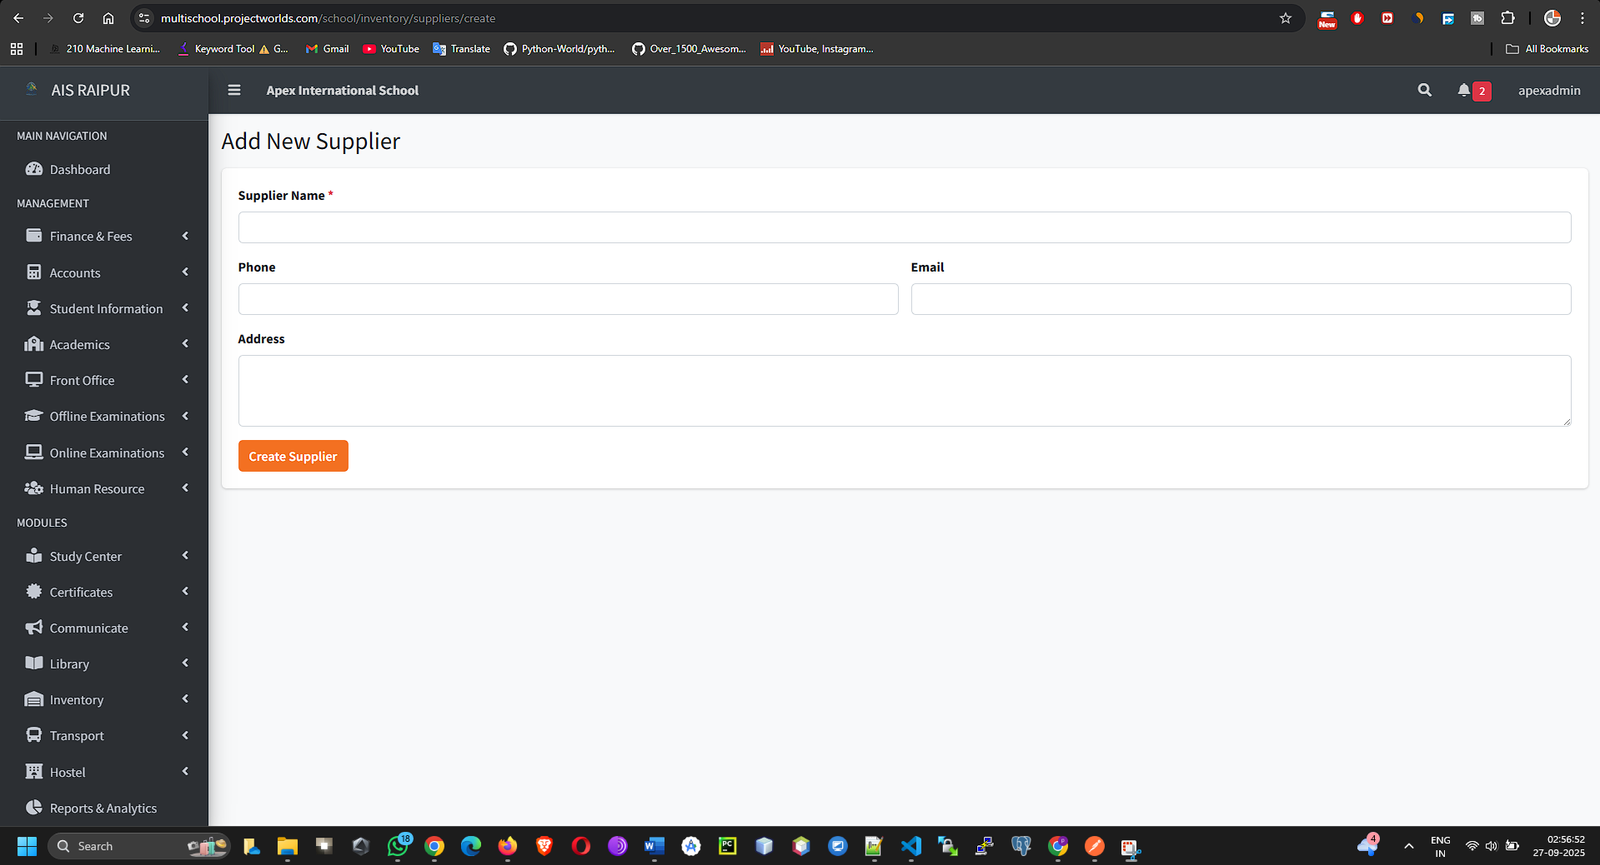
- Click Save. Add all your regular suppliers to this list.
Step B: Manage Item Categories
Categories help in grouping similar inventory items for better organization and reporting.
- From the Inventory menu, select Item Categories.
- Click the + Add New Category button.
- Enter the Category Name. Examples: "Stationery", "Sports Equipment", "Lab Chemicals", "Computer Peripherals", "Furniture".
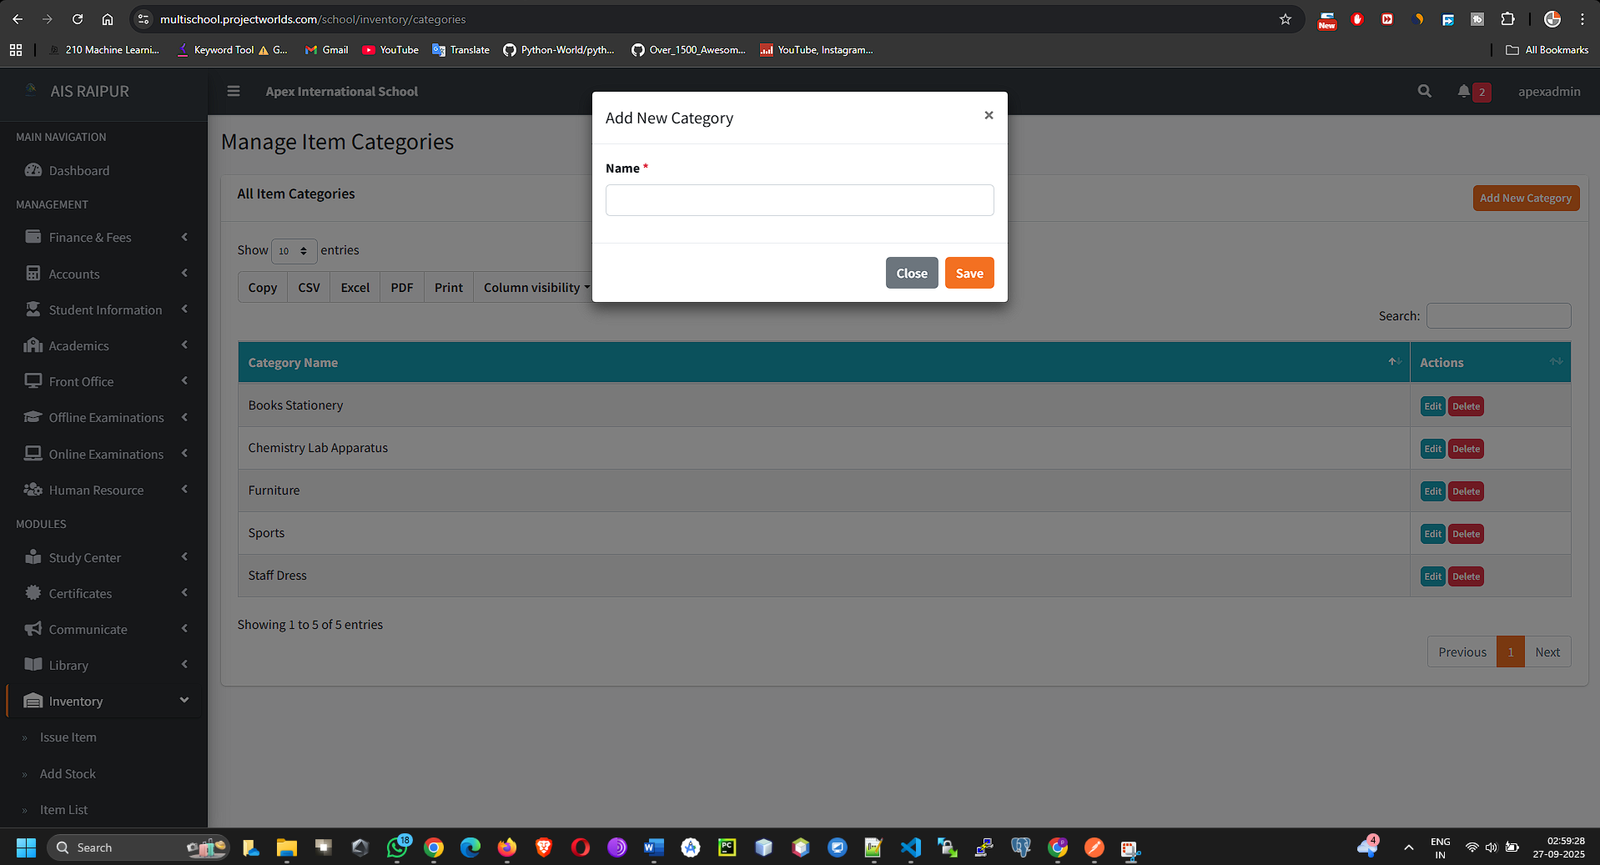
- Click Save.
9.2 Item List: Creating Your Inventory Catalog
This is where you define every unique item that the school stocks. This step only creates the item record; it does not add any quantity.
Navigation: MODULES > Inventory > Item List
- Click the + Add New Item button.
- Fill in the item's details:
- Item Name: The name of the product. Examples: "Whiteboard Markers", "Cricket Bat - Size 5", "Microscope", "Dell USB Keyboard".
- Item Category: Select the appropriate category from the dropdown you created in the previous step.
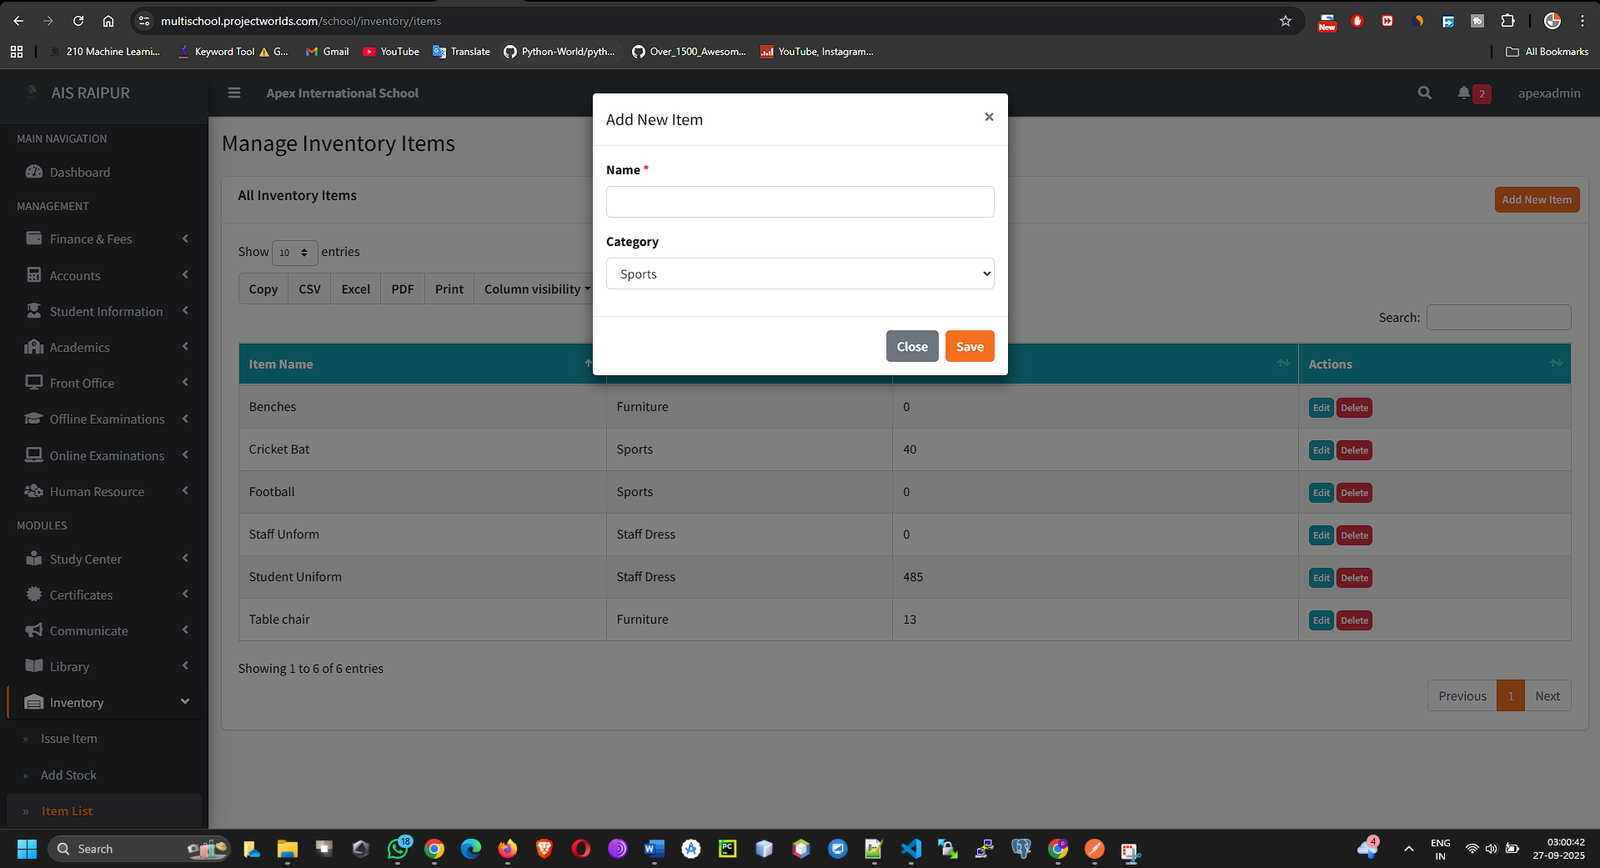
- Click Save. The item is now created in your catalog with a default Stock Quantity of 0.
- The "Item List" page shows your entire catalog and the current stock level for each item.

9.3 Add Stock: Increasing Item Quantities
After purchasing new items, you must record them in the system to increase the stock quantity.
Navigation: MODULES > Inventory > Add Stock
- You will be taken to the "Add Stock to Inventory" form.
- Fill in the details of the purchase:
- Item: Select the item from your catalog for which you are adding stock.
- Supplier (Optional): You can select the supplier from whom you purchased the item.
- Quantity: The number of units you are adding.
- Date: The date of the purchase or when the stock was received.
- Cost (Optional): The purchase price for the items.
- Description (Optional): Any notes, like an invoice or receipt number.
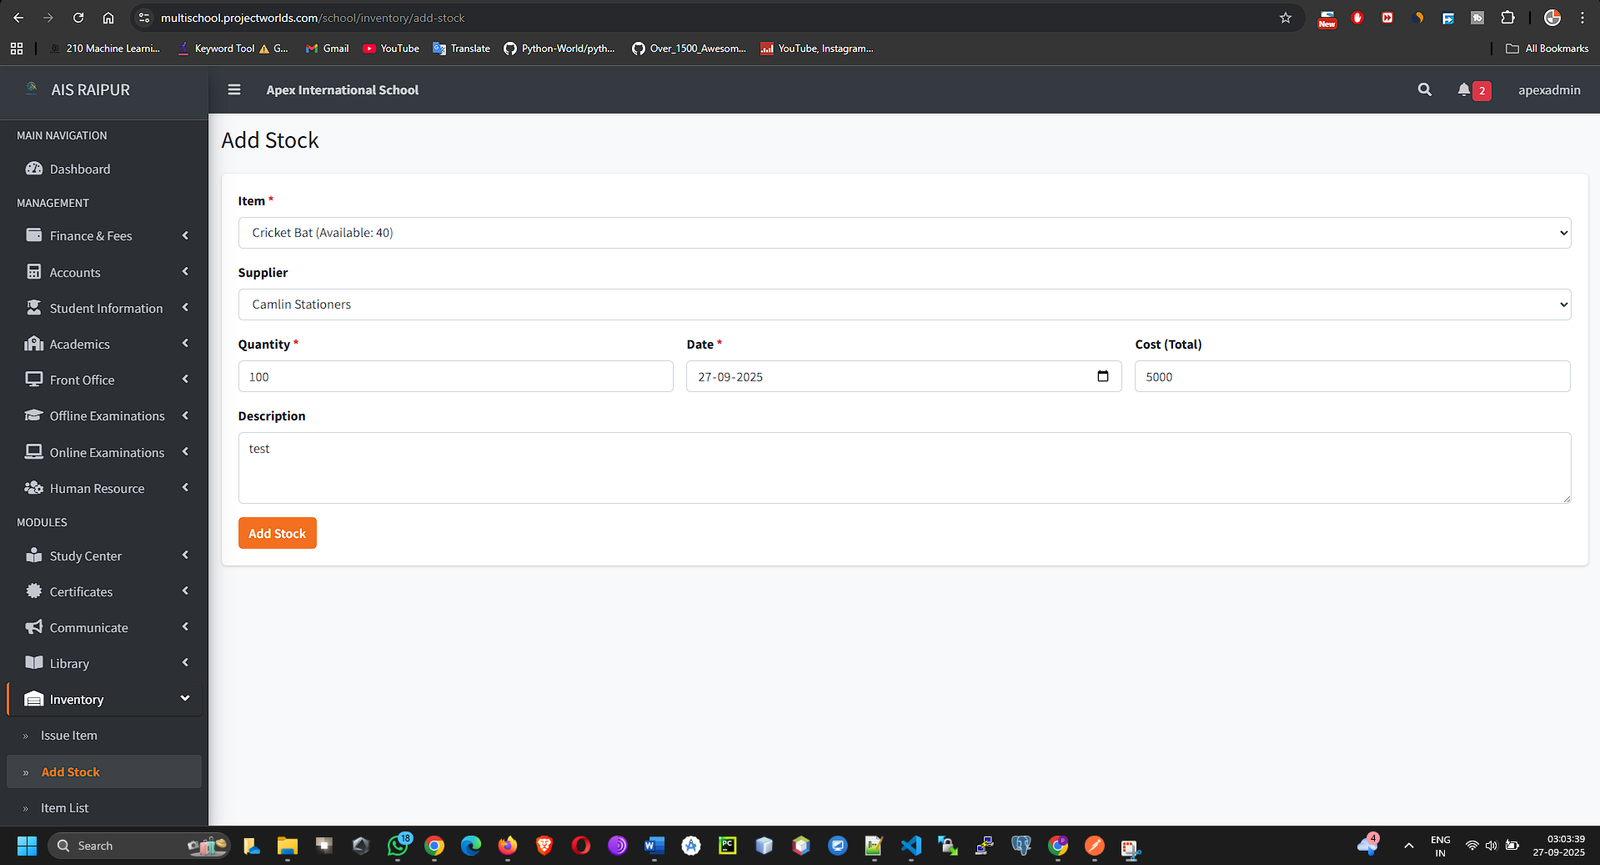
- Click Save. The system will now update the Stock Quantity for that item in your "Item List".
9.4 Issue Item: Managing Item Distribution
This is the primary operational screen for managing the distribution of items to staff.
Navigation: MODULES > Inventory > Issue Item
This page functions similarly to the library module, with a form to issue items and a list of items that have been issued.
Issuing an Item to Staff
- In the Issue Item section, fill in the form:
- Item: Select the item you wish to issue from the dropdown. The system will show the current Available Stock. You cannot issue more than what is available.
- Staff: Start typing the name of the staff member who is receiving the item and select them from the search results.
- Quantity: The number of units being issued to the staff member.
- Issue Date: The date the item is being given out.
- Return Date (Optional): If the item is returnable (like a laptop or a specific tool), set the expected return date. For consumable items like stationery, leave this blank.
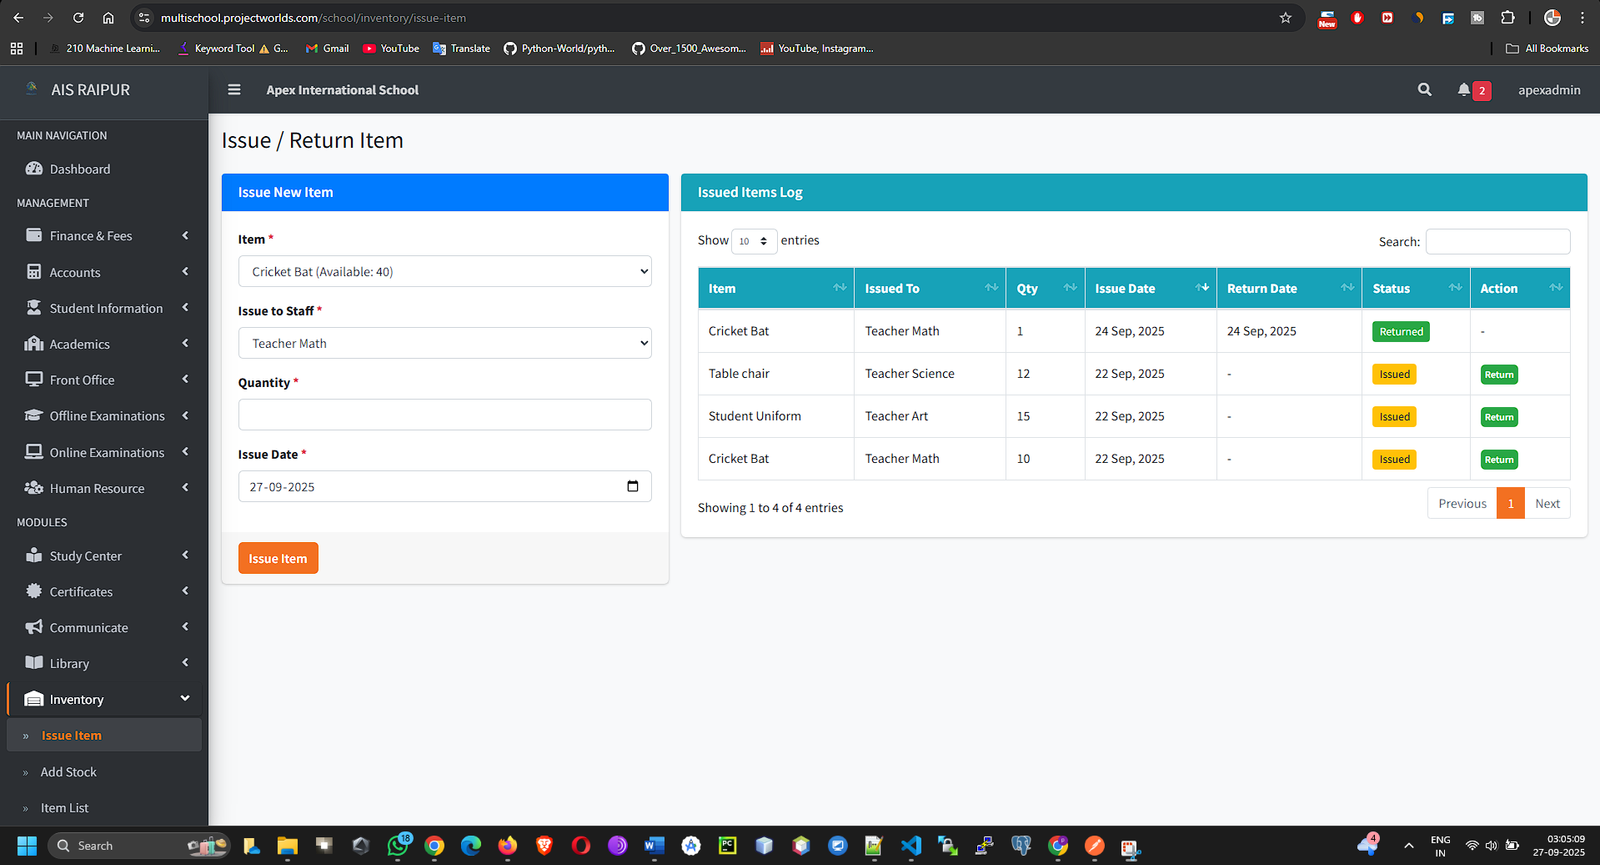
- Click Issue Item.
- The transaction is now logged. The Stock Quantity for the item will decrease by the issued quantity. The record will appear in the Issued Item List on the same page with a status of Issued.
Recording a Returned Item
- The Issued Item List shows all items currently with staff members.
- Find the item that is being returned by a staff member.
- In the Action column, click the Click to Return (Green Checkmark) button.
- A confirmation prompt will appear. Once you confirm, the item's status will change to Returned.
- Crucially, the Stock Quantity for that item in your inventory will increase by the quantity that was returned.