To digitize your school's library operations. This includes cataloging all books, managing book categories, and tracking the complete lifecycle of issuing books to students and staff and recording their returns.
8.1 Library Setup: Book Categories
Before adding books, it's best to categorize them. This helps in organizing and searching for books later.
Navigation: MODULES > Library > Book Categories
- Click the + Add New Category button.
- In the modal window, enter the Category Name. Examples: "Science Fiction", "Mathematics", "History", "Reference Books", "Children's Story Books".

- Click Save. Create all the categories that are relevant to your library's collection.
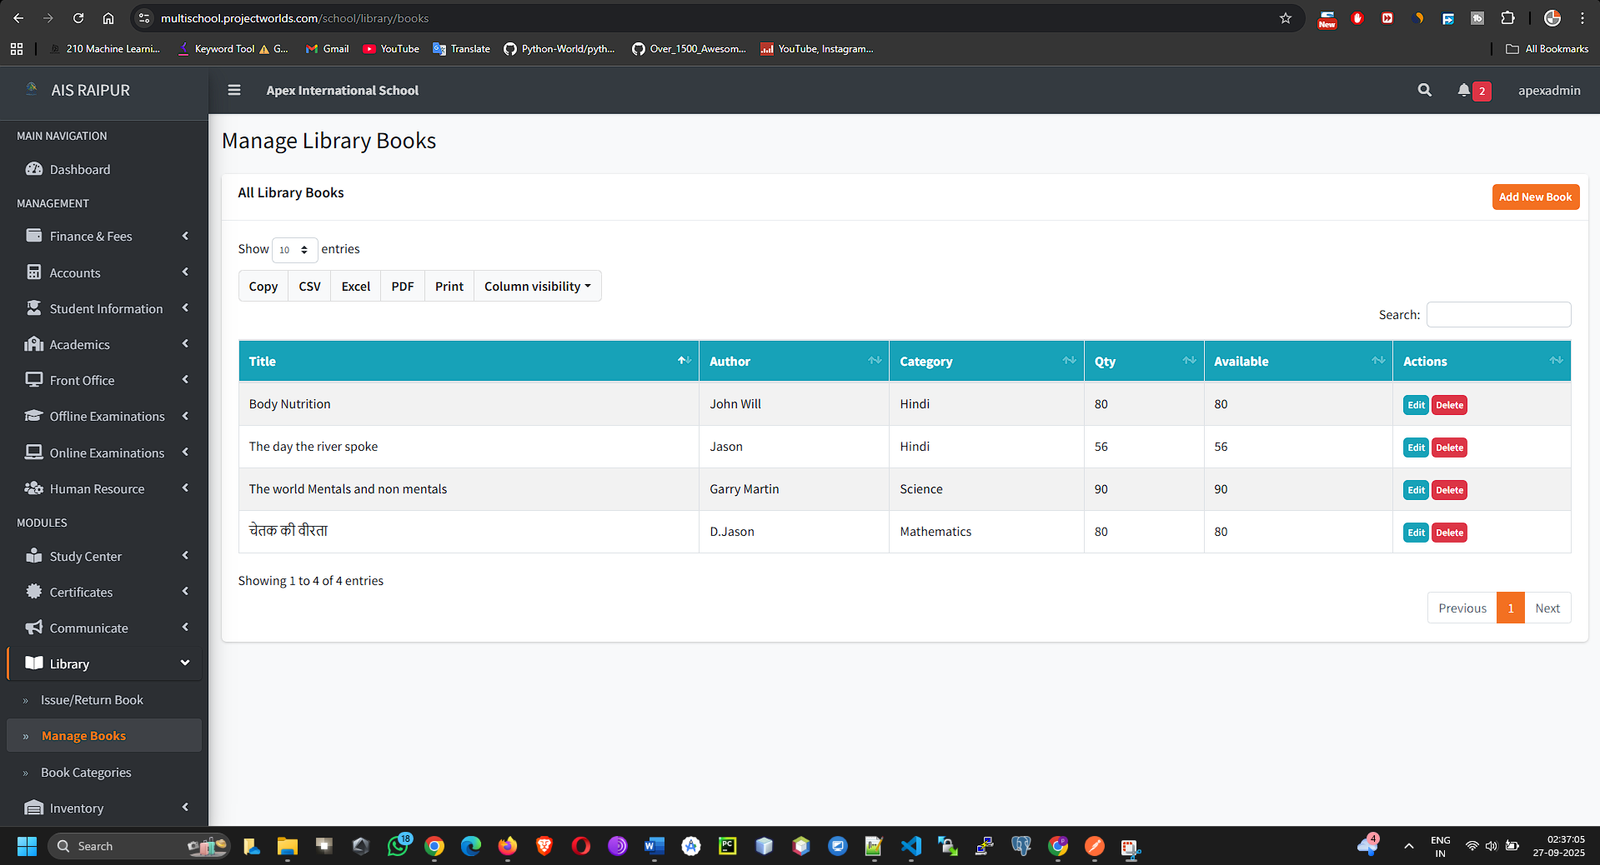
8.2 Manage Books: Building Your Digital Catalog
This is where you will add every book in your library into the ERP system.
Navigation: MODULES > Library > Manage Books
- Click the + Add New Book button.
- A detailed form will appear. Fill in all the available information for the book:
- Book Title: The full title of the book.
- Book Category: Select a category from the dropdown list you created in the previous step.
- Author: The name of the author.
- Publisher: The publisher of the book.
- ISBN (International Standard Book Number): A unique identifier for the book.
- Quantity: The total number of copies of this book that the library owns. The system will automatically set the Available Quantity to this number.
- Rack Number (Optional): The physical location of the book in the library for easy retrieval.
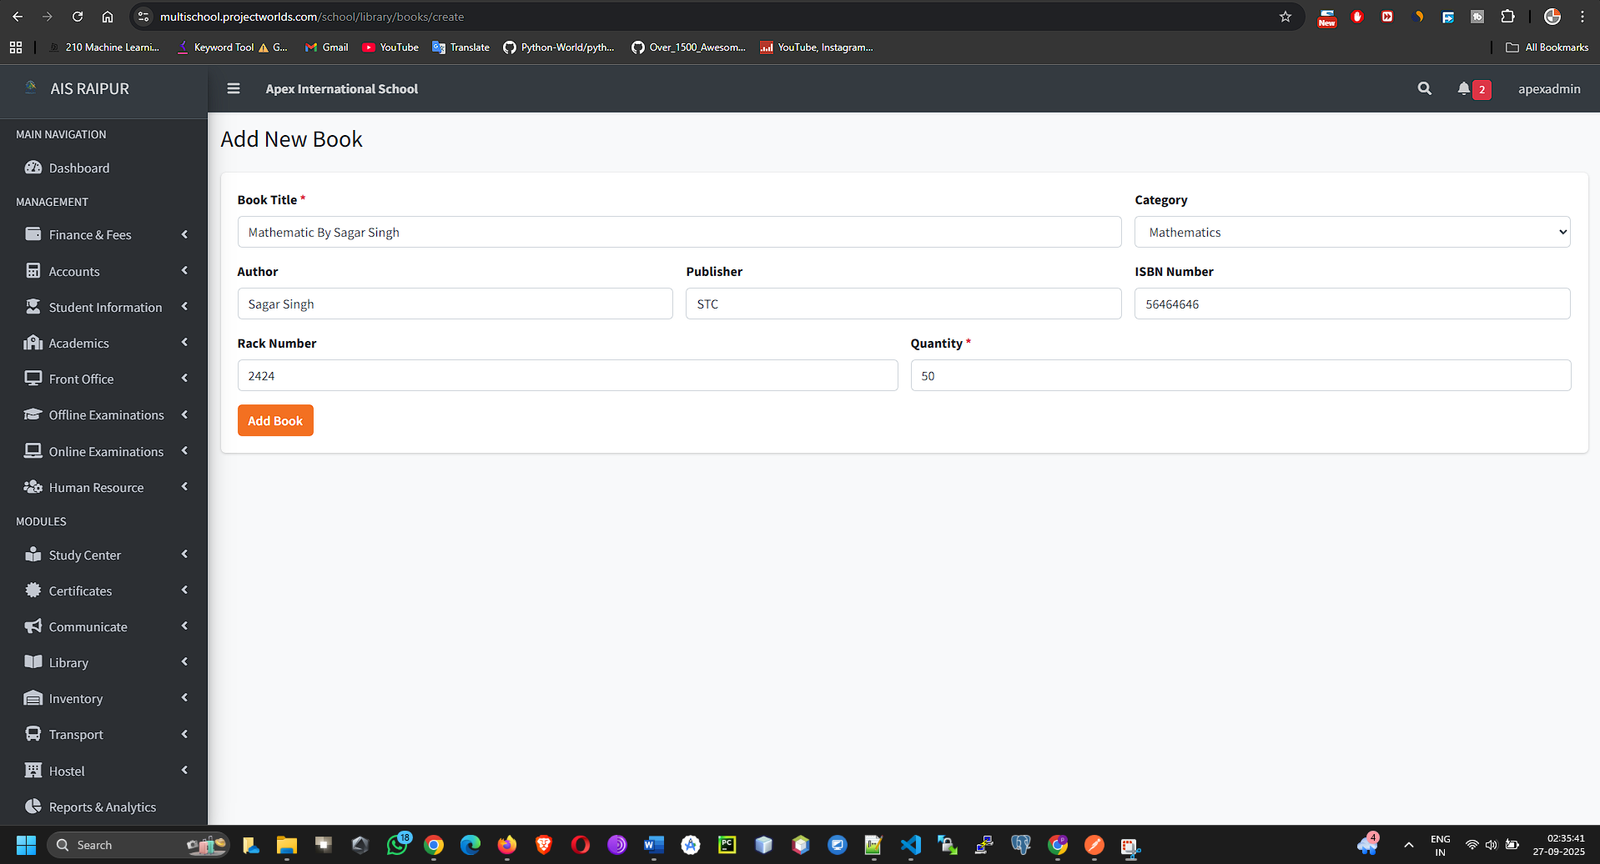
- Click Save. The book is now part of your digital catalog.
- The "Manage Books" page will show a list of all your books, along with their total quantity and the currently available quantity.
8.3 Issue & Return Book: The Core Operation
This is the main operational screen for the librarian, used for daily transactions.
Navigation: MODULES > Library > Issue/Return Book
This page is divided into two main sections: Issue Book and Issued Book List.
Issuing a Book to a Member
- In the Issue Book section, you need to identify both the member (student or staff) and the book.
- Search Member:
- Select the Member Type (Student or Staff).
- Start typing the student's name/admission no or the staff member's name in the search box. A list of matching members will appear. Select the correct one.
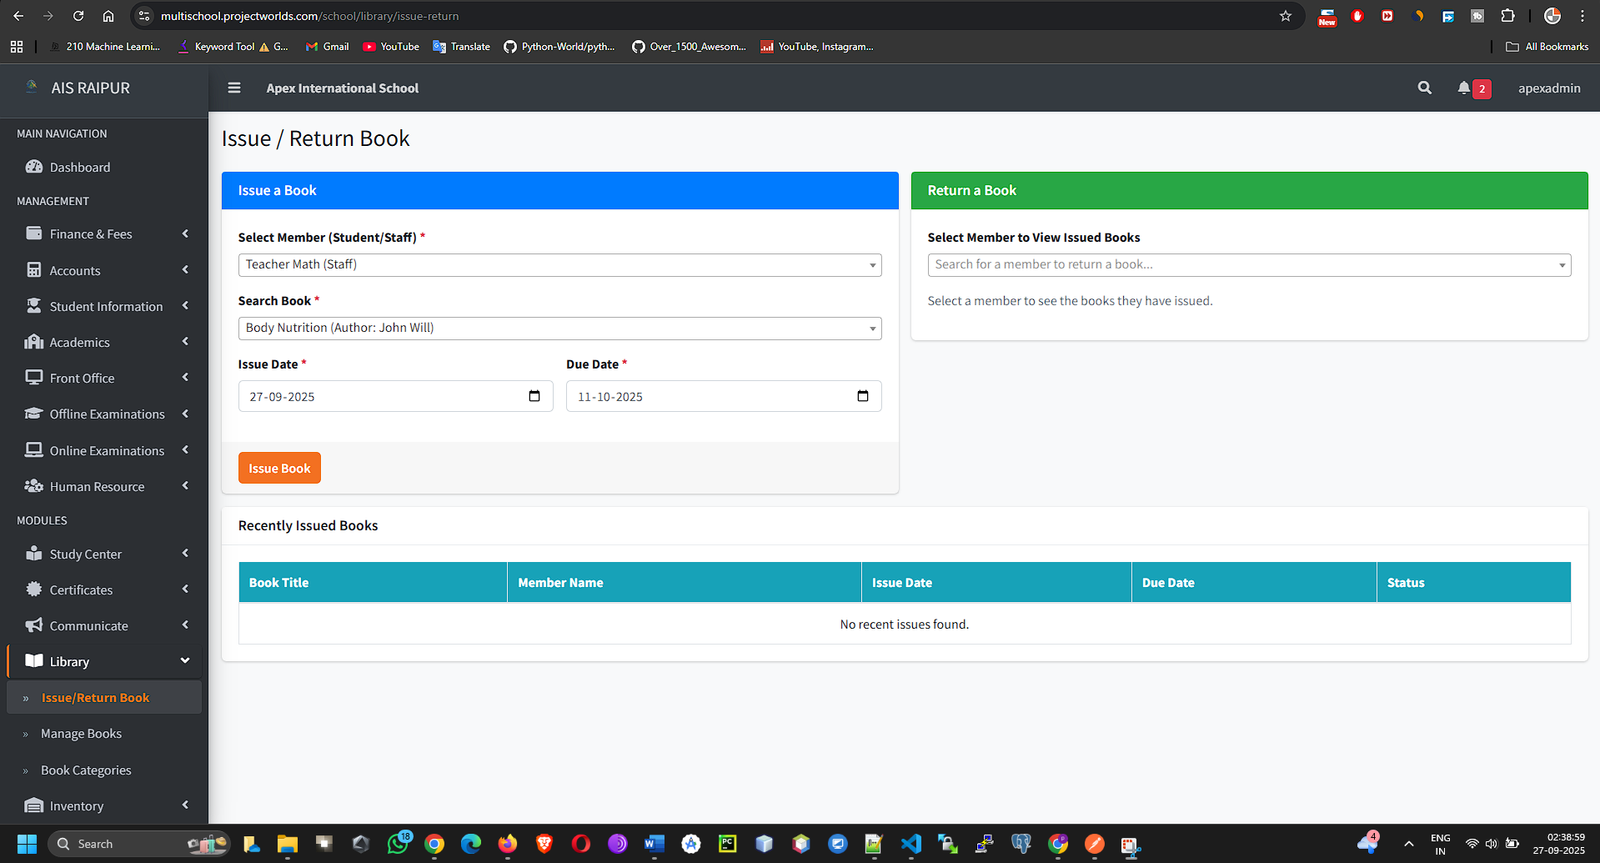
- Search Book:
- Start typing the Book Title or ISBN in the book search box. A list of matching books will appear. Select the book you want to issue.
- The system will show the number of currently available copies. You cannot issue a book if the available quantity is zero.
- Finalize Issue:
- Issue Date: This defaults to the current date.
- Due Date: Select the date by which the book must be returned.
- Click the Issue Book button.
- The system will now record the transaction. The Available Quantity for that book will decrease by one, and the new entry will appear in the Issued Book List on the same page.
Returning a Book
- The Issued Book List at the bottom of the page shows all books that are currently checked out by members. The status will be Issued.
- You can use the search bar to quickly find a specific book or member.
- Find the book that is being returned. In the Action column, click the Return (Green Arrow) button.
- A confirmation modal will appear. It will automatically calculate any late fines if applicable (based on your school's policy, which might be a future setting).
- Click Confirm Return.
- The book's status will change to Returned, the Return Date will be recorded, and the Available Quantity for that book in your catalog will increase by one.