To create, manage, and conduct online objective-type (MCQ) examinations. This includes building a reusable question bank, scheduling exams for specific classes, and viewing automated results and student performance.
6.1 Building the Question Bank
The Question Bank is your central repository of all questions. You create questions here once and can then reuse them in multiple online exams.
Navigation: MANAGEMENT > Online Examinations > Question Bank
Adding a Single Question
- Click the + Add New Question button.
- A form will appear. Fill in the details meticulously:
- Class: Select the class this question is intended for.
- Subject: Select the subject the question belongs to.
- Question: Type the full question text.
- Options: You will see fields for Option A, Option B, Option C, etc. Fill in the possible answers.
- Correct Answer: From the dropdown, select the option that is the correct answer (e.g., Option A). This is crucial for auto-grading.
- Marks: Enter the number of marks this question carries (e.g., 1, 2).
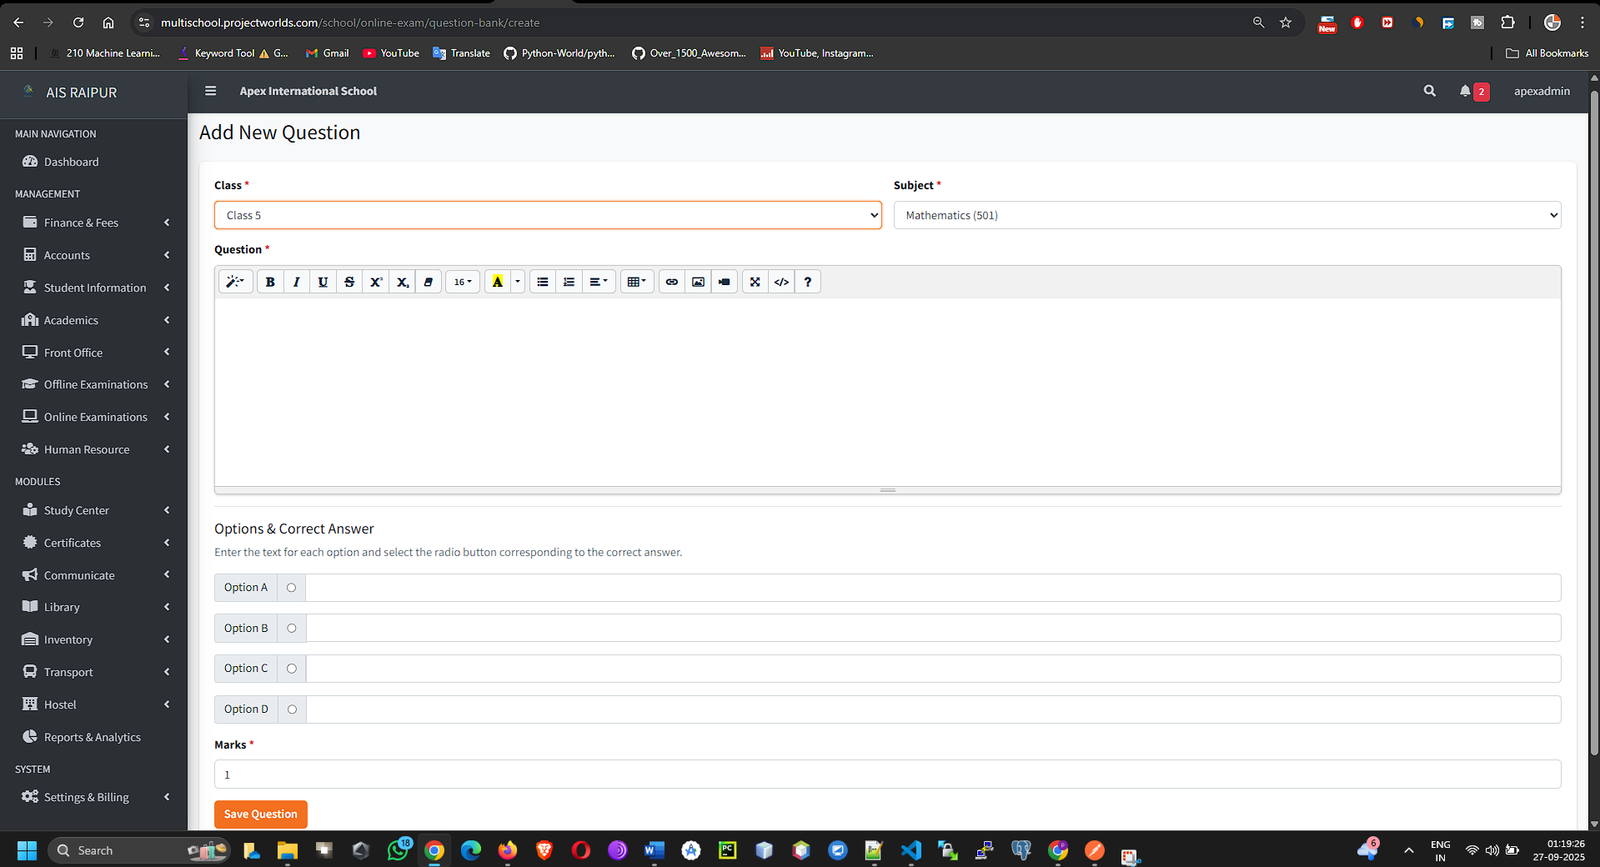
- Click Save. The question is now added to the bank.
Bulk Uploading Questions
For adding a large number of questions at once, using the Excel template is highly efficient.
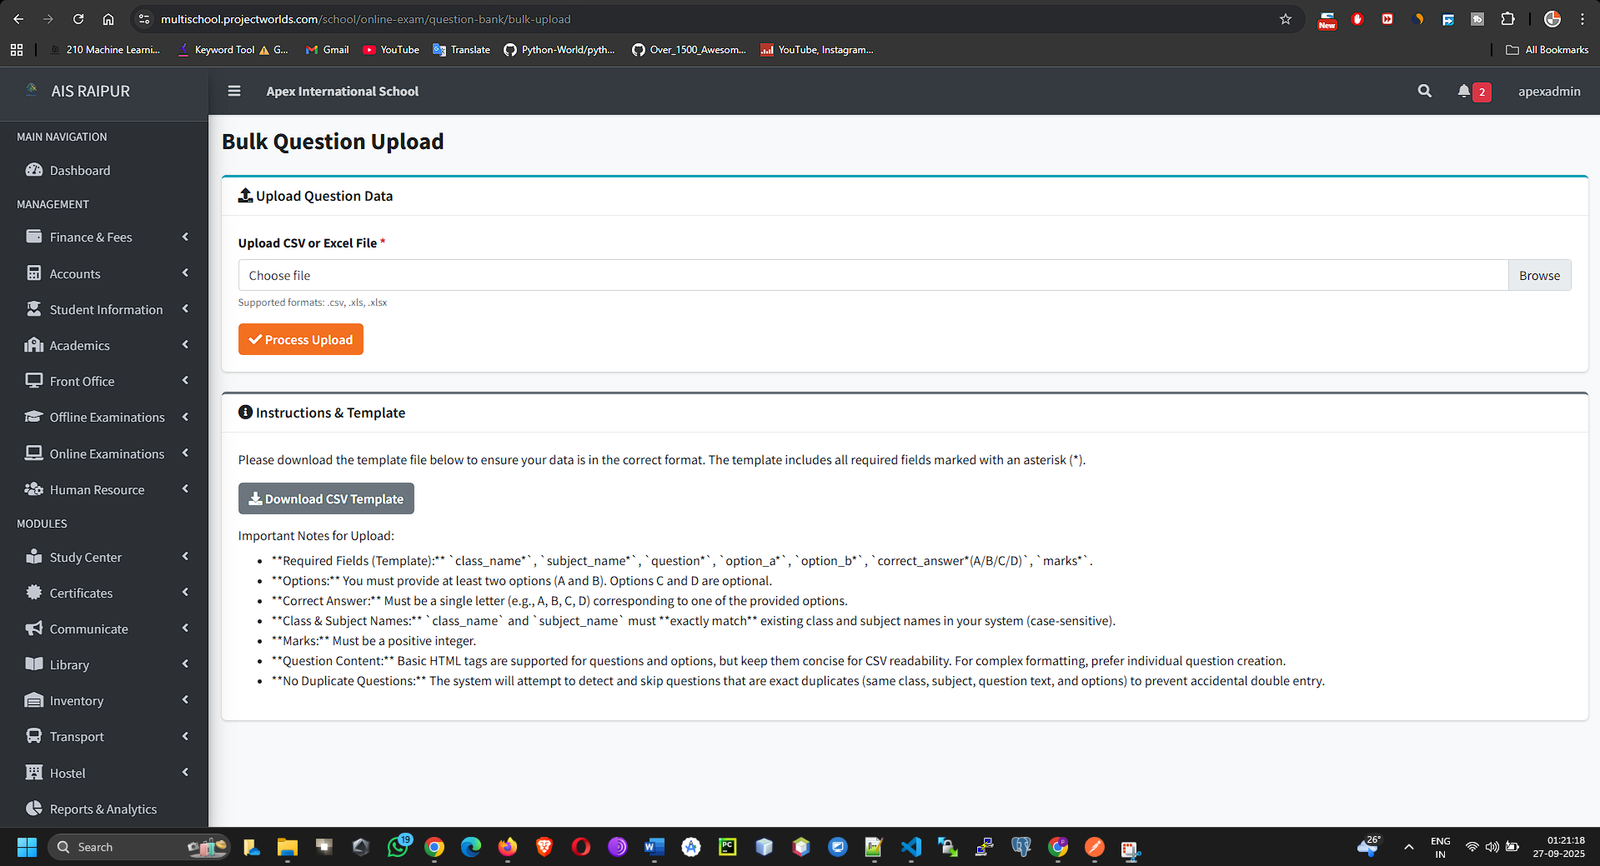
- On the Question Bank page, click the Bulk Upload button.
- On the Bulk Upload page, first click Download Template. An Excel file will be downloaded.
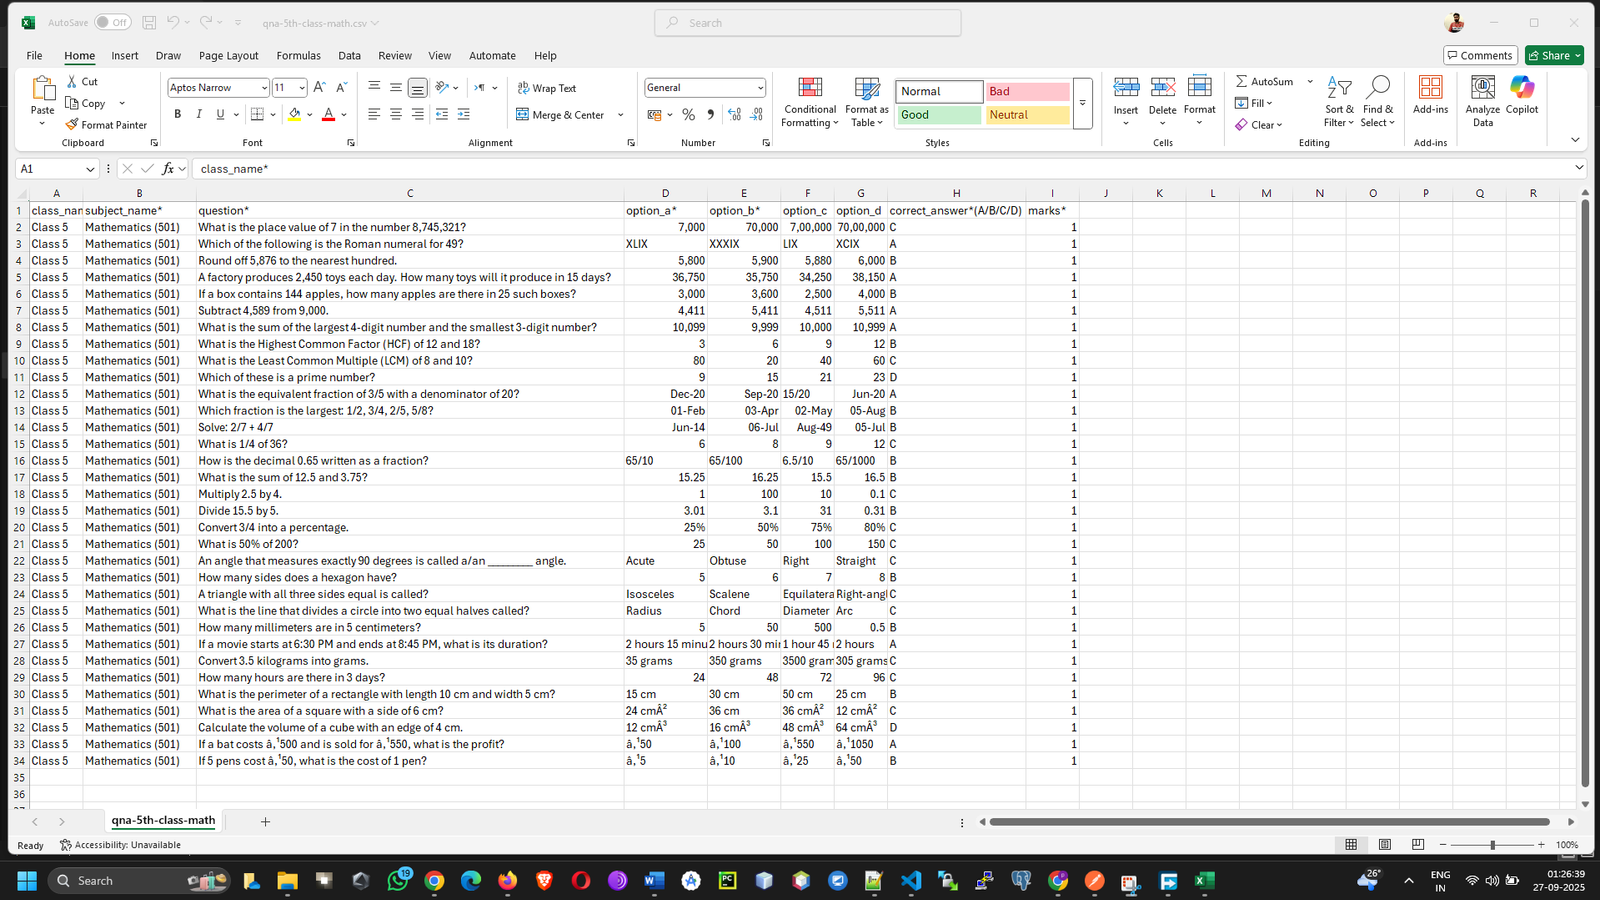
- Fill the Excel Template:
- Open the downloaded file.
- Each row represents a single question.
- Fill in the columns exactly as specified: question, option_a, option_b, option_c, option_d, correct_answer, marks.
- Important: For the correct_answer column, you must write the option key exactly (e.g., option_a, option_b).
- Upload the File:
- Go back to the Bulk Upload page in the ERP.
- Select the Class and Subject for which you are uploading questions.
- Click Choose File and select your completed Excel file.
- Click Upload Questions.
- The system will process the file and import all the questions into your bank. You will see a success message or a list of errors if the format was incorrect.
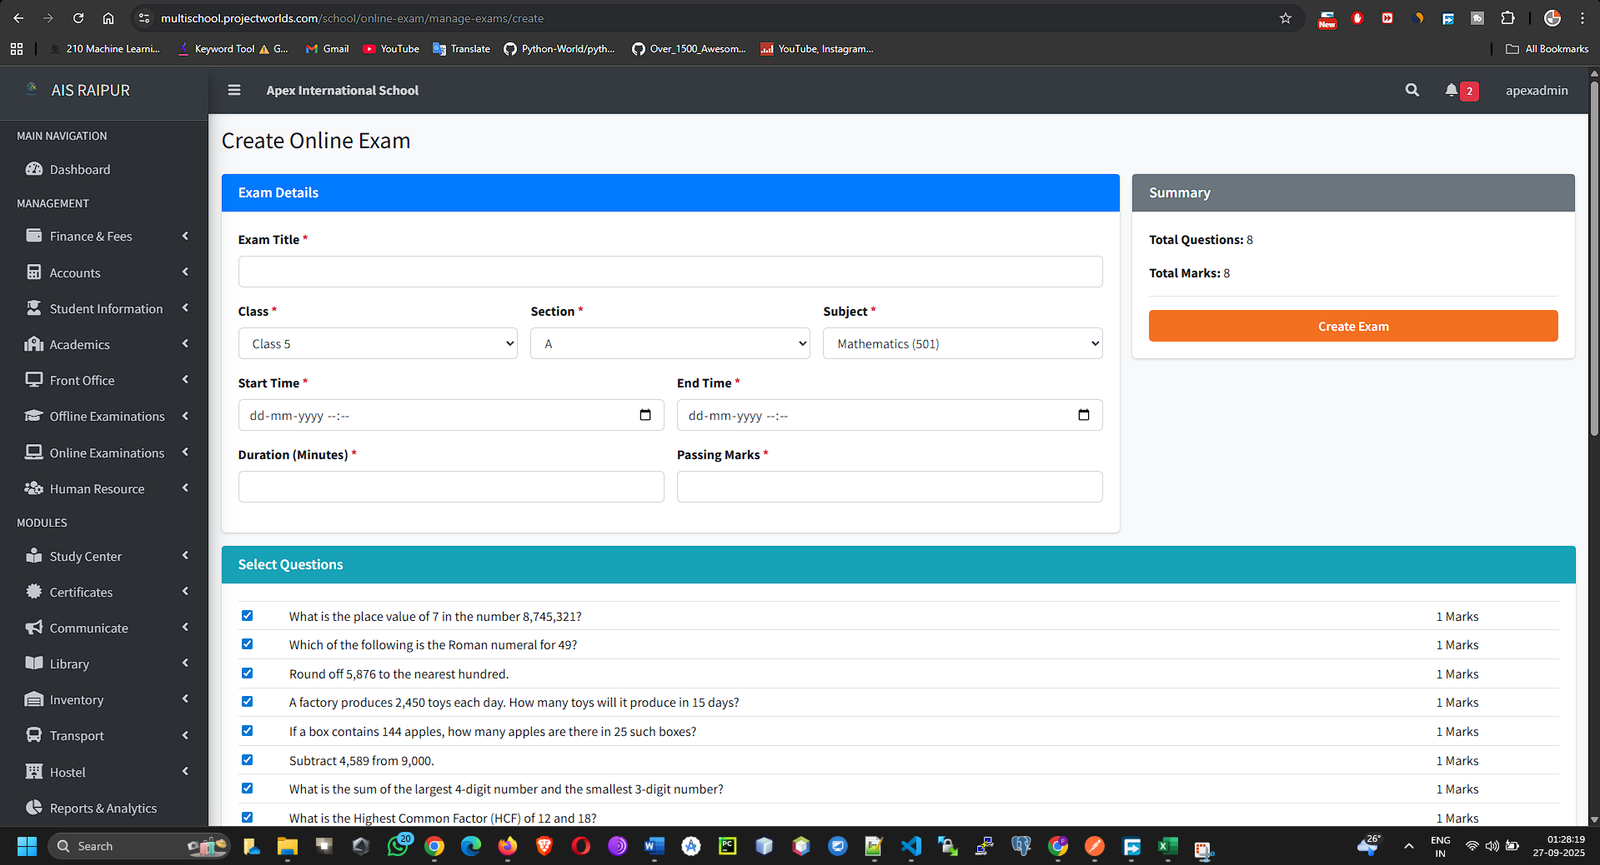
6.2 Creating & Managing the Online Exam
Now that you have questions in your bank, you can assemble them into an exam.
Navigation: MANAGEMENT > Online Examinations > Manage Online Exams
- Click the + Add New Exam button.
- The "Create Online Exam" process is in two steps.
Step 1: Exam Details
- Title: A clear name for the exam. Example: "Chapter 3: Biology Quiz", "Monthly Current Affairs Test".
- Class & Section: Select the target audience for this exam.
- Subject: Choose the subject of the exam. This will be used to filter questions from the bank.
- Duration (Minutes): The total time students will have to complete the exam.
- Start Time & End Time: This is the window during which the exam will be active and available for students to start. A student can start the exam anytime within this window.
- Total Marks & Passing Marks: The overall marks and the minimum required to pass.
- Click Next: Add Questions.
Step 2: Add Questions to the Exam
- You will be taken to a new page. On the left, you will see the exam details you just entered. On the right, the system will automatically display all the questions from your Question Bank that match the Class and Subject of the exam.
- Review the list of available questions.
- Select Questions: Check the box next to each question you want to include in this specific exam.
- As you select questions, the "Total Marks of Selected Questions" counter will update. Ensure this matches the "Total Marks" you set in Step 1.
- Once you have selected all the required questions, click Save Exam.
The online exam is now created and will become active for students during the scheduled time window.
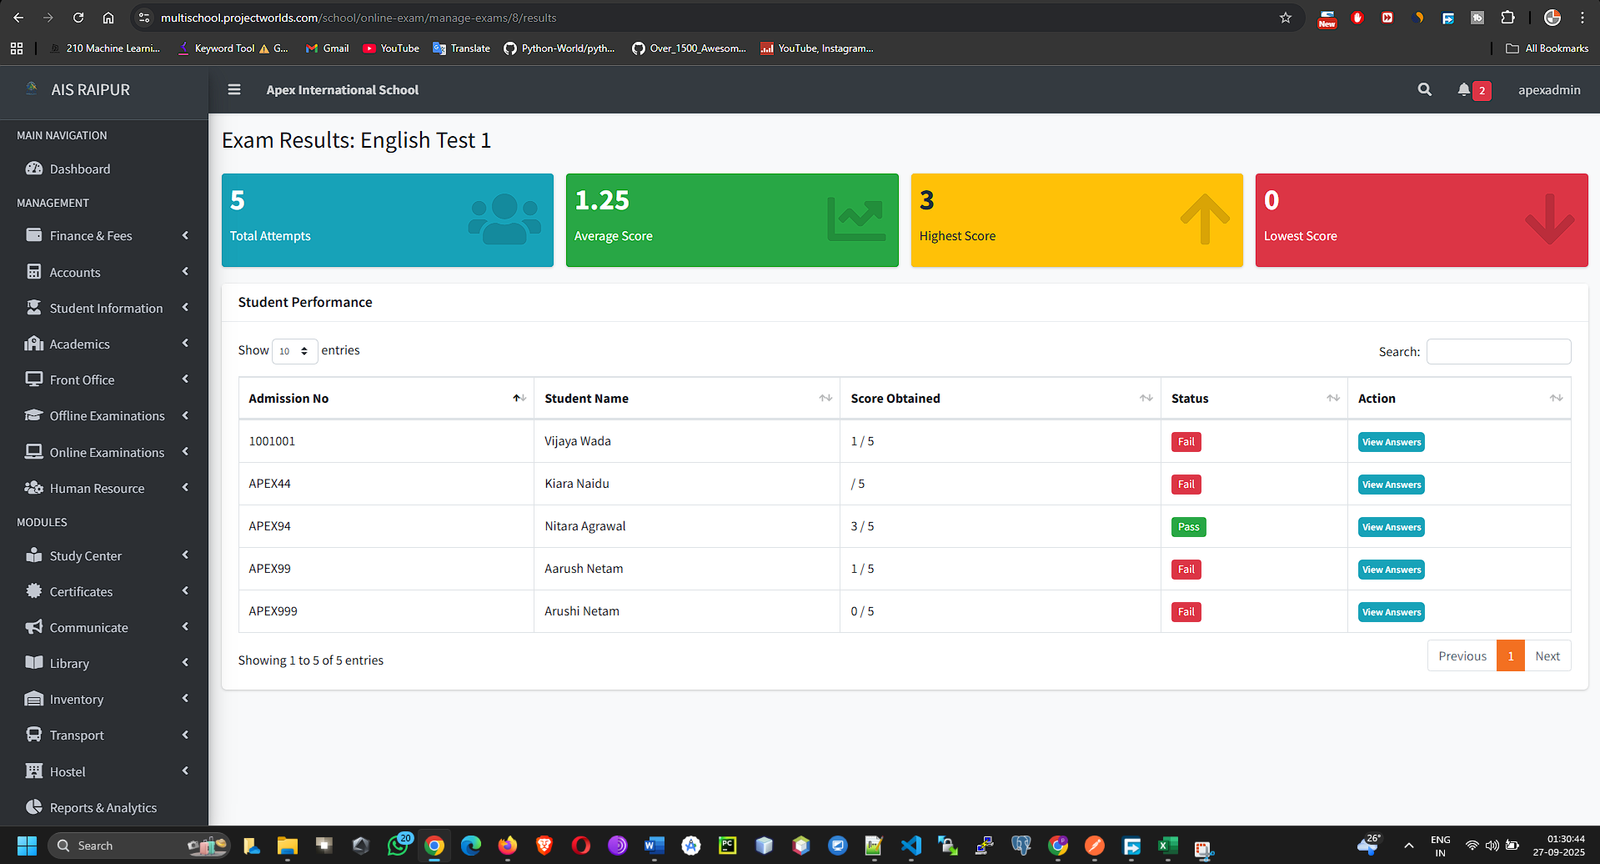
6.3 Viewing Exam Results
Since the grading is automated, results are available as soon as students complete the exam.
Navigation: MANAGEMENT > Online Examinations > Manage Online Exams
- The list will show all created online exams. The Status column will indicate if an exam is Pending, Active, or Completed.
- Find the completed exam you wish to review.
- In the Action column, click the View Results (Graph) icon.
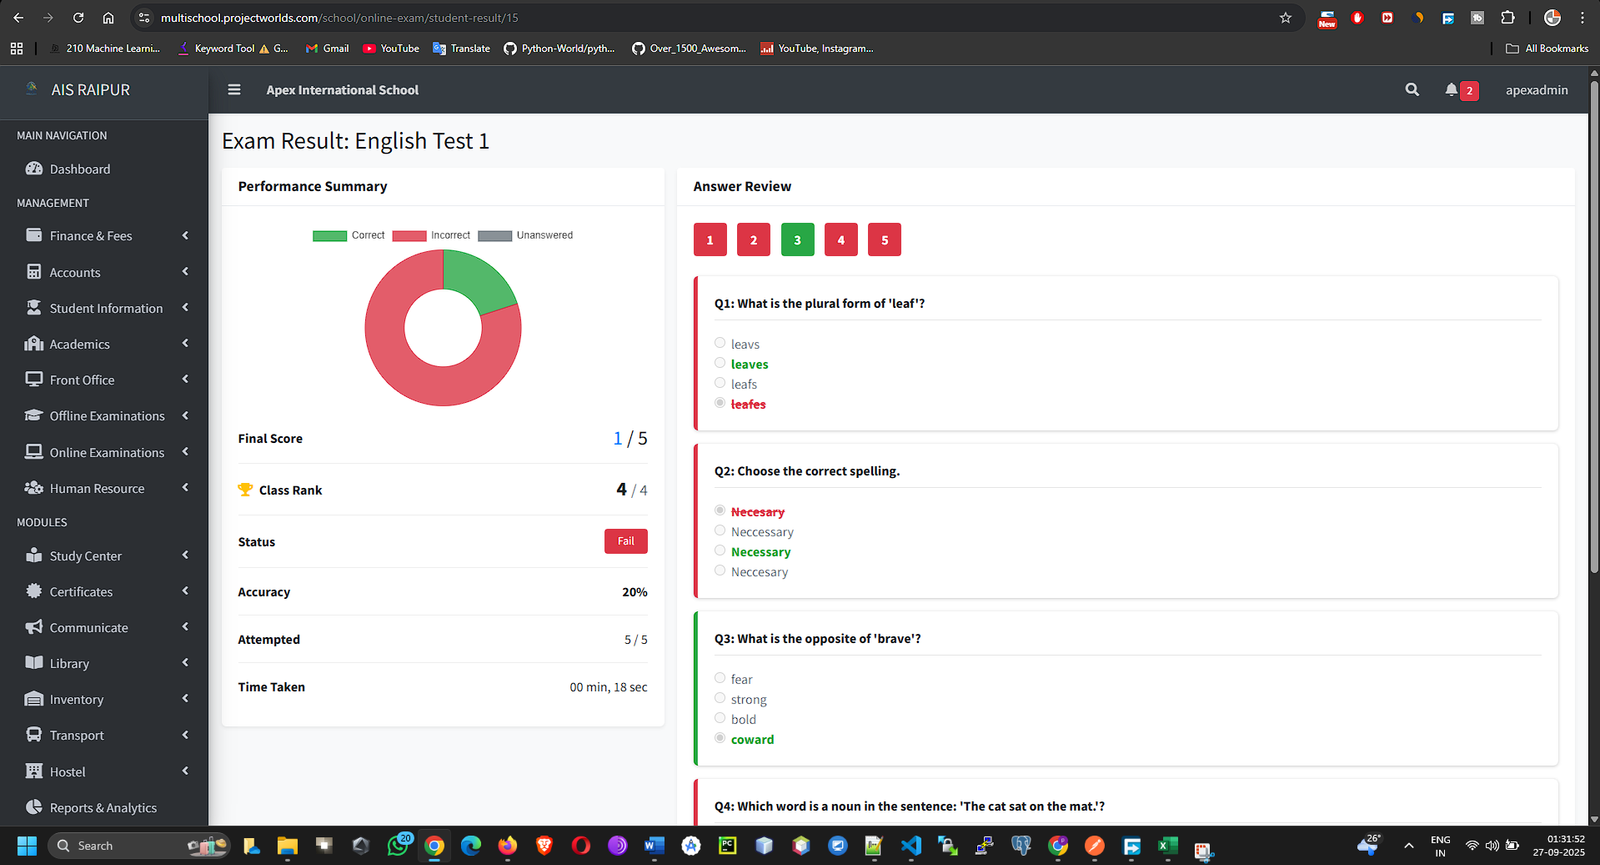
- You will be taken to the Exam Results Page. This page shows:
- A summary of the exam.
- A list of all students who were assigned the exam.
- For each student, you can see their Score, Status (Completed or In-Progress), and the time they took the exam.
- To see a detailed, question-by-question analysis for a specific student, click the View (Eye) icon next to their name.
- This Detailed Result View will show:
- Every question in the exam.
- The answer submitted by the student.
- The correct answer.
- A clear indication of whether their answer was Correct or Incorrect.