To configure the core technical and administrative settings of your school's ERP instance. This module is typically restricted to the main School Admin role.
Navigation: SYSTEM > Settings & Billing
15.1 School Settings
This is the primary configuration page for your school's identity.
- Navigate to Settings & Billing > School Settings.
- Here you can update all the foundational details:
- School Name, Address, Phone
- Logo, Favicon, Signature: Upload or change the school's branding images.
- Currency Symbol & Code: Adjust the financial currency.
- Attendance Method: Switch between Manual and Biometric attendance tracking. If Biometric is chosen, you must enter the ZKTeco device IP address.
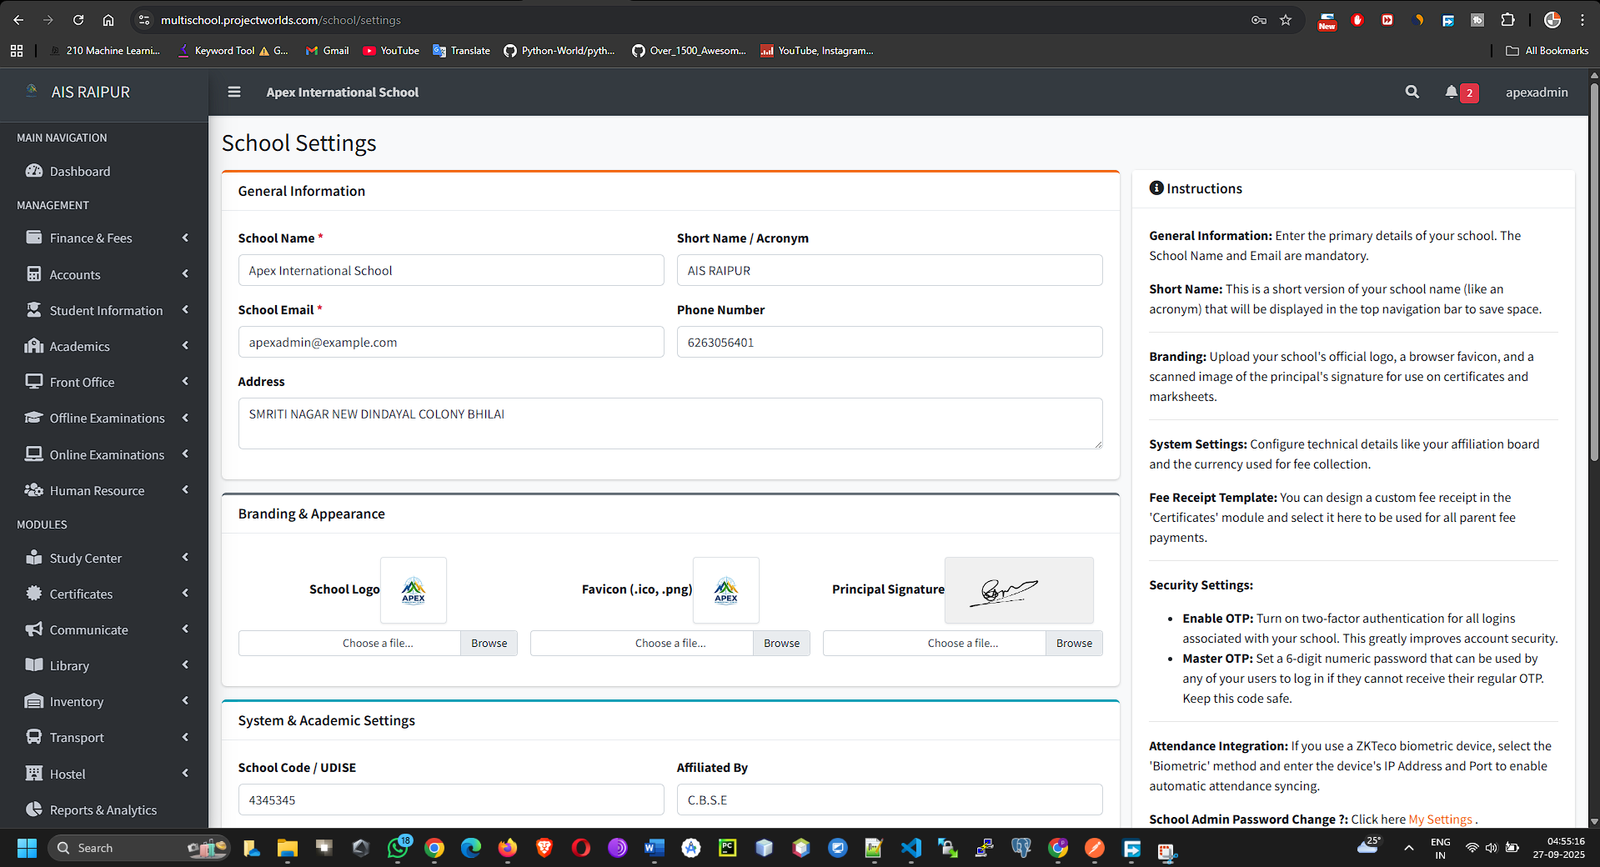
- Click Save Settings after making any changes.
15.2 Roles & Permissions
This powerful feature allows you to customize what each type of user can do.
- Navigate to Settings & Billing > Roles & Permissions.
- You will see a list of existing roles (teacher, accountant, librarian, etc.). You can Add a New Role if needed.
- Click the Manage Permissions (Lock) icon next to a role (e.g., teacher).
- You will be taken to a page with a long list of all possible permissions in the system, grouped by module (e.g., Academics, Student, Fees).
- Check the boxes for the permissions you want to grant to this role. For example, you might allow teachers to study.homework.manage but not fees.collection.manage.
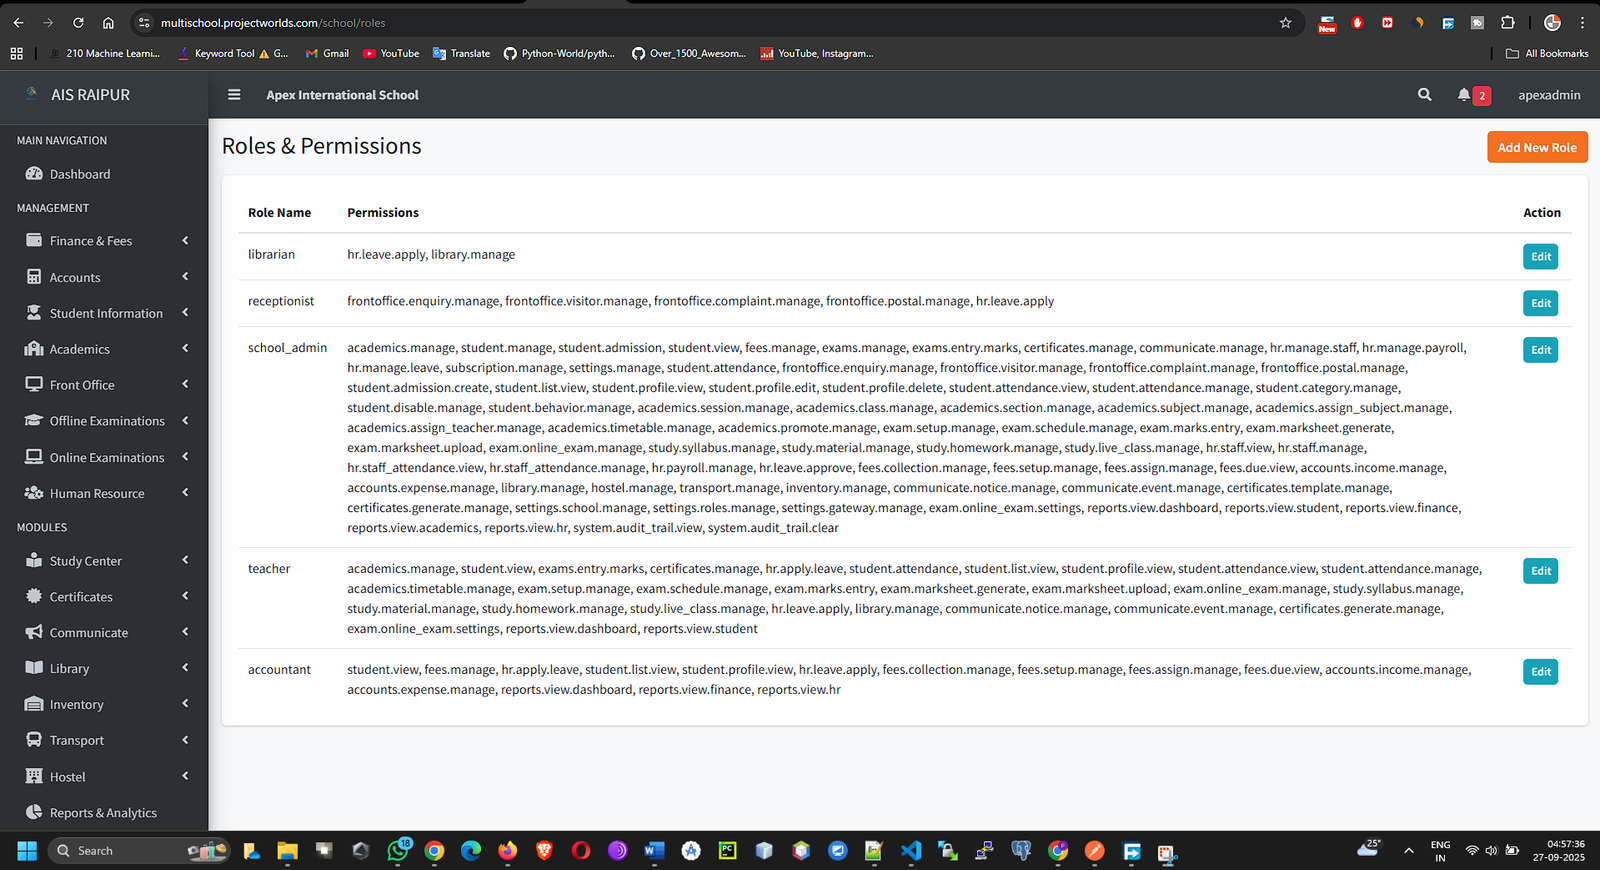
- Click Save Permissions. Any user with this role will now have their access rights updated instantly.
15.3 Payment Gateway
This is where you configure the settings for online fee collection.
- Navigate to Settings & Billing > Payment Gateway.
- The system will list the available gateways (e.g., Stripe, Razorpay).
- Select the gateway you want to configure.
- Enter your API Keys (e.g., Key ID, Key Secret, Webhook Secret) that you get from your payment gateway provider's dashboard.
- Set the Payment Mode (Sandbox for testing or Live for real transactions).
- You can also add a Gateway Charge (a fixed amount or percentage) to be added to the parent's fee if you wish to pass on the transaction costs.
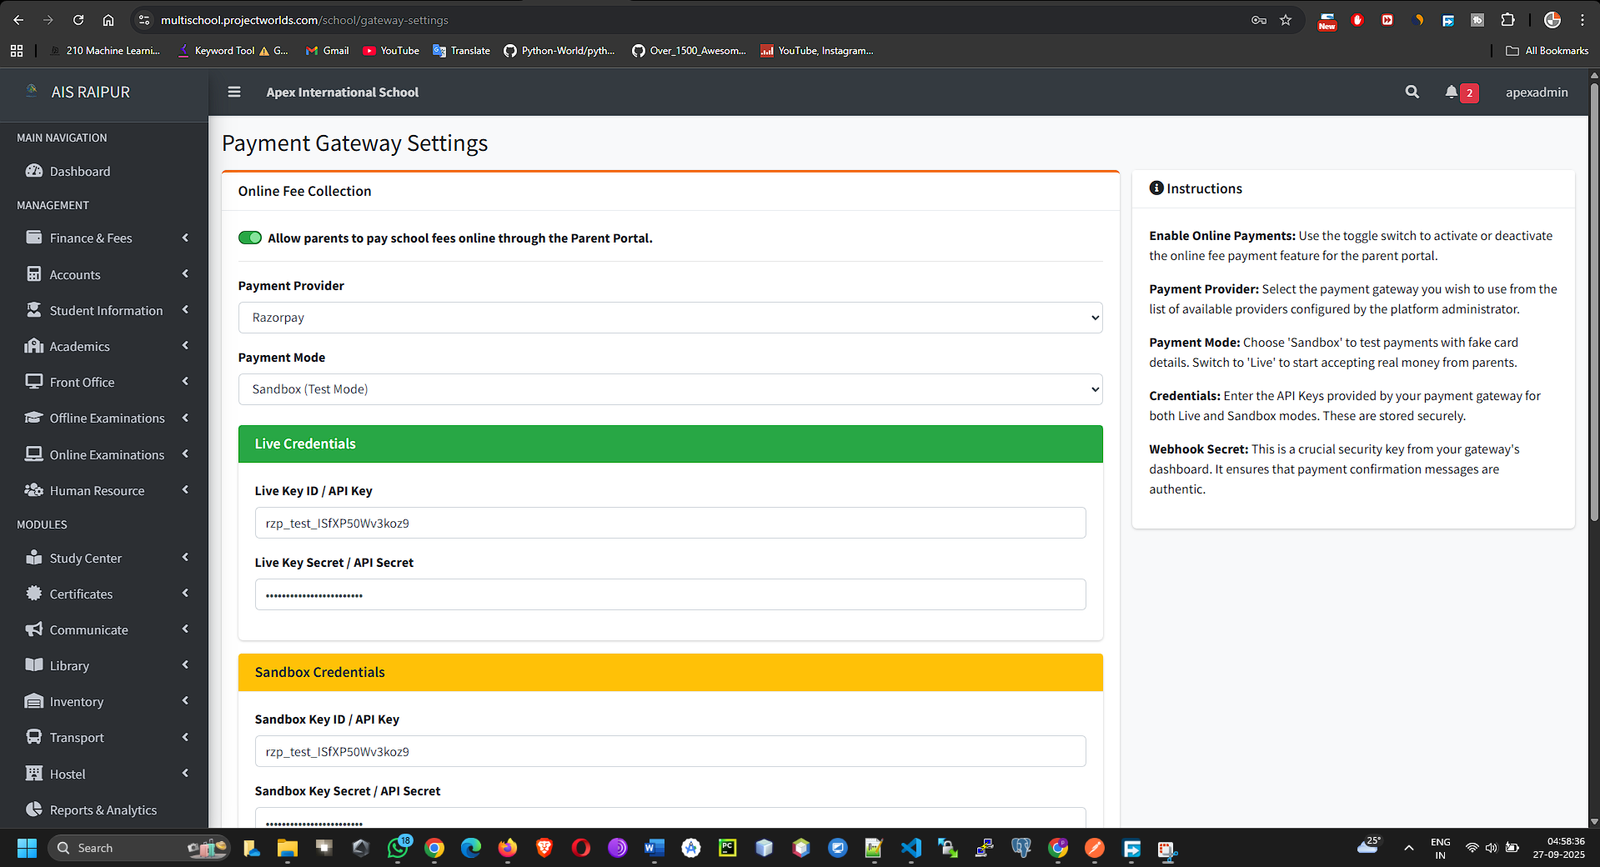
- Click Save.
15.4 Audit Trail
The Audit Trail provides a log of all significant activities performed in the system, which is crucial for security and accountability.
- Navigate to Settings & Billing > Audit Trail.
- You will see a chronological list of actions, including:
- Who: The user who performed the action.
- What: The event that occurred (e.g., created, updated, deleted).
- Which Record: The specific record that was affected (e.g., "Student: John Doe").
- When: The date and time of the action.
- IP Address: The IP address from where the action was performed.
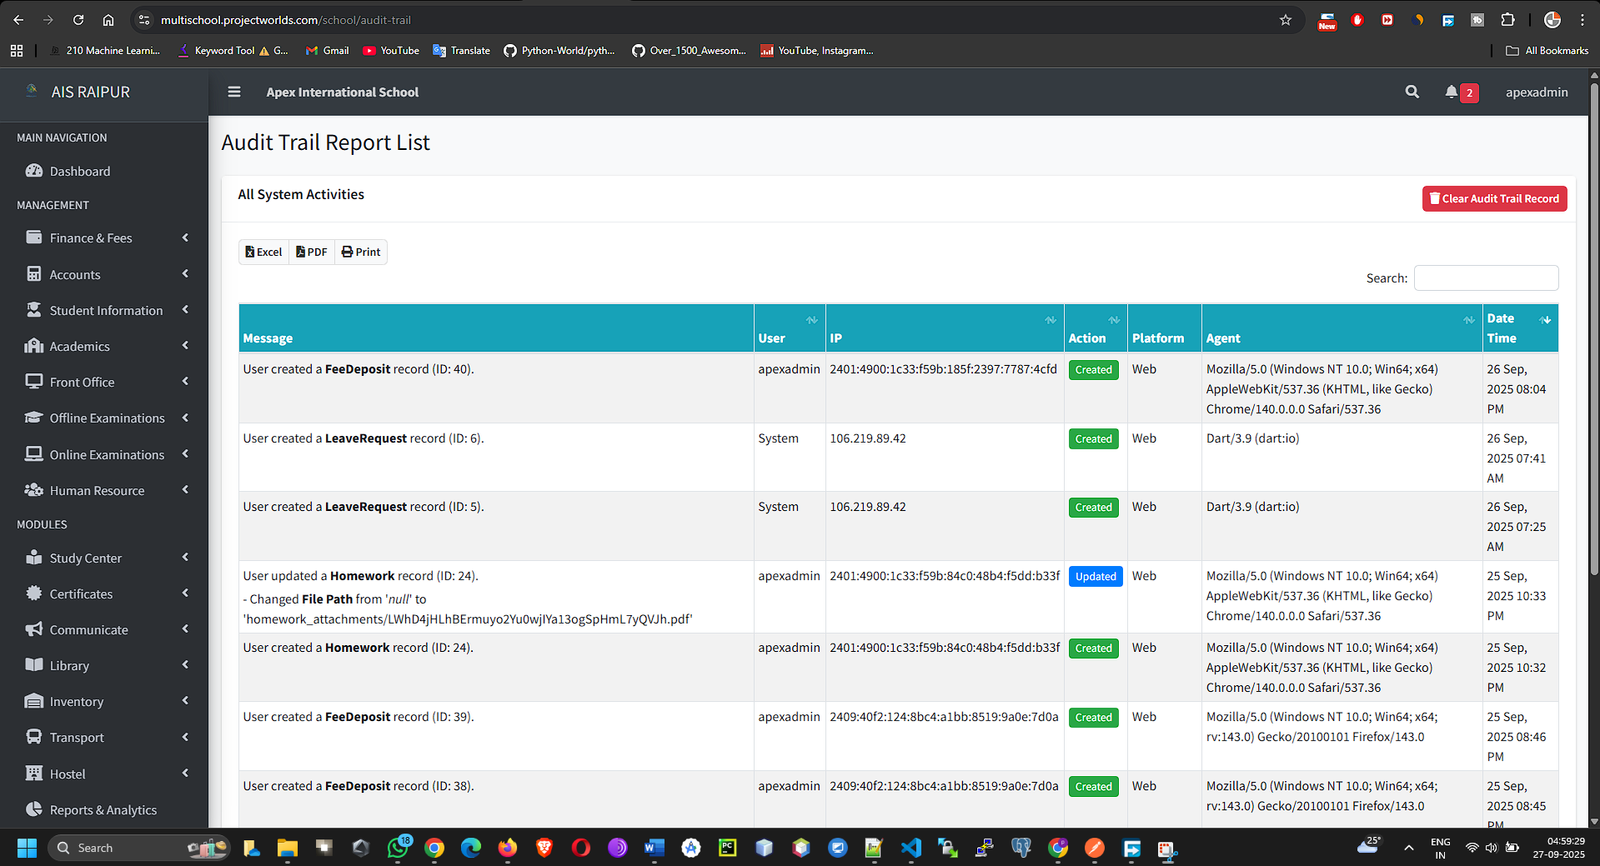
- This log is invaluable for tracking changes and investigating any discrepancies. You can also clear the log if needed.