Part 2: The Student Information Module
Objective: To accurately enroll new students, manage their profiles, track their daily attendance, and maintain important records. All student-related activities, such as fee collection and exam results, depend on the data entered in this module.
2.1 (Optional) Student Categories
Before admitting students, you can create categories to classify them. This is useful for reporting and applying specific fee discounts later.
Navigation: MANAGEMENT > Student Information > Student Categories
- Click the + Add New Category button.
- In the modal, enter the Category Name. Examples: "General", "Sibling Discount", "Right to Education (RTE)", "Staff Ward".
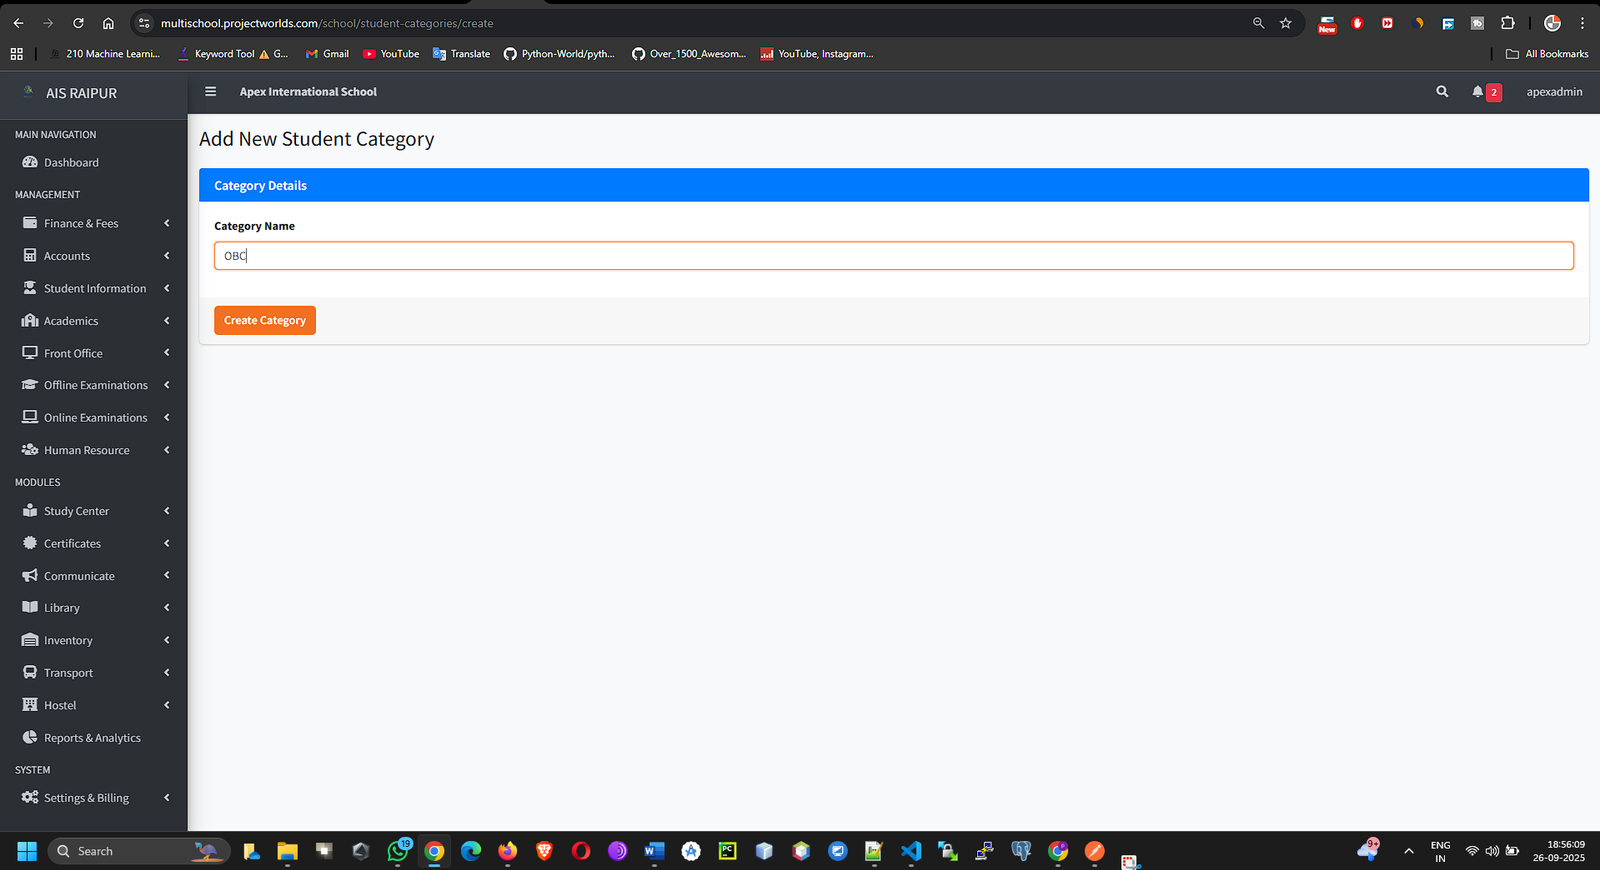
- Click Save. Create as many categories as your school requires.
2.2 Student Admission: The Complete Guide
This is the most detailed and important form in the module. It captures all necessary information for a student's record.
Navigation: MANAGEMENT > Student Information > Student Admission
You will be presented with a multi-section form. Fill out each section carefully.
Section A: Admission Details
This section defines the student's primary identifiers in the school.
- Admission No: A unique number for each student across the entire school. The system will not allow duplicates.
- Roll No: The student's roll number within their specific class.
- Class: Select the class the student is being admitted to.
- Section: After selecting a class, this dropdown will populate with the available sections for that class.
- Admission Date: The date the student is officially admitted.
- Student Category: Select a category you created in the previous step (e.g., "General").
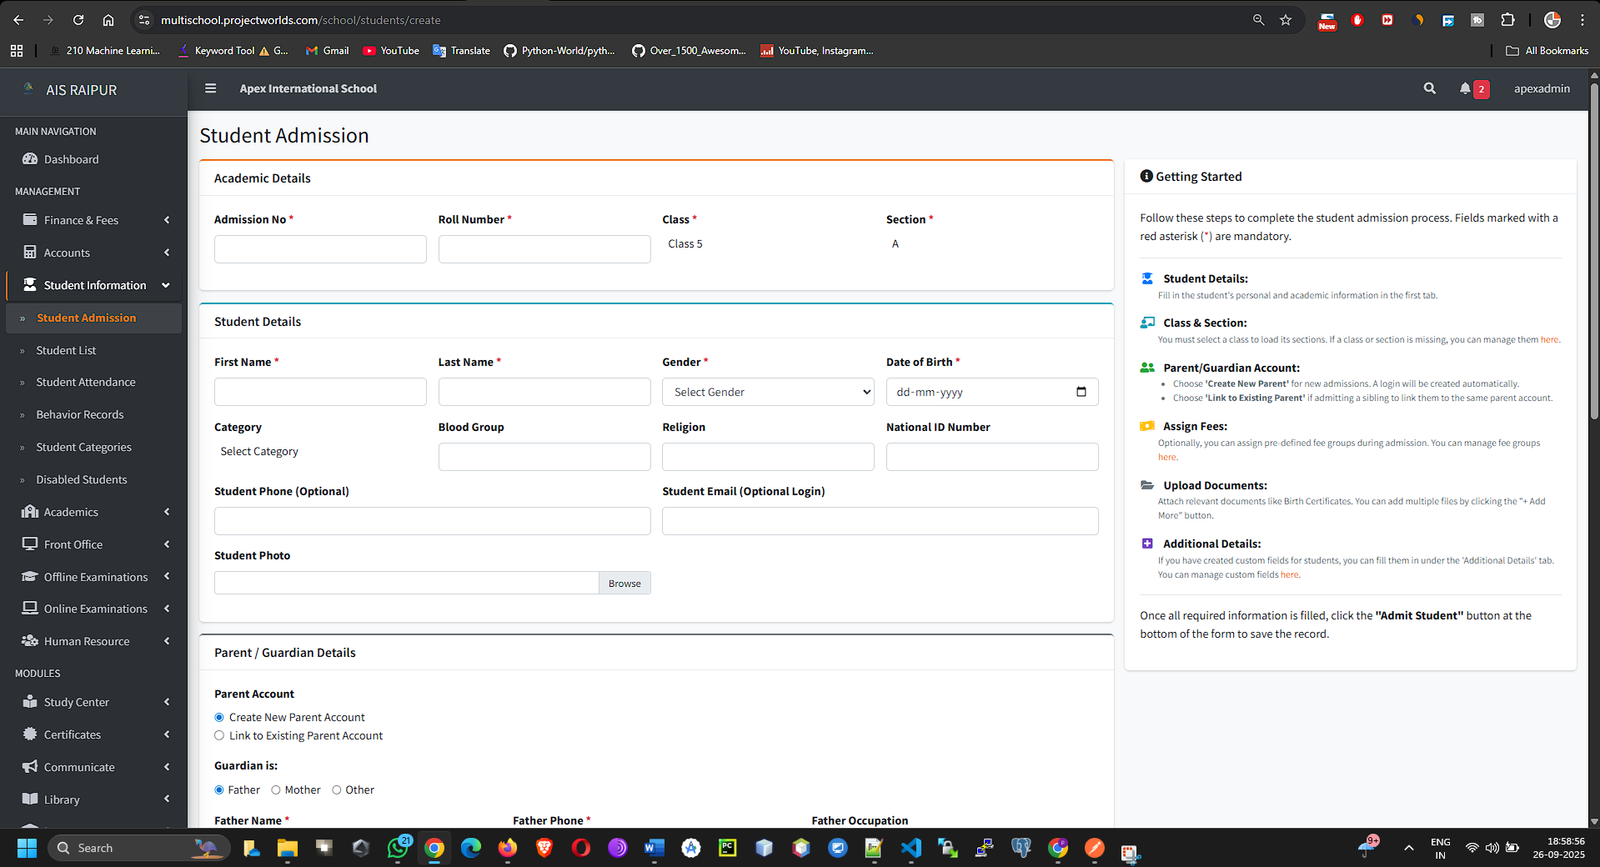
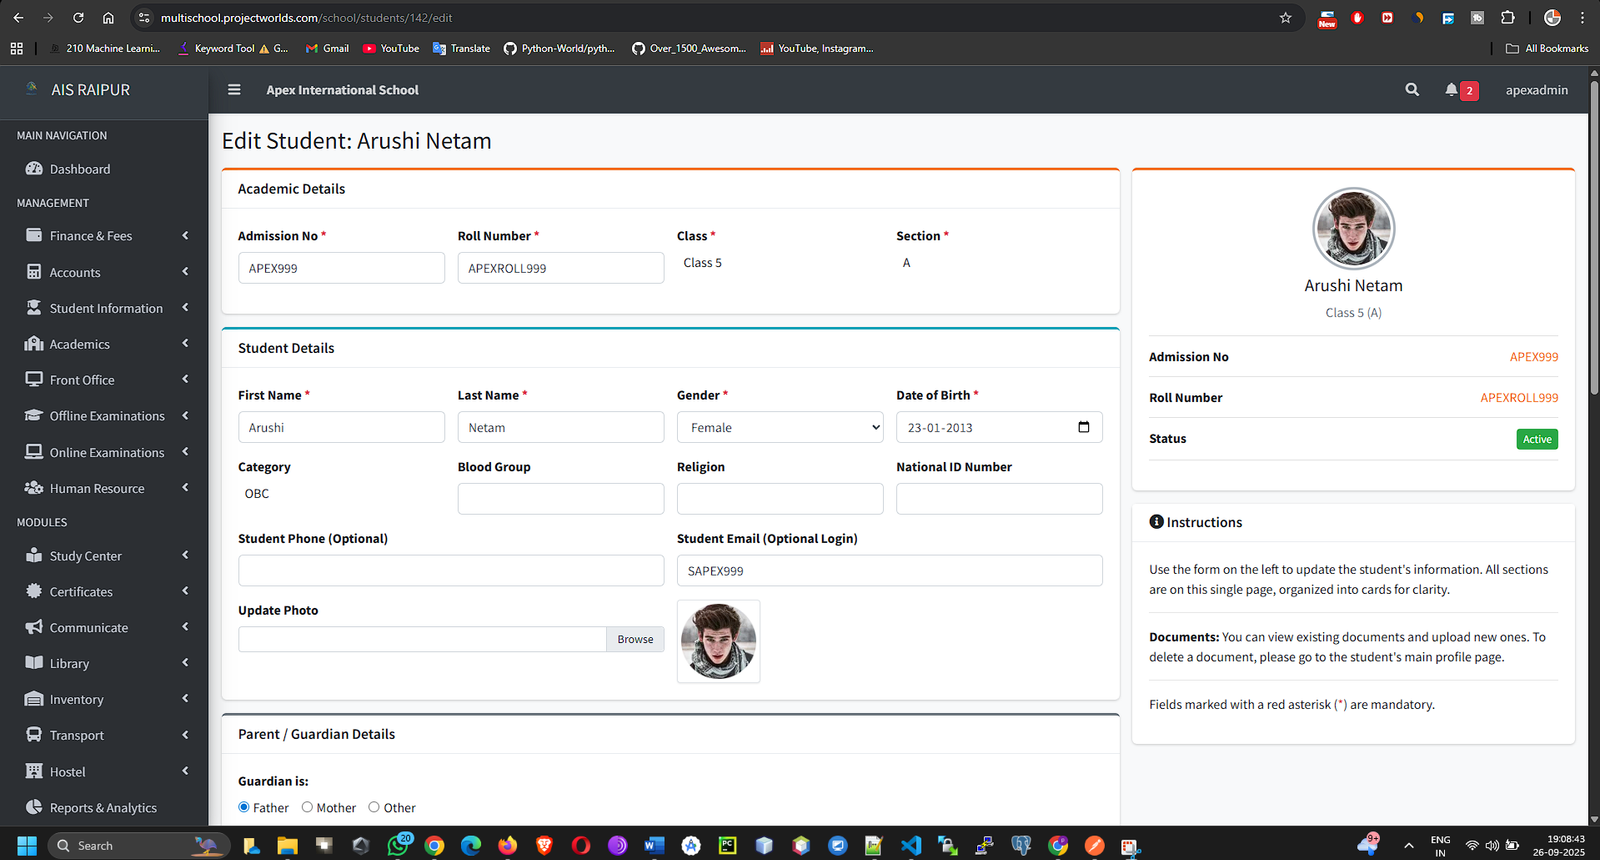
Section B: Student Details
This section contains the student's personal information.
- First Name & Last Name: The student's legal name.
- Date of Birth: Use the date picker to select the correct date.
- Gender: Select from the dropdown.
- Student Phone / Email (Optional): Contact details for the student, if applicable.
- Photo: Click to upload a passport-sized photograph of the student.
- Religion, Caste, Blood Group, National ID: Additional personal details.
[SCREENSHOT: StudentInfo_AdmissionForm_StudentDetails.png]
Section C: Parent & Guardian Details
This section is for parent and guardian contact information, which is also used to create their login for the parent mobile app.
- Father's Details: Enter the Father's Name, Phone, and Occupation.
- Mother's Details: Enter the Mother's Name, Phone, and Occupation.
- Parent Email: Crucial Step! Enter the primary email address for the parents. This email will be used for communication and for the parent app login.
- Guardian Is: This is a smart-fill feature.
- If you select Father, the Guardian Name, Phone, and Occupation fields will be auto-filled with the father's details.
- If you select Mother, it will use the mother's details.
- If you select Other, you must manually enter the details for the guardian.
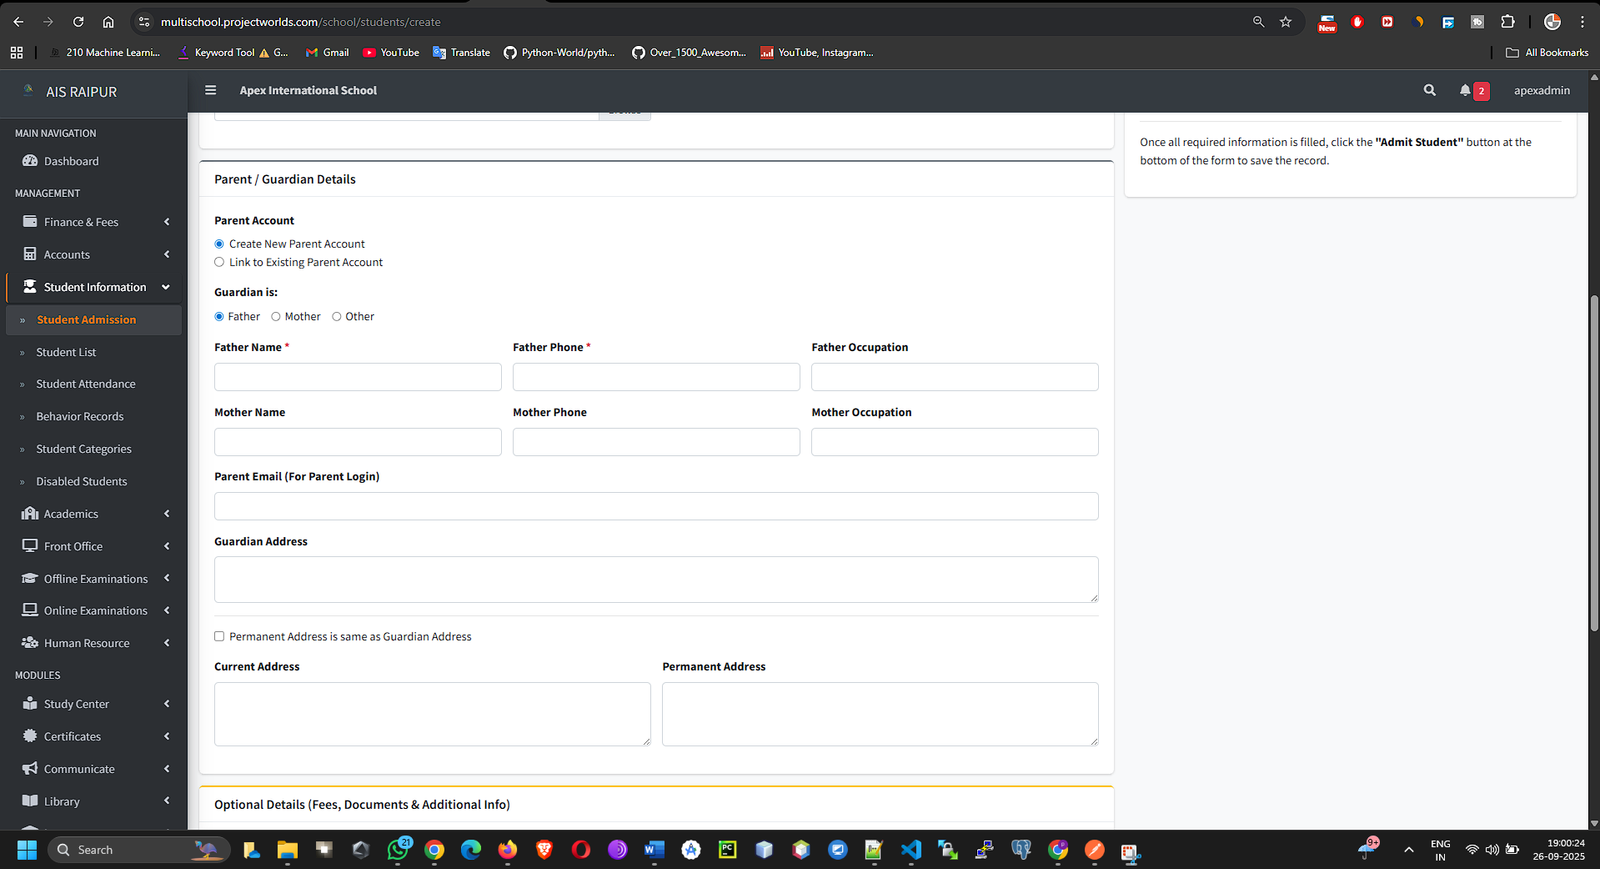
Section D: Address Details
- Enter the Current Address and Permanent Address for the student.
System Automation Note: When you click Save, the system performs several actions automatically:
- Creates the student record.
- Creates a user account for the parent using the Parent Email and a system-generated password.
- Creates a login record for the parent portal/app.
- Creates a student_session record, officially placing the student in the selected Class and Section for the current Academic Session.
Click the Save Student button at the bottom to complete the admission process.
2.3 Managing Students: The Student List & Profile
Once students are admitted, you can manage them from the Student List.
Navigation: MANAGEMENT > Student Information > Student List
- To find students, first Select Class and then Select Section.
- The list of all students in that section will appear, showing their Admission No, Name, Parent's Name, and Phone Number.
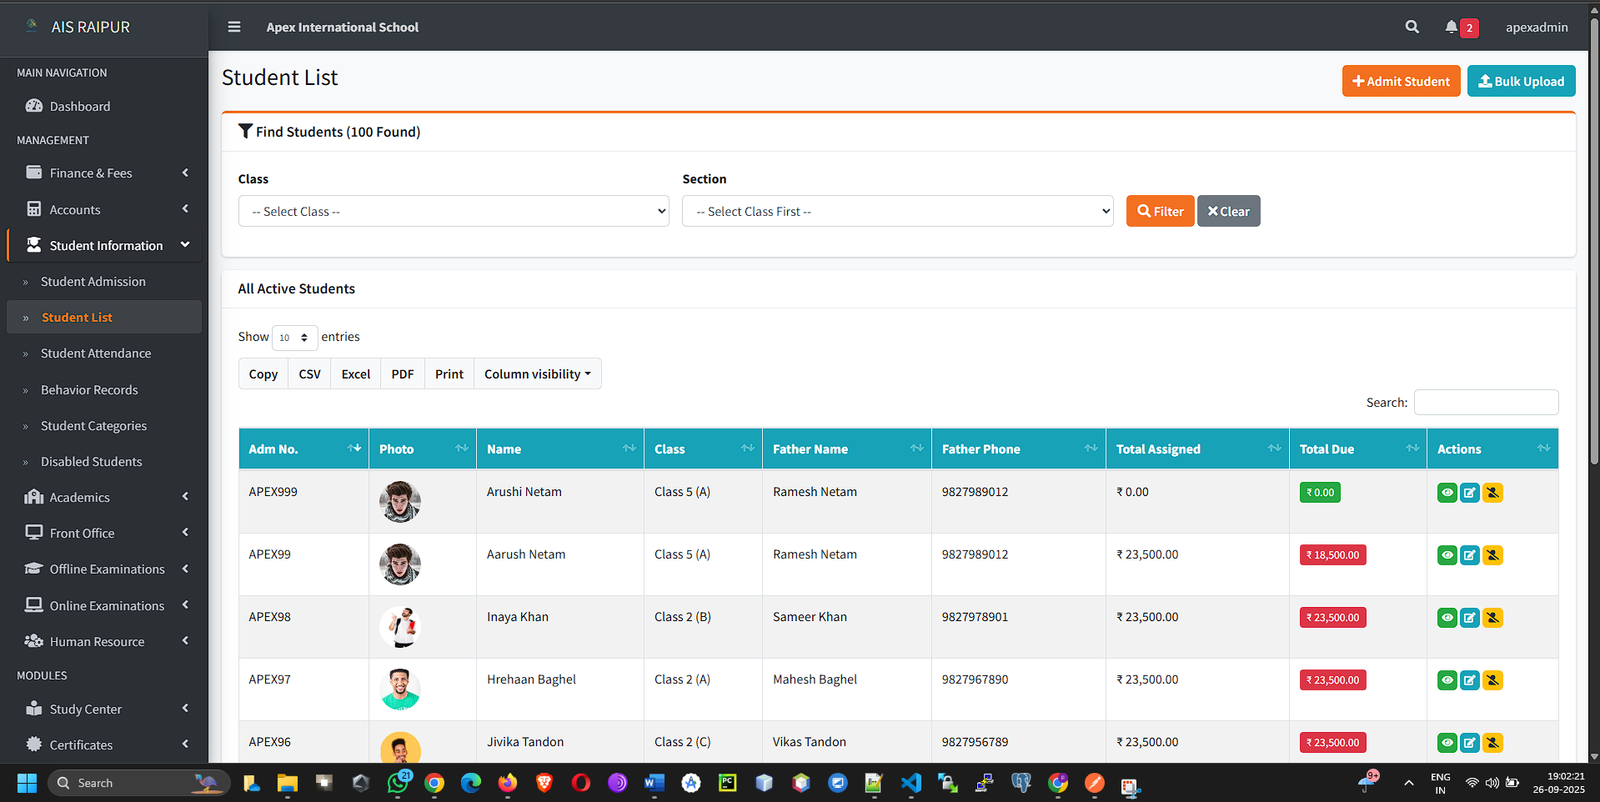
- In the Action column for each student, you have several options:
- View Profile (Eye Icon): This is the most important action. Clicking this takes you to the student's comprehensive profile page.
- Edit: Allows you to modify the information you entered during admission.
- Delete: Permanently removes the student's record.
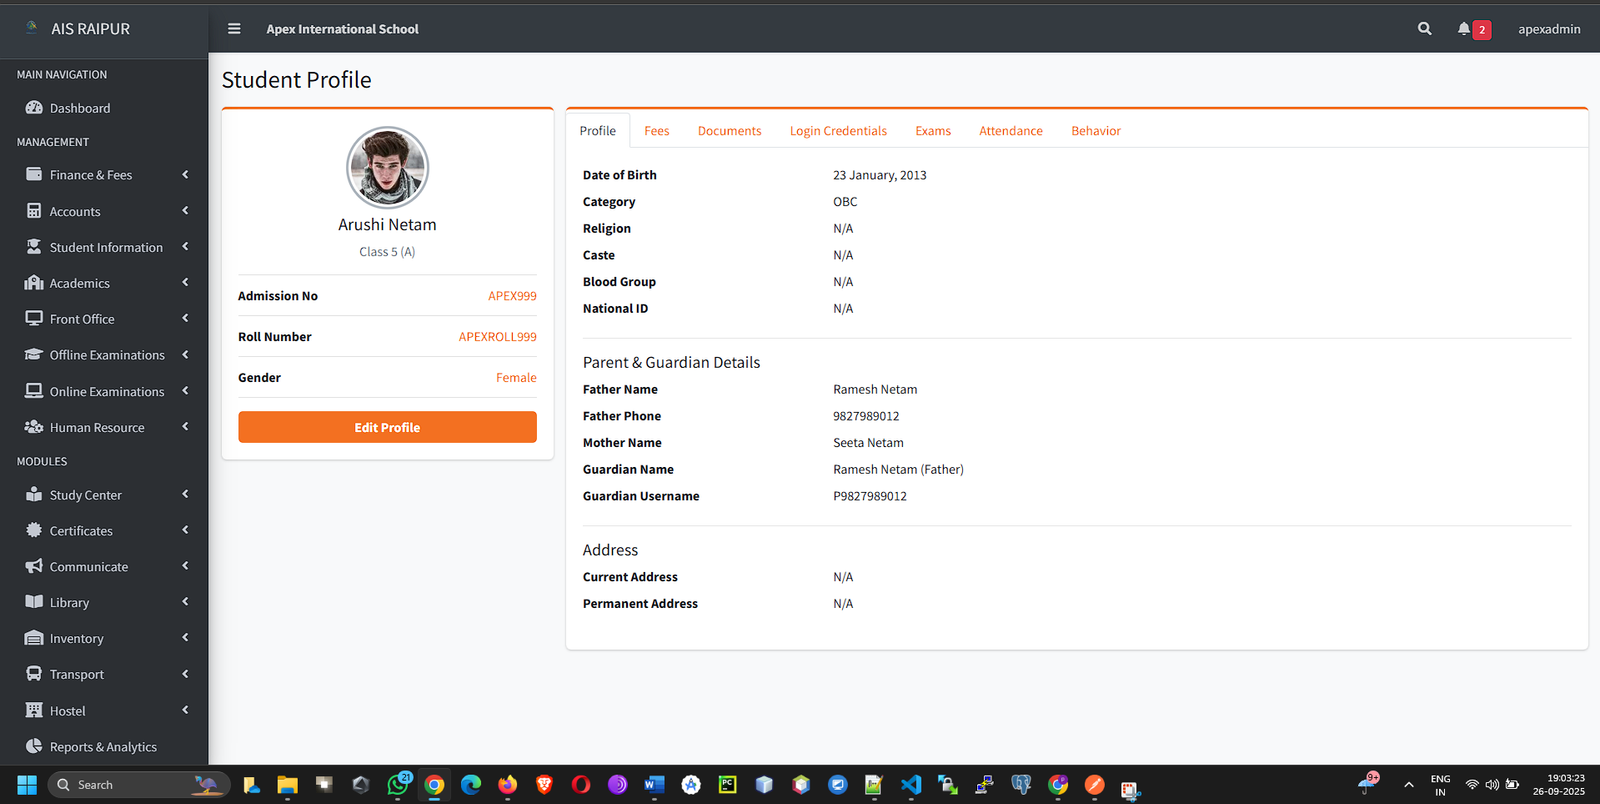
The Student Profile Page
This page is the central hub for an individual student. It contains multiple tabs:
- Profile: Shows all the personal, parent, and address details. You can also upload documents here.
- Fees: View a complete history of all fees assigned, paid, and due. (Covered in Part 3: Finance & Fees).
- Attendance: See a calendar view of the student's attendance record.
- Exams: View all exam results and report cards for this student. (Covered in Part 5: Examinations).
- Documents: Upload and manage documents like Birth Certificates, Transfer Certificates, etc.
2.4 Student Attendance
This feature allows you to take daily attendance efficiently.
Navigation: MANAGEMENT > Student Information > Student Attendance
- On the attendance page, select the Class, Section, and the Attendance Date.
- Click the Search button.
- A list of all students in that section will load.
- By default, all students are marked as Present. You can use the Mark All Present button to reset.
- For any student who is not present, select the appropriate status: Absent, Late, or Half Day.
- You can add optional remarks in the Remarks box for any student.
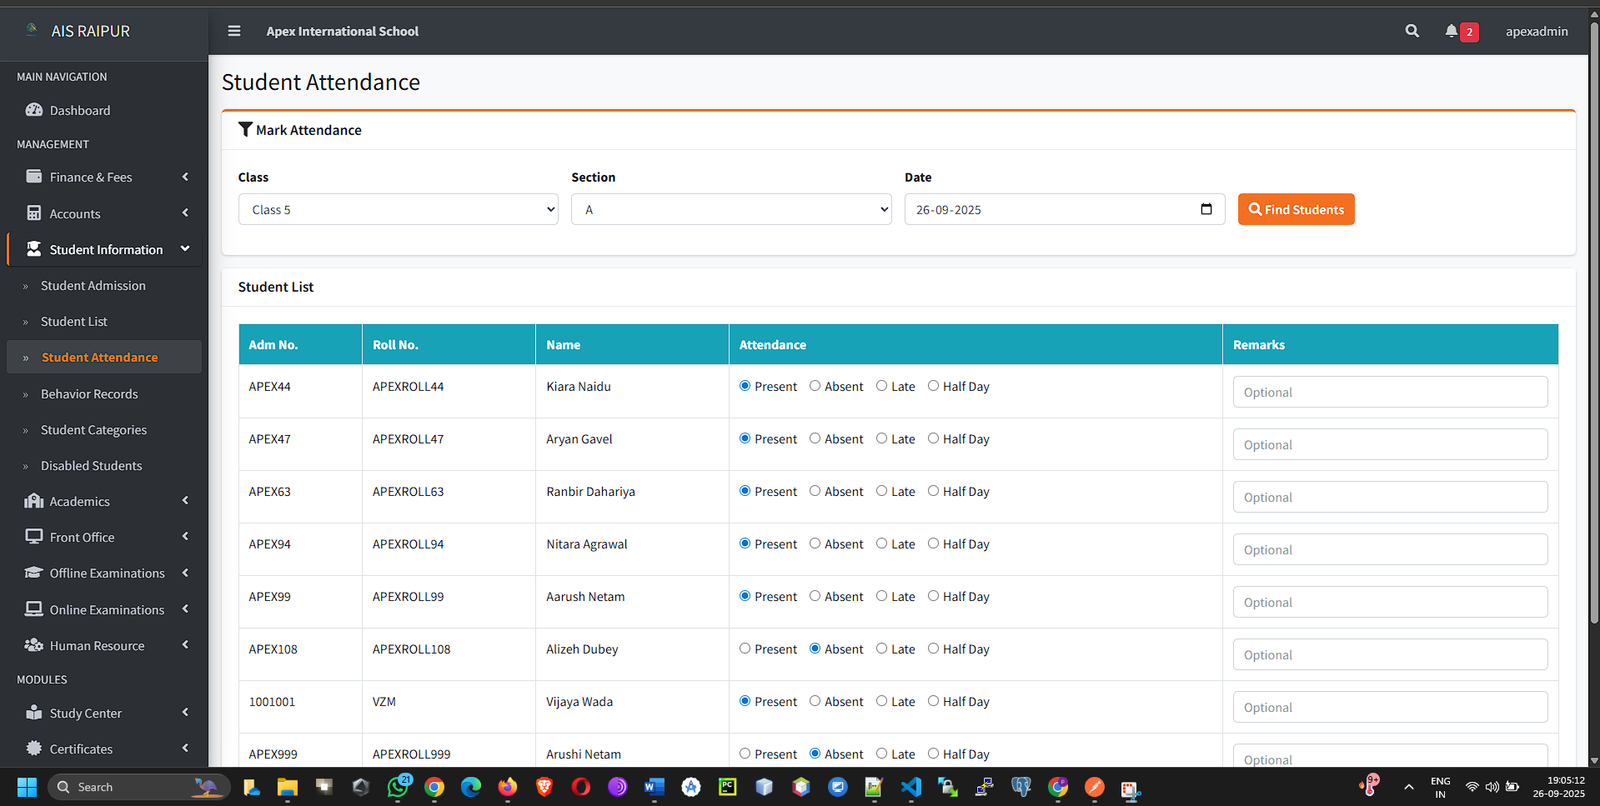
- Once you have marked the attendance for the day, click Save Attendance.
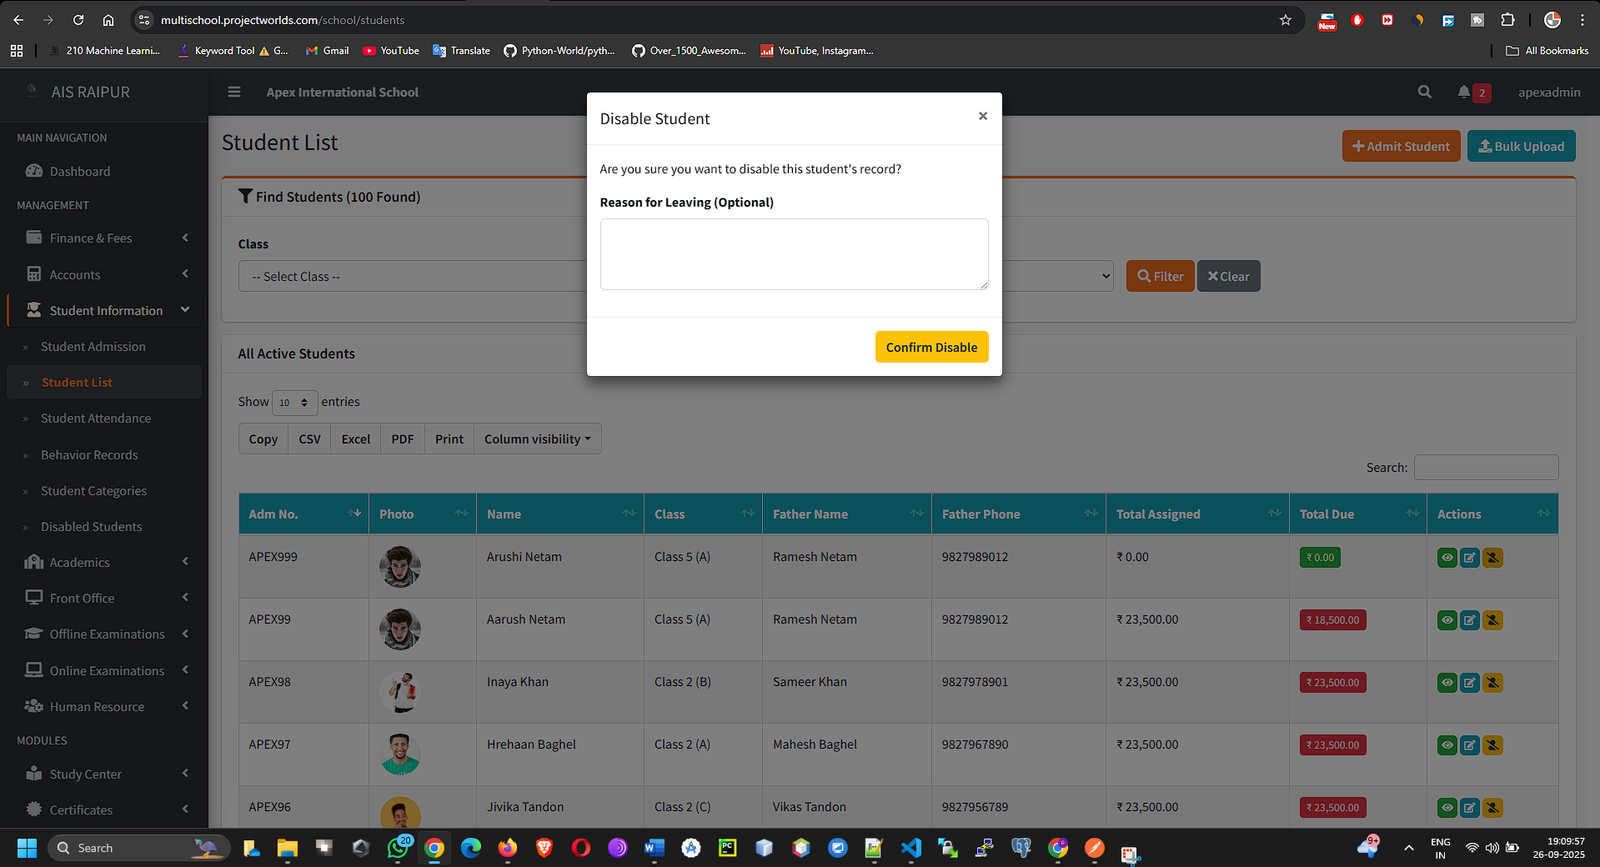
2.5 Disabled Students
This section is for managing students who are no longer active. It does not refer to students with physical disabilities.
How to Disable a Student:
- Go to the student's profile page from the Student List.
- In the main profile details section, you will see a "Status" field.
- Click the "Edit Status" or a similar button. You can change the status from Active to Inactive, Struck Off, or Left. You will be prompted to provide a reason.
Viewing Disabled Students:
Navigation: MANAGEMENT > Student Information > Disabled Students
This page provides a consolidated list of all students who are not currently active, making it easy to track school dropouts or transfers. You may also have an option to re-activate a student from this screen.
2.6 Student Behavior Records
This feature is essential for maintaining a holistic record of a student's conduct and achievements beyond academics. It provides a formal system to log both positive commendations (Achievements) and negative disciplinary actions (Misconduct), creating a valuable history for parent-teacher meetings, student evaluations, and overall development tracking.
Navigation: MANAGEMENT > Student Information > Behavior Records
Viewing and Adding Records:
The main page shows a list of all previously entered behavior records for the school. You can filter this list by class and section to find specific records. 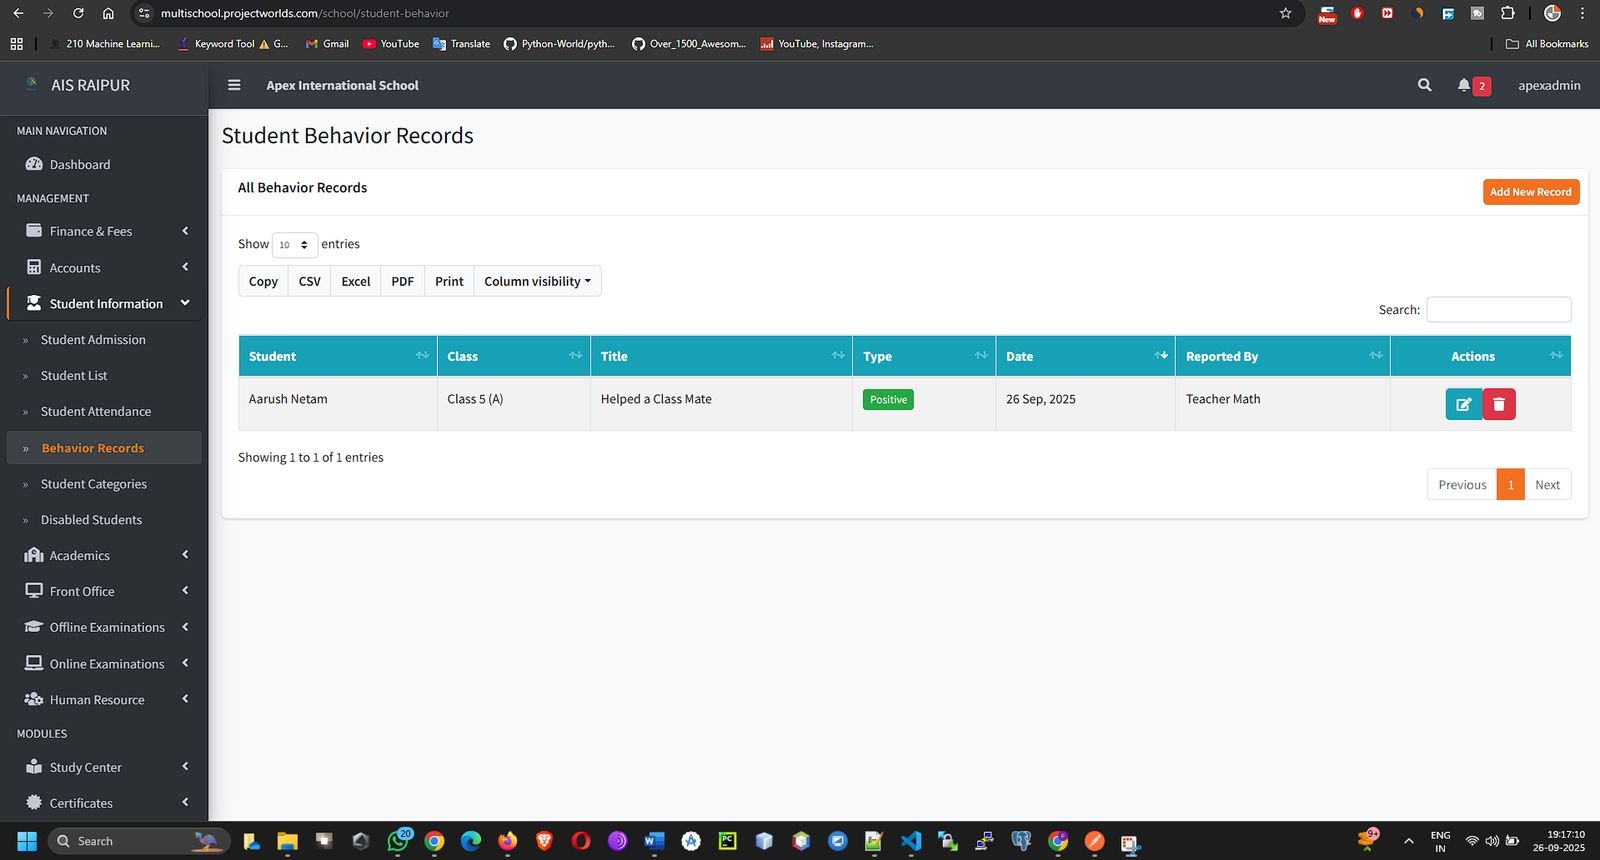
Click the + Add New Record button to open the "Add New Behavior Record" form.
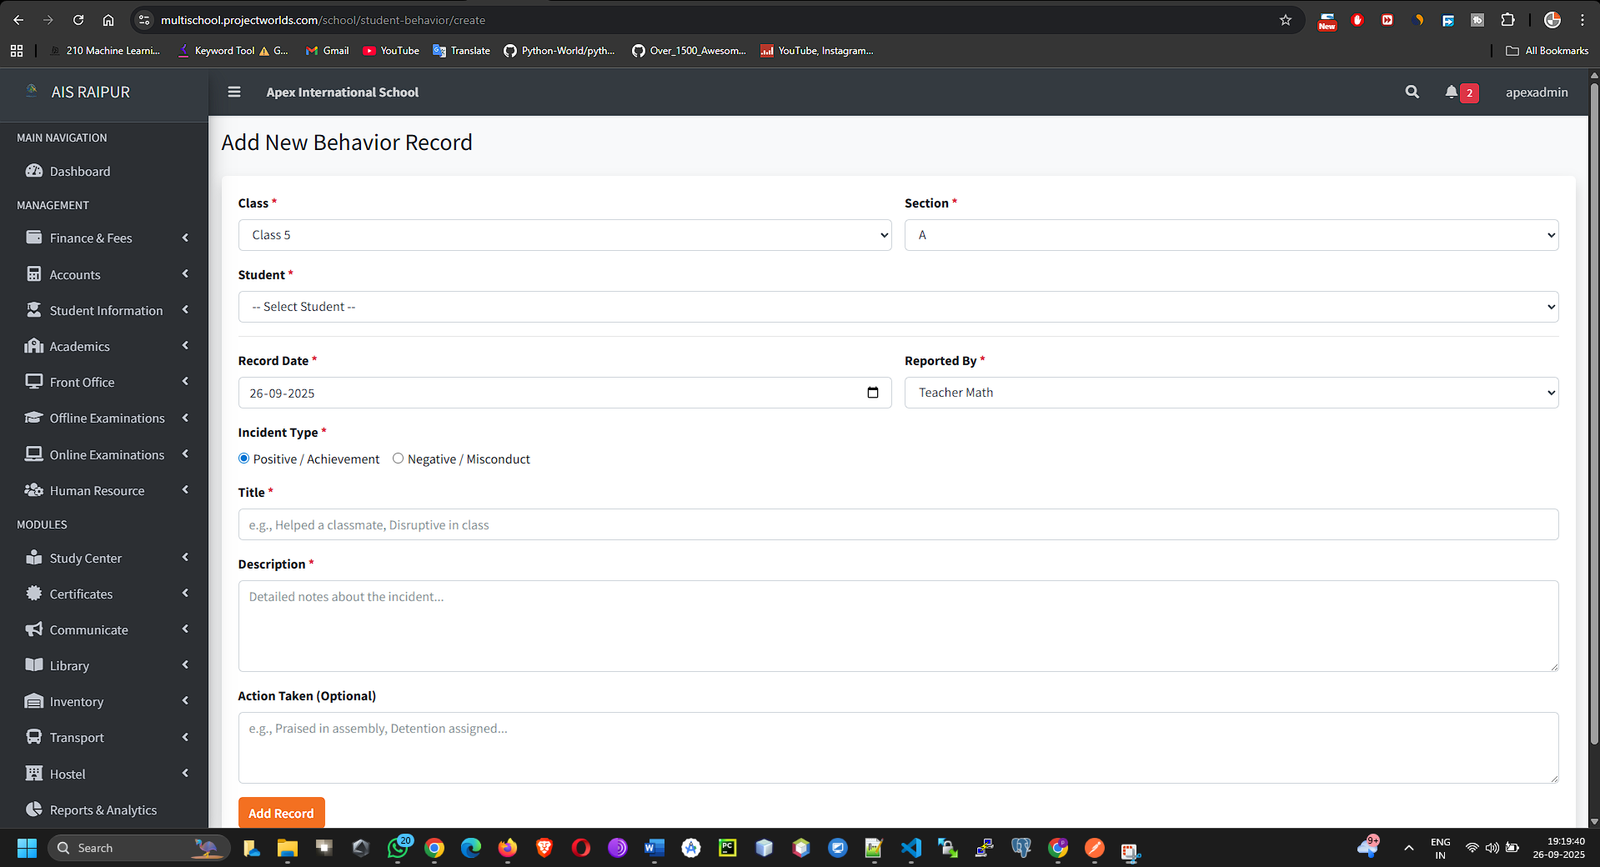
Fill in the details for the record by following these steps in order:
Step 1: Select Class & Section
First, choose a Class from the dropdown.
The Section dropdown will then populate with the sections available for the chosen class. Select the correct one.
Step 2: Select the Student
Once a section is selected, the Student dropdown will become active. Choose the specific student for whom you are logging the record.
Step 3: Confirm the Dates
Record Date: This will automatically be set to the current date (e.g., 26-09-2025). You can click the calendar icon to change it if you are logging a past event.
Reported By: Select the name of the staff member who is reporting the incident. This is crucial for accountability and is typically the teacher who witnessed the event or the admin entering the data.
Step 4: Define the Incident
Incident Type: Choose one of the two options:
Positive / Achievement: Select this for awards, commendations, exceptional performance, or acts of good character.
Negative / Misconduct: Select this for disciplinary issues, rule violations, or other behavioral problems.
Title: Provide a short, clear summary of the event.
Positive Examples: "Won Science Olympiad," "Helped a classmate prepare for exam."
Negative Examples: "Consistent classroom disruption," "Failed to submit assignment."
Description: In this field, provide a detailed, objective account of what happened. Be specific about the circumstances, the behavior observed, and the immediate outcome.
Step 5: Log the Resolution (If Applicable)
Action Taken (Optional): This field is most often used for "Negative / Misconduct" records. Describe the resolution or consequence.
Positive Examples: "Congratulated in the morning assembly," "Awarded a certificate."
Negative Examples: "Verbal warning was given," "Parents were contacted by phone," "Detention was assigned for Friday."