College Exam Management System - User Manual
Live Demo Click Here
Buy Now ₹11999/-
1. Overview
This module is designed specifically for Higher Education (Colleges/Universities). Unlike standard school exams, this system handles:
Semester-based Exams (Internal/Sessional & External/University).
Subject Types (Theory vs. Practical).
Admit Card Generation based on Fee Clearance.
Answer Script Archiving.
2. Prerequisites (Before You Start)
Before scheduling an exam, ensure the following data exists in the system:
Academic Session: Ensure the current session (e.g., 2024-2028) is active.
Course (Class): Classes like B.Pharm, D.Pharm must exist.
Subjects: Subjects must be assigned to the respective Course.
Note: Ensure Subjects are correctly marked as Theory or Practical in the Subject Master.
Students: Students must be admitted and linked to the correct Session and Course.
3. The 8-Step Workflow
Step 1: Create Exam Template 📝
Purpose: Define the structure of an exam once, so you can reuse it every year.
Navigate to: College Exam Section > Exam Templates > Add New.
Action:
Select the Course (e.g., Bachelor of Pharmacy).
Give it a generic Name (e.g., Sessional Exam - Semester 1).
Add Subjects: The system auto-loads subjects linked to that course.
Define Full Marks and Passing Marks for each subject.
Click Save.
Tip: You can view the template details later to verify if a subject is Theory or Practical.
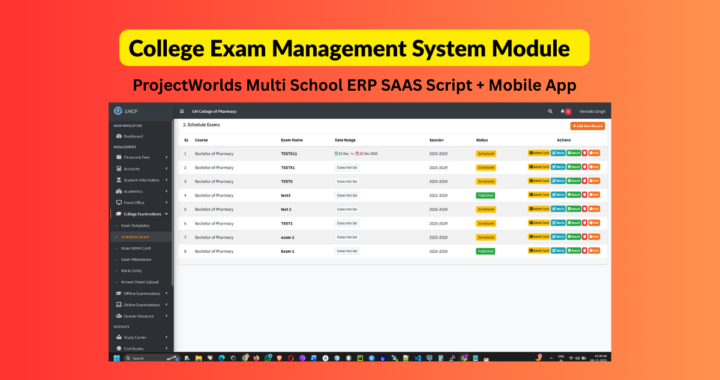
Step 2: Schedule Exam 📅
Purpose: Create a specific instance of an exam for a specific batch (e.g., Sessional Exam Dec 2024).
Navigate to: College Exam Section > Schedule Exam > Add New.
Action:
Select Course & Session.
Select the Template you created in Step 1.
Exam Name: Enter the specific name (e.g., First Sessional Dec 2024).
Centre Type:
Home Centre: Internal exams (Marks entered by your teachers).
Other Centre: University exams (Marks entered based on University results).
Set Timetable: Enter Date, Shift (Morning/Evening), and Time for each subject.
Note: Pay attention to the "Theory" vs "Practical" tags.
Select Students: Check the box to select all eligible students.
Click Save Schedule.
Step 3: Issue Admit Cards 🆔
Purpose: Generate Hall Tickets, enforcing Fee Clearance checks.
Navigate to: College Exam Section > Issue Admit Card.
Workflow:
Select the Scheduled Exam.
The list shows every student with their Current Fee Due.
🔴 Red Amount: Fees are pending.
🟢 Green Amount: Fees are clear.
Verify History: Click the "Verify History" button to open the student's fee ledger in a new tab to check payment details.
Selection: Check the boxes for students you want to allow. (You can issue cards to defaulters if you have special administrative permission).
Click Generate Selected.
Print: Once generated, a "Print" button appears. Click to download the PDF Admit Card containing the photo, roll no, and timetable.
Step 4: Exam Attendance 🙋♂️
Purpose: Record who sat for the exam. Critical Step: You cannot enter marks for a student unless they are marked Present.
Navigate to: College Exam Section > Exam Attendance.
Action:
Select Exam and Subject.
Bulk Action: Click "Mark All Present" (fastest method).
Manually toggle specific students to ABSENT (Red Badge) if they didn't show up.
Click Save Attendance.
Step 5 & 6: Marks Entry ✍️
Purpose: Enter the marks obtained by students.
Navigate to: College Exam Section > Marks Entry.
Action:
Select Exam.
Tabs: Click the Subject Tabs at the top to switch subjects instantly.
Data Entry:
Keyboard Navigation: Type marks and press Enter to jump to the next student.
Status: The system automatically calculates PASS or FAIL as you type.
Absent: Students marked absent in Step 4 are disabled and shown in Red.
Bulk Upload (Optional):
Click "Download Template" to get an Excel/CSV file.
Fill marks in Excel.
Click "Upload CSV" to bulk import marks.
Click Save Marks.
Step 7: Result Sheet & Publishing 📢
Purpose: View the consolidated result matrix and declare results.
Navigate to: Schedule Exam > Click "Result" Button.
Features:
Matrix View: Shows all subjects side-by-side for every student.
Fail Highlighting: Failed subjects are highlighted in Red. Absentees in Yellow.
Export:
PDF: Clean A4 Landscape format for Notice Boards.
Excel: Raw CSV data for statistical analysis.
Publish: Click the "Publish" button.
Warning: Once published, marks cannot be edited unless un-published.
Step 8: Answer Sheet Upload (Archiving) 📂
Purpose: Store digital copies of the physical answer scripts for future reference (e.g., re-evaluation or audit).
Navigate to: College Exam Section > Answer Sheet Upload.
Note: Only available for Home Centre exams.
Action:
Enter the physical Serial Number of the answer booklet.
Drag & Drop the scanned PDF/Image onto the upload zone.
Click the small Save Icon.
Use the Eye Icon to view the uploaded script later.
4. Common Scenarios (FAQ)
Q: I created an exam but forgot to add a subject. Can I edit the template?
A: No. Once an exam is scheduled using a template, the template is locked to preserve data integrity. You must delete the schedule first, edit the template, and reschedule.
Q: The exam date changed due to a holiday. What do I do?
A: Go to Schedule Exam list. Click the Edit button. You can change dates for any subject unless attendance has already been marked for it.
Q: Why can't I enter marks for a specific student?
A: Check Exam Attendance. The student is likely marked "Absent". You must mark them "Present" there first.
Q: A student paid their fees, but the Admit Card page still shows "Due".
A: Go to Collect Fees module and record the transaction. Then refresh the Admit Card page. The status will update automatically.