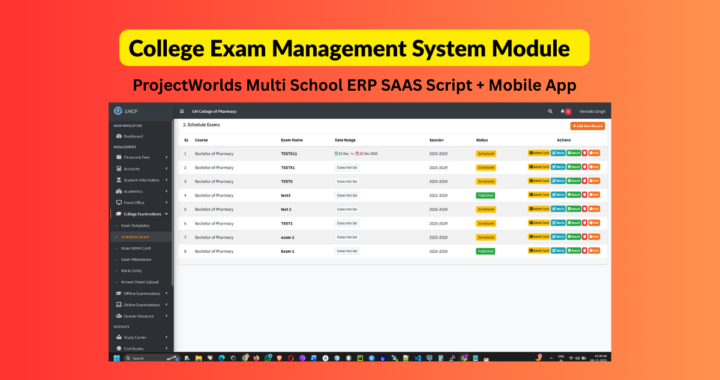
College Exam Management System - User Manual
Live Demo Click Here
Buy Now ₹11999/-
1. Overview
This module is designed specifically for Higher Education (Colleges/Universities). Unlike standard school exams, this system handles:
-
Semester-based Exams (Internal/Sessional & External/University).
-
Subject Types (Theory vs. Practical).
-
Admit Card Generation based on Fee Clearance.
-
Answer Script Archiving.
2. Prerequisites (Before You Start)
Before scheduling an exam, ensure the following data exists in the system:
-
Academic Session: Ensure the current session (e.g., 2024-2028) is active.
-
Course (Class): Classes like B.Pharm, D.Pharm must exist.
-
Subjects: Subjects must be assigned to the respective Course.
-
Note: Ensure Subjects are correctly marked as Theory or Practical in the Subject Master.
-
-
Students: Students must be admitted and linked to the correct Session and Course.
3. The 8-Step Workflow
Step 1: Create Exam Template 📝
Purpose: Define the structure of an exam once, so you can reuse it every year.
-
Navigate to: College Exam Section > Exam Templates > Add New.
-
Action:
-
Select the Course (e.g., Bachelor of Pharmacy).
-
Give it a generic Name (e.g., Sessional Exam - Semester 1).
-
Add Subjects: The system auto-loads subjects linked to that course.
-
Define Full Marks and Passing Marks for each subject.
-
Click Save.
-
-
Tip: You can view the template details later to verify if a subject is Theory or Practical.
Step 2: Schedule Exam 📅
Purpose: Create a specific instance of an exam for a specific batch (e.g., Sessional Exam Dec 2024).
-
Navigate to: College Exam Section > Schedule Exam > Add New.
-
Action:
-
Select Course & Session.
-
Select the Template you created in Step 1.
-
Exam Name: Enter the specific name (e.g., First Sessional Dec 2024).
-
Centre Type:
-
Home Centre: Internal exams (Marks entered by your teachers).
-
Other Centre: University exams (Marks entered based on University results).
-
-
Set Timetable: Enter Date, Shift (Morning/Evening), and Time for each subject.
-
Note: Pay attention to the "Theory" vs "Practical" tags.
-
-
Select Students: Check the box to select all eligible students.
-
Click Save Schedule.
-
Step 3: Issue Admit Cards 🆔
Purpose: Generate Hall Tickets, enforcing Fee Clearance checks.
-
Navigate to: College Exam Section > Issue Admit Card.
-
Workflow:
-
Select the Scheduled Exam.
-
The list shows every student with their Current Fee Due.
-
🔴 Red Amount: Fees are pending.
-
🟢 Green Amount: Fees are clear.
-
-
Verify History: Click the "Verify History" button to open the student's fee ledger in a new tab to check payment details.
-
Selection: Check the boxes for students you want to allow. (You can issue cards to defaulters if you have special administrative permission).
-
Click Generate Selected.
-
Print: Once generated, a "Print" button appears. Click to download the PDF Admit Card containing the photo, roll no, and timetable.
-
Step 4: Exam Attendance 🙋♂️
Purpose: Record who sat for the exam. Critical Step: You cannot enter marks for a student unless they are marked Present.
-
Navigate to: College Exam Section > Exam Attendance.
-
Action:
-
Select Exam and Subject.
-
Bulk Action: Click "Mark All Present" (fastest method).
-
Manually toggle specific students to ABSENT (Red Badge) if they didn't show up.
-
Click Save Attendance.
-
Step 5 & 6: Marks Entry ✍️
Purpose: Enter the marks obtained by students.
-
Navigate to: College Exam Section > Marks Entry.
-
Action:
-
Select Exam.
-
Tabs: Click the Subject Tabs at the top to switch subjects instantly.
-
Data Entry:
-
Keyboard Navigation: Type marks and press Enter to jump to the next student.
-
Status: The system automatically calculates PASS or FAIL as you type.
-
Absent: Students marked absent in Step 4 are disabled and shown in Red.
-
-
Bulk Upload (Optional):
-
Click "Download Template" to get an Excel/CSV file.
-
Fill marks in Excel.
-
Click "Upload CSV" to bulk import marks.
-
-
Click Save Marks.
-
Step 7: Result Sheet & Publishing 📢
Purpose: View the consolidated result matrix and declare results.
-
Navigate to: Schedule Exam > Click "Result" Button.
-
Features:
-
Matrix View: Shows all subjects side-by-side for every student.
-
Fail Highlighting: Failed subjects are highlighted in Red. Absentees in Yellow.
-
Export:
-
PDF: Clean A4 Landscape format for Notice Boards.
-
Excel: Raw CSV data for statistical analysis.
-
-
Publish: Click the "Publish" button.
-
Warning: Once published, marks cannot be edited unless un-published.
-
-
Step 8: Answer Sheet Upload (Archiving) 📂
Purpose: Store digital copies of the physical answer scripts for future reference (e.g., re-evaluation or audit).
-
Navigate to: College Exam Section > Answer Sheet Upload.
-
Note: Only available for Home Centre exams.
-
Action:
-
Enter the physical Serial Number of the answer booklet.
-
Drag & Drop the scanned PDF/Image onto the upload zone.
-
Click the small Save Icon.
-
Use the Eye Icon to view the uploaded script later.
-
4. Common Scenarios (FAQ)
Q: I created an exam but forgot to add a subject. Can I edit the template?
-
A: No. Once an exam is scheduled using a template, the template is locked to preserve data integrity. You must delete the schedule first, edit the template, and reschedule.
Q: The exam date changed due to a holiday. What do I do?
-
A: Go to Schedule Exam list. Click the Edit button. You can change dates for any subject unless attendance has already been marked for it.
Q: Why can't I enter marks for a specific student?
-
A: Check Exam Attendance. The student is likely marked "Absent". You must mark them "Present" there first.
Q: A student paid their fees, but the Admit Card page still shows "Due".
-
A: Go to Collect Fees module and record the transaction. Then refresh the Admit Card page. The status will update automatically.